Knee Braces
How knee braces stay up: Every knee brace on this page — sleeve, hinged, immobilizer, T-Scope, unloader, all of them — is suspended by the CALF, not by the thigh. The strap or band that wraps around your calf must sit ABOVE the muscle belly (in the narrower spot just below the knee) and be tighter there than anywhere else on the brace. That taper from a fatter calf-muscle below to a narrower band above is what keeps the brace from sliding down toward your ankle as you walk. If your brace keeps migrating down the leg, the upper calf strap is the first thing to tighten — not the thigh strap.
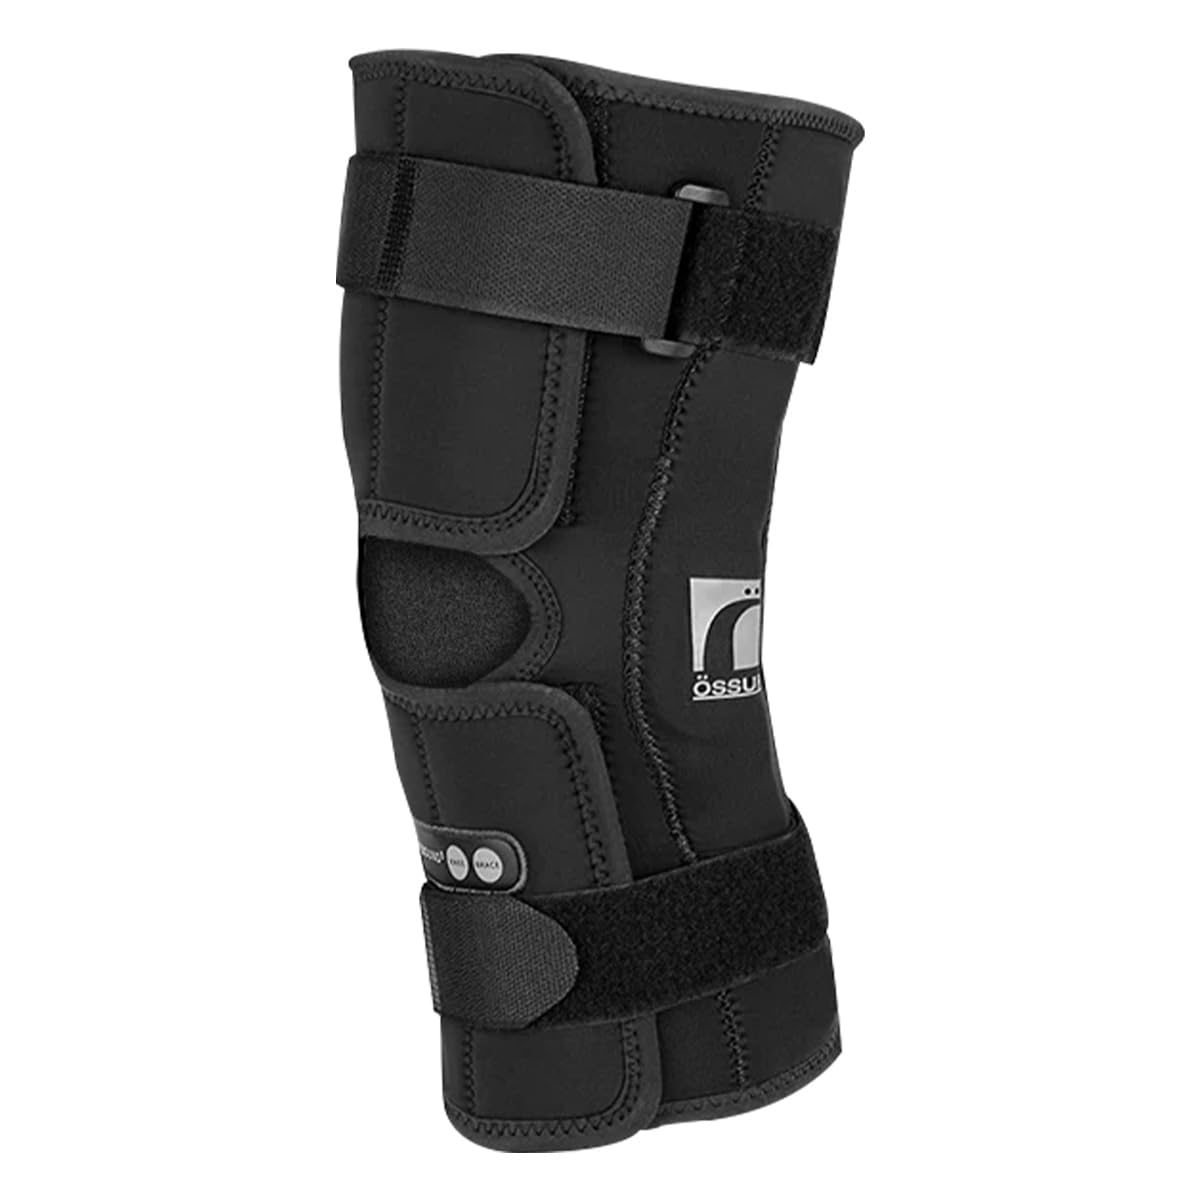
Hinged Knee Brace (Mild Instability)
For mild knee injuries and mild ligament instability — the kind of "my knee feels loose when I cut sideways" or "I sprained it skiing and it's just unsure of itself" presentations. The hinges provide modest medial-lateral support and a sense of stability for activities. Not a substitute for a prescribed post-op or rigid functional brace (ACL/PCL reconstruction, severe MCL/LCL injuries) — those require a custom or rigid functional brace fit by an orthotist or surgeon.
Sizing Guide
Measure around the center of your kneecap with your leg straight. Match to Össur's size chart (XS-XL). The hinges should align with the center of your knee joint — usually at the bony point you can feel on the side of the knee. Important caveat for this brace: this style does not always open fully to wrap around — it can be more of a slide-on. If you can't bend the knee enough to slide a brace on (recent injury, acute swelling, surgery), look at the wrap-around hinged brace below instead.
Tips & Tricks
Position the hinges directly at the sides of your knee joint. The brace should feel secure without sliding down — remember, the calf strap above the muscle belly is what suspends it. Adjust straps so the brace is snug but does not restrict circulation. Most patients wear this during activity (hiking, sports, yard work) where stability matters, then take it off for sedentary time.
Common Mistakes
Treating this as a substitute for a real post-op or functional ACL brace — it isn't, and using it that way risks reinjury. Forcing a slide-on brace over a swollen knee can hurt and may not get over the joint at all — use a wrap-around if you can't slide it on. A brace that slides down the leg has the calf strap in the wrong spot (it needs to sit above the calf muscle belly, tighter there). Hinges not aligned with the joint chafe and don't support.
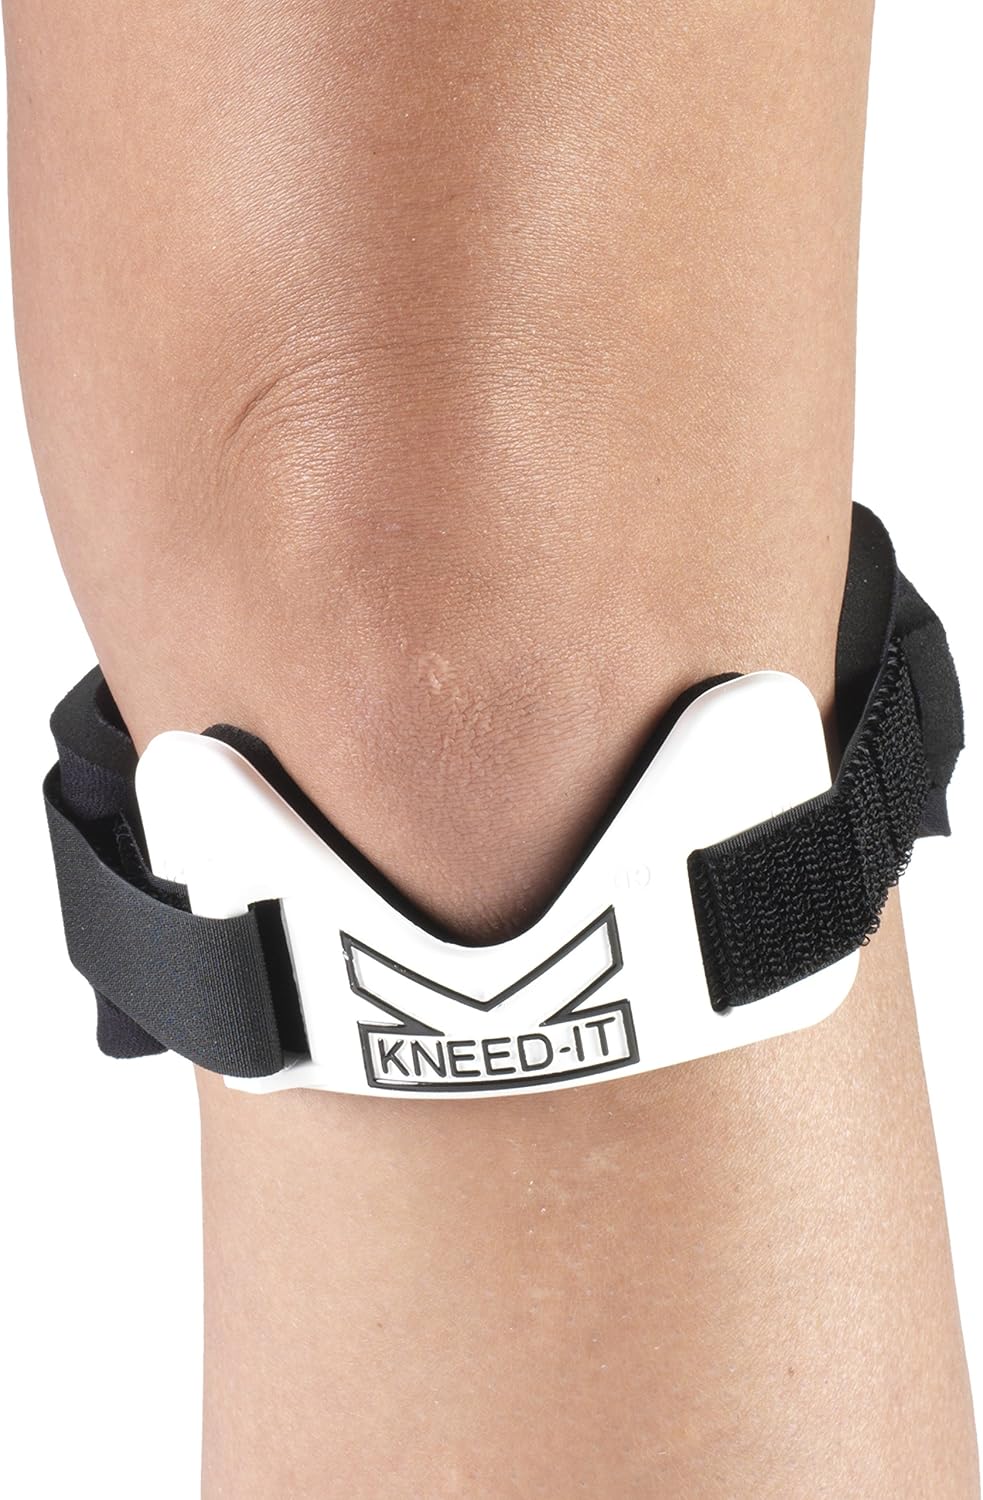
KneedIt Patellar Strap (Patellar Tendonitis / Jumper's Knee / Osgood-Schlatter's)
For anterior knee pain, patellar tendonitis, jumper's knee, runner's knee, and adolescent Osgood-Schlatter disease. The KneedIt uses a rigid plastic contact pad — same focal-compression principle as the BandIt elbow strap — that absorbs the initial shock of quadriceps contraction and converts a sharp pull on the tendon insertion into a more distributed, dynamic load. That's what actually reduces the inflammation. Soft elastic straps just wrap the joint with circumferential compression and don't deliver the focal pressure that matters.
Sizing Guide
One-size-adjustable with a hook-and-loop closure. The strap should sit just below the kneecap with the rigid pad directly over the patellar tendon. For Osgood-Schlatter's, the rigid pad sits slightly lower — directly over the tibial tubercle (the bony bump that hurts).
Tips & Tricks
Position the rigid contact pad DIRECTLY OVER the patellar tendon (for patellar tendonitis or jumper's knee) or DIRECTLY OVER the tibial tubercle (for Osgood-Schlatter's — about an inch lower than the tendonitis position). Snug until firm but not painful (one finger under the strap). Wear during sports or the activities that aggravate pain — not all day. More comfortable than soft straps for active wear because the rigid pad doesn't dig in the way pulled-tight elastic does.
Common Mistakes
Choosing a soft elastic patellar strap with no rigid contact pad — that's circumferential compression, not focal compression, and it doesn't address what makes patellar tendonitis or Osgood-Schlatter's hurt. Placing the pad too high (on the kneecap itself) or too low (mid-shin) misses the target. For Osgood-Schlatter's specifically, the pad needs to land on the tibial tubercle — the painful bony bump — not on the patella.
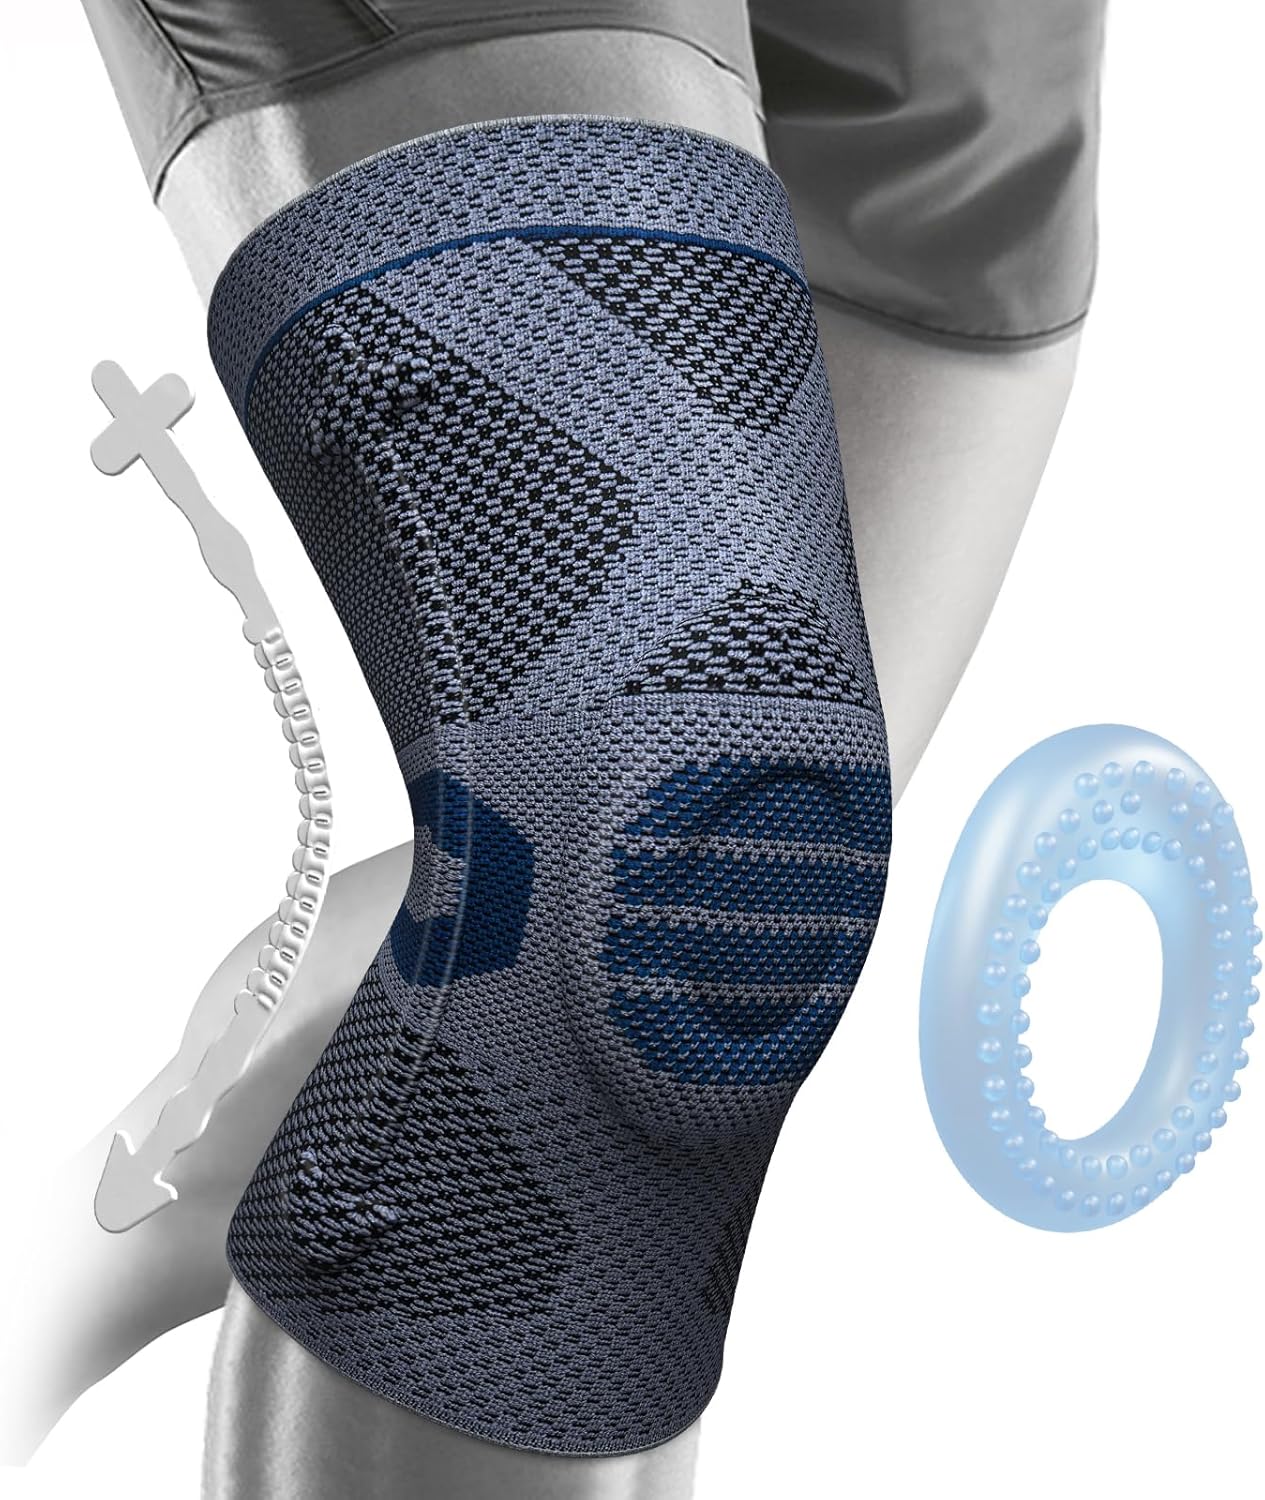
Knee Compression Sleeve (NEENCA)
For mild knee swelling, general post-activity soreness, light arthritis discomfort, meniscus-tear support during walking, and warm-up support for runners and recreational athletes. A knit compression sleeve evens out pressure around the knee and gives the joint a familiar, supported feel — useful for confidence as much as for mechanical support.
Sizing Guide
Measure circumference around the center of your kneecap with your leg straight. NEENCA's chart runs S/M/L/XL — use their exact ranges (not Amazon's generic size guide). The sleeve should fit snugly like athletic compression wear without cutting in above or below the knee. If you see skin bulging at either edge, size up.
Tips & Tricks
Roll the sleeve on from the ankle UP rather than pulling it onto the knee — that avoids overstretching the elastic and extends its life. Center the patella opening (if present) directly over your kneecap. Knee sleeves work best worn during activity, not for sleeping. Hand-wash and air-dry to preserve compression. If you need more support than a sleeve provides (true ligament instability, post-op recovery), step up to the hinged brace above. Suspension reminder: the sleeve's upper edge needs to sit above the calf muscle belly — the taper from narrower above to wider calf-muscle below is what keeps it from migrating down toward the ankle.
Common Mistakes
A sleeve too tight restricts circulation and causes swelling below the knee (or numbness in the lower leg). A sleeve too loose slides down with every step and gives no compression at all. Expecting a compression sleeve to "fix" a torn ACL or significant ligament injury — it can't, and the sense of stability it provides is no substitute for real protection.
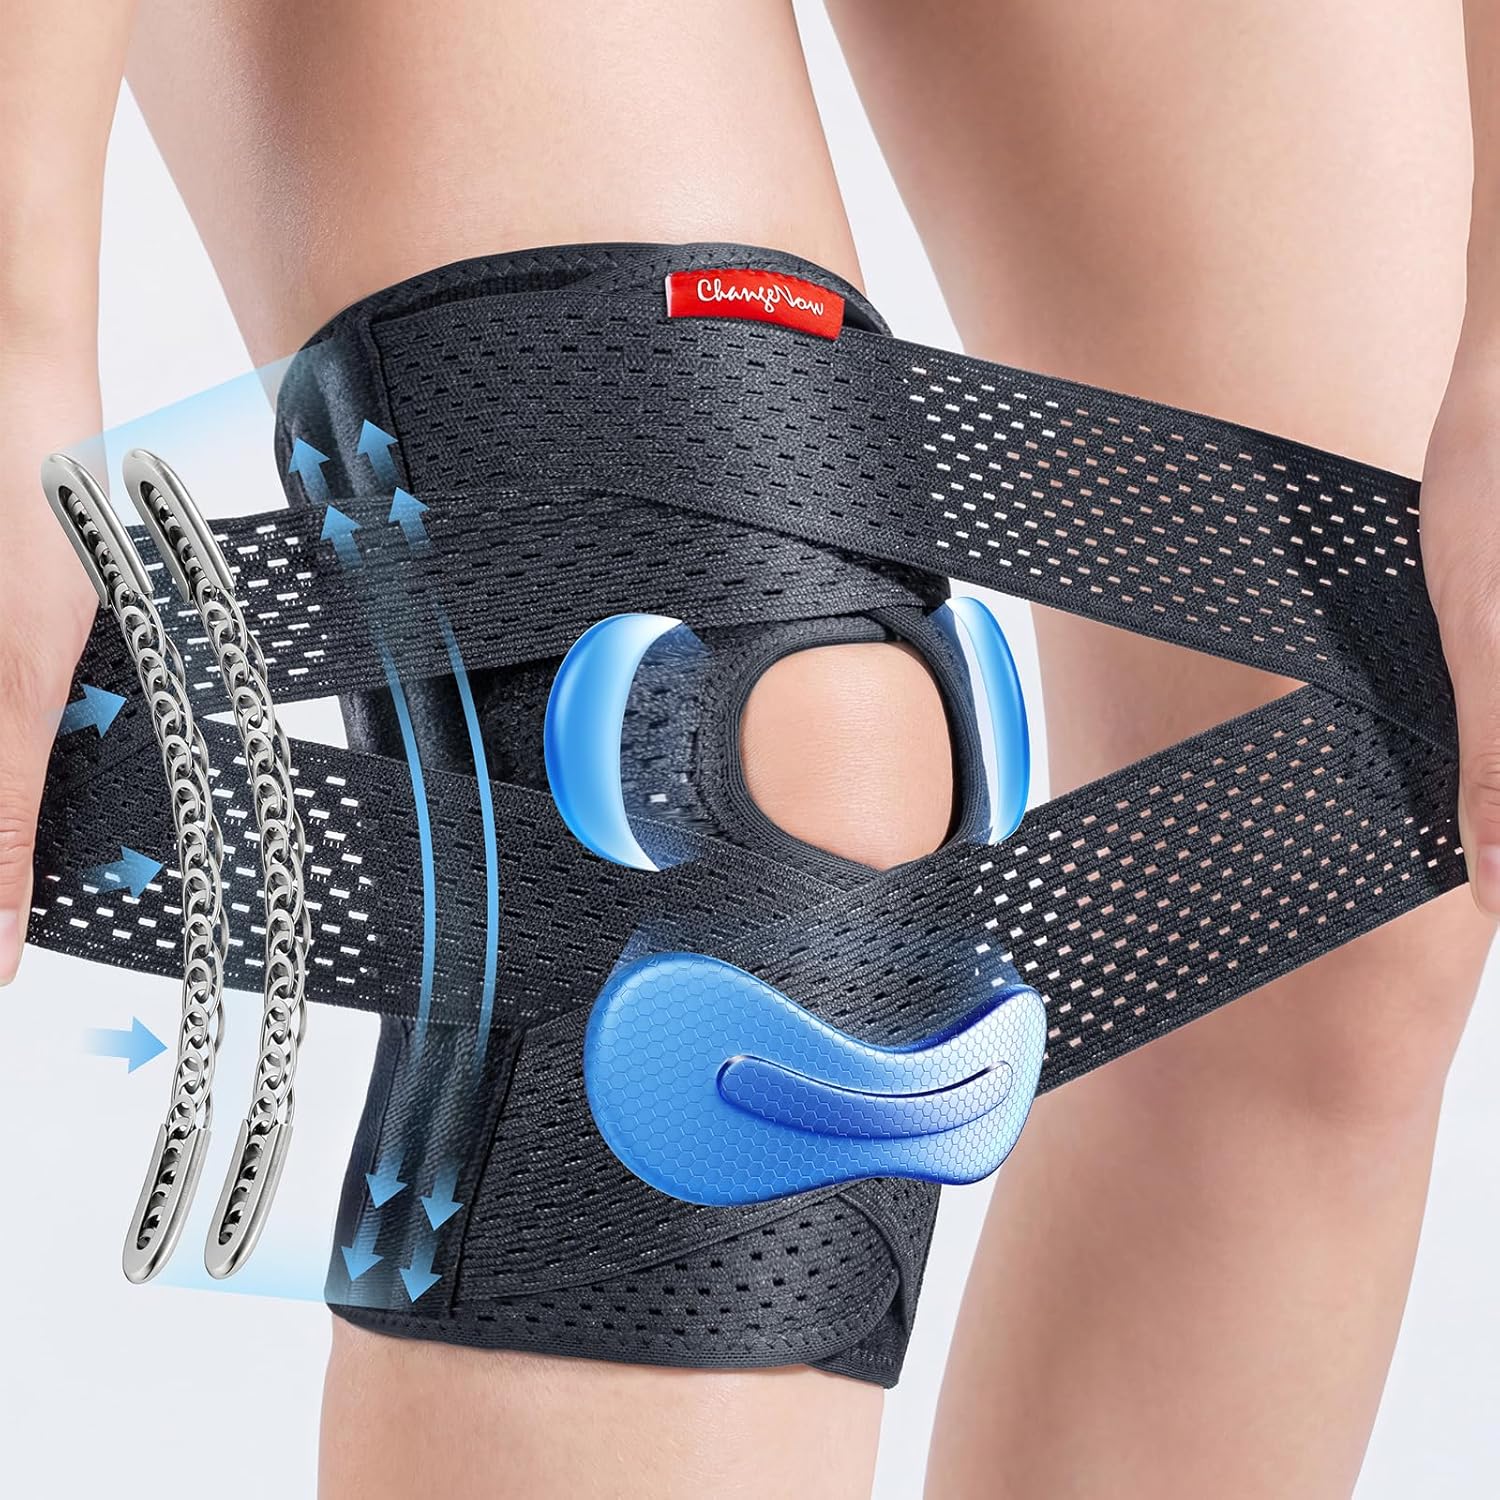
Adjustable-Compression Knee Sleeve (V-Strap)
A step up from a pull-on knee sleeve: this style adds V-shaped Velcro straps that cross above and below the kneecap so you can dial in compression to your exact preference. Side stabilizers add modest medial-lateral support. Best for patients who like the secure feel of a sleeve but want firmer control where they need it most, or for activities where pull-on compression alone is too uniform — running, hiking with a pack, work that involves a lot of squatting and standing.
Sizing Guide
Measure circumference around the center of the kneecap with your leg straight. The brand's chart runs S/M/L/XL — use their exact ranges. Because the V-straps add adjustability, fit is more forgiving than a fixed-compression sleeve — but a brace that's far too big won't anchor and a far-too-small one will dig in even with straps loosened. Aim for snug-but-comfortable as the baseline before adjusting straps.
Tips & Tricks
Pull the brace on like a sleeve first, then dial in the V-straps last. Tighten the lower (below-kneecap) strap before the upper one — that locks the position before you add the upper compression. The side stabilizers should rest at the natural side of the knee joint. Loosen the straps and re-cinch every 30-60 minutes during long wear — Velcro tension settles, and a brace that started snug can end up loose. Suspension reminder: the lower V-strap sits above the calf muscle belly — that's what anchors the whole brace; if the brace migrates down the leg, this strap is what you tighten first.
Common Mistakes
Over-tightening the straps in pursuit of "more support" cuts off circulation and causes calf or lower-leg numbness — back off until the leg feels comfortable. Letting the V-straps overlap on the kneecap itself puts uncomfortable pressure on the patella; the straps should V around the kneecap, not over it. As with any sleeve, this is not a substitute for a hinged or rigid functional brace if you have true ligament instability.
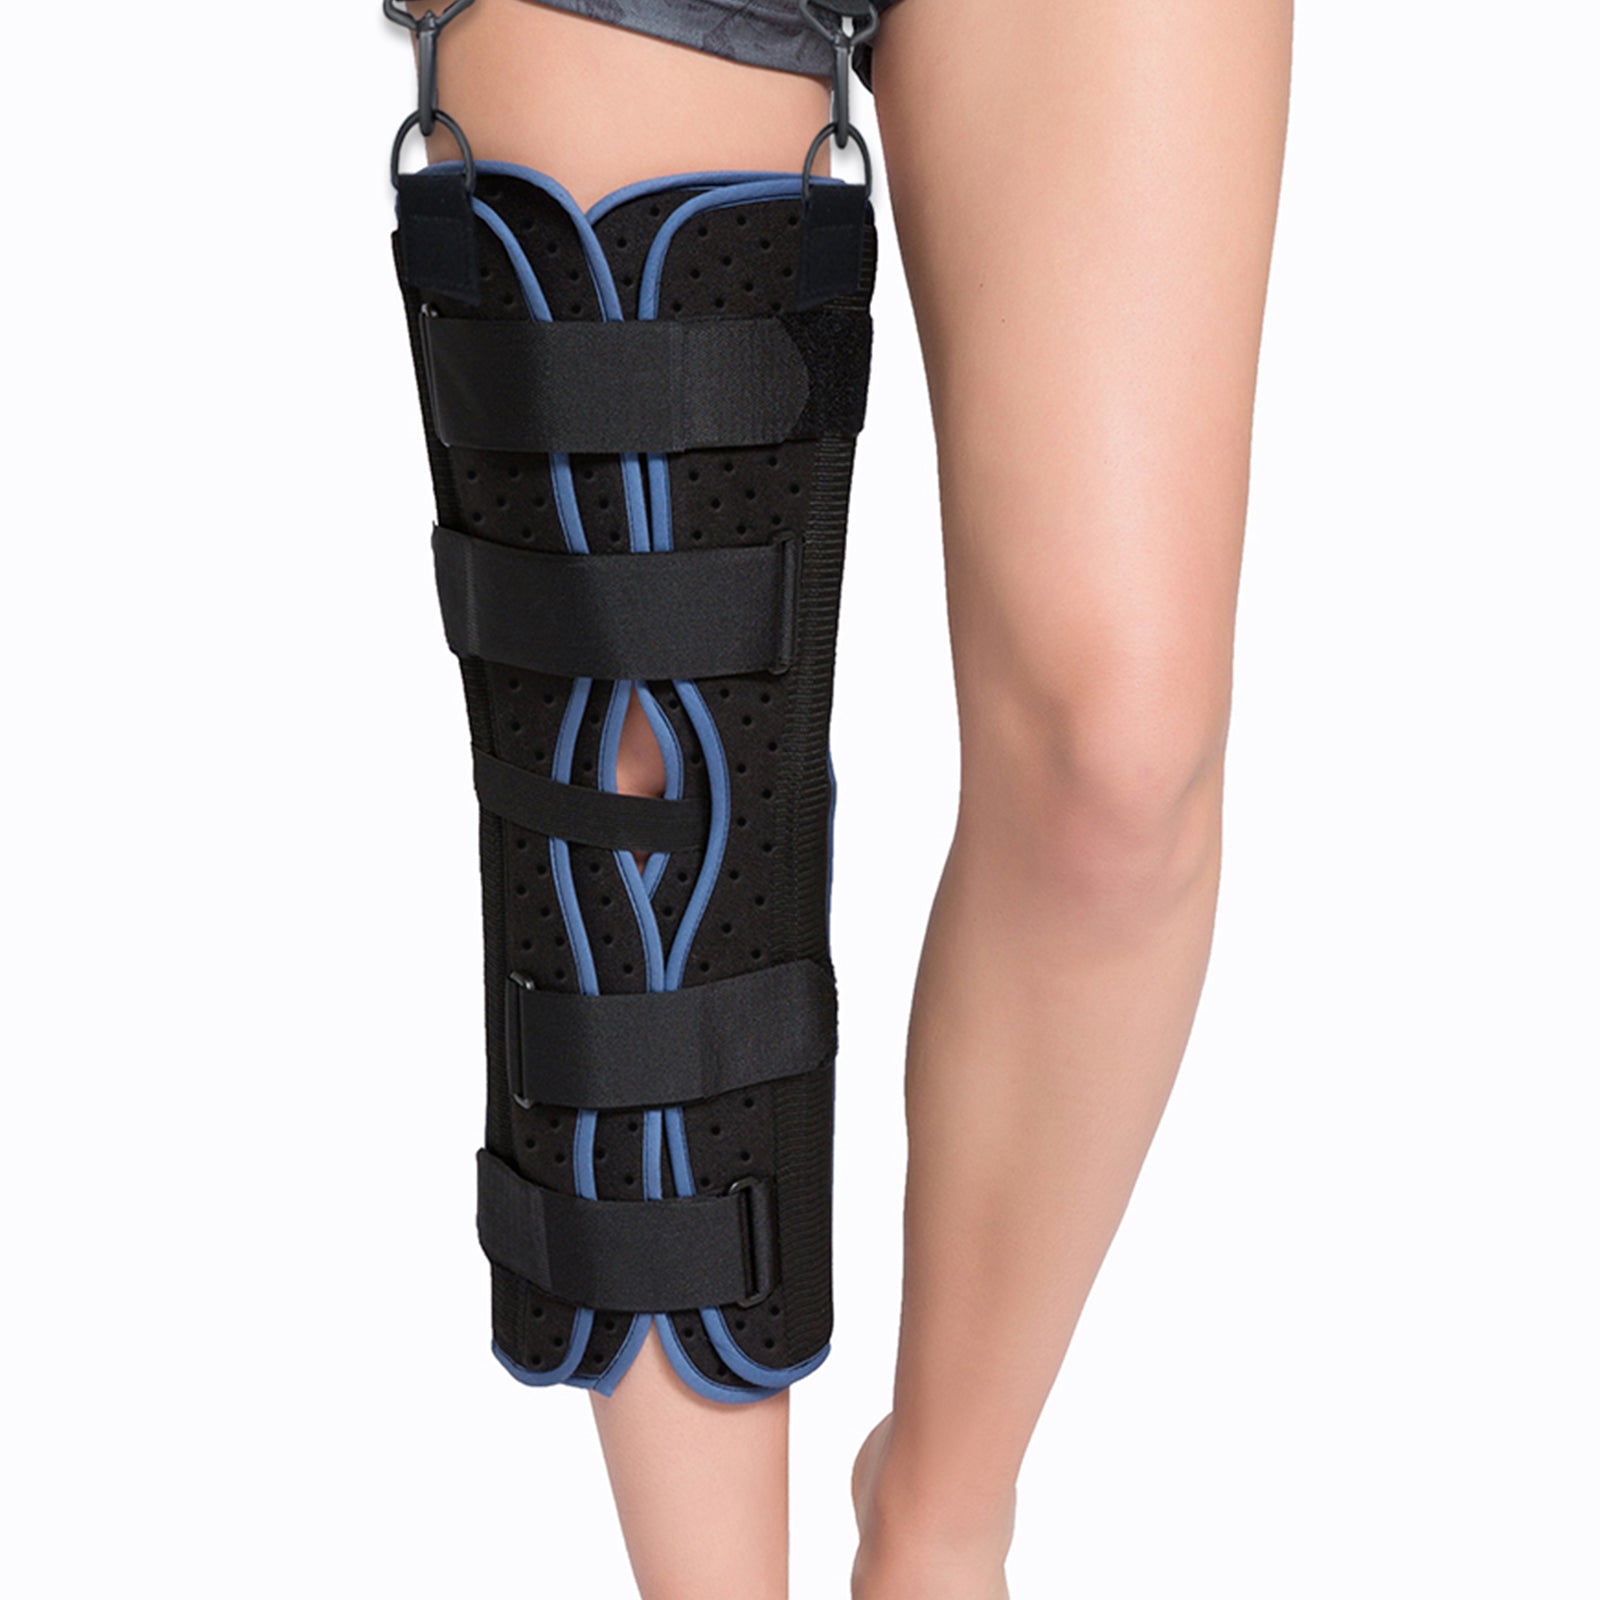
Knee Immobilizer
For post-injury or post-surgical immobilization of the knee in full extension.
Sizing Guide
Measure the length of your leg from mid-thigh to mid-calf. Most immobilizers come in lengths (12, 16, 18, 20, 24 inches). Choose the length that covers from above the knee to below it. Also measure thigh and calf circumference for width sizing.
Tips & Tricks
Center the immobilizer behind your knee. Fasten straps starting from the middle and work outward. The knee should be held straight. Wear over clothing or a sock to prevent skin irritation. Suspension reminder: the strap just below the knee — sitting above the calf muscle belly, tighter there than anywhere else — is what keeps the immobilizer from sliding toward your ankle. The middle and thigh straps add stability; the upper calf strap is what suspends the whole thing.
Common Mistakes
An immobilizer that is too short will not properly stabilize the knee. If the top or bottom edge digs in, the length is wrong.
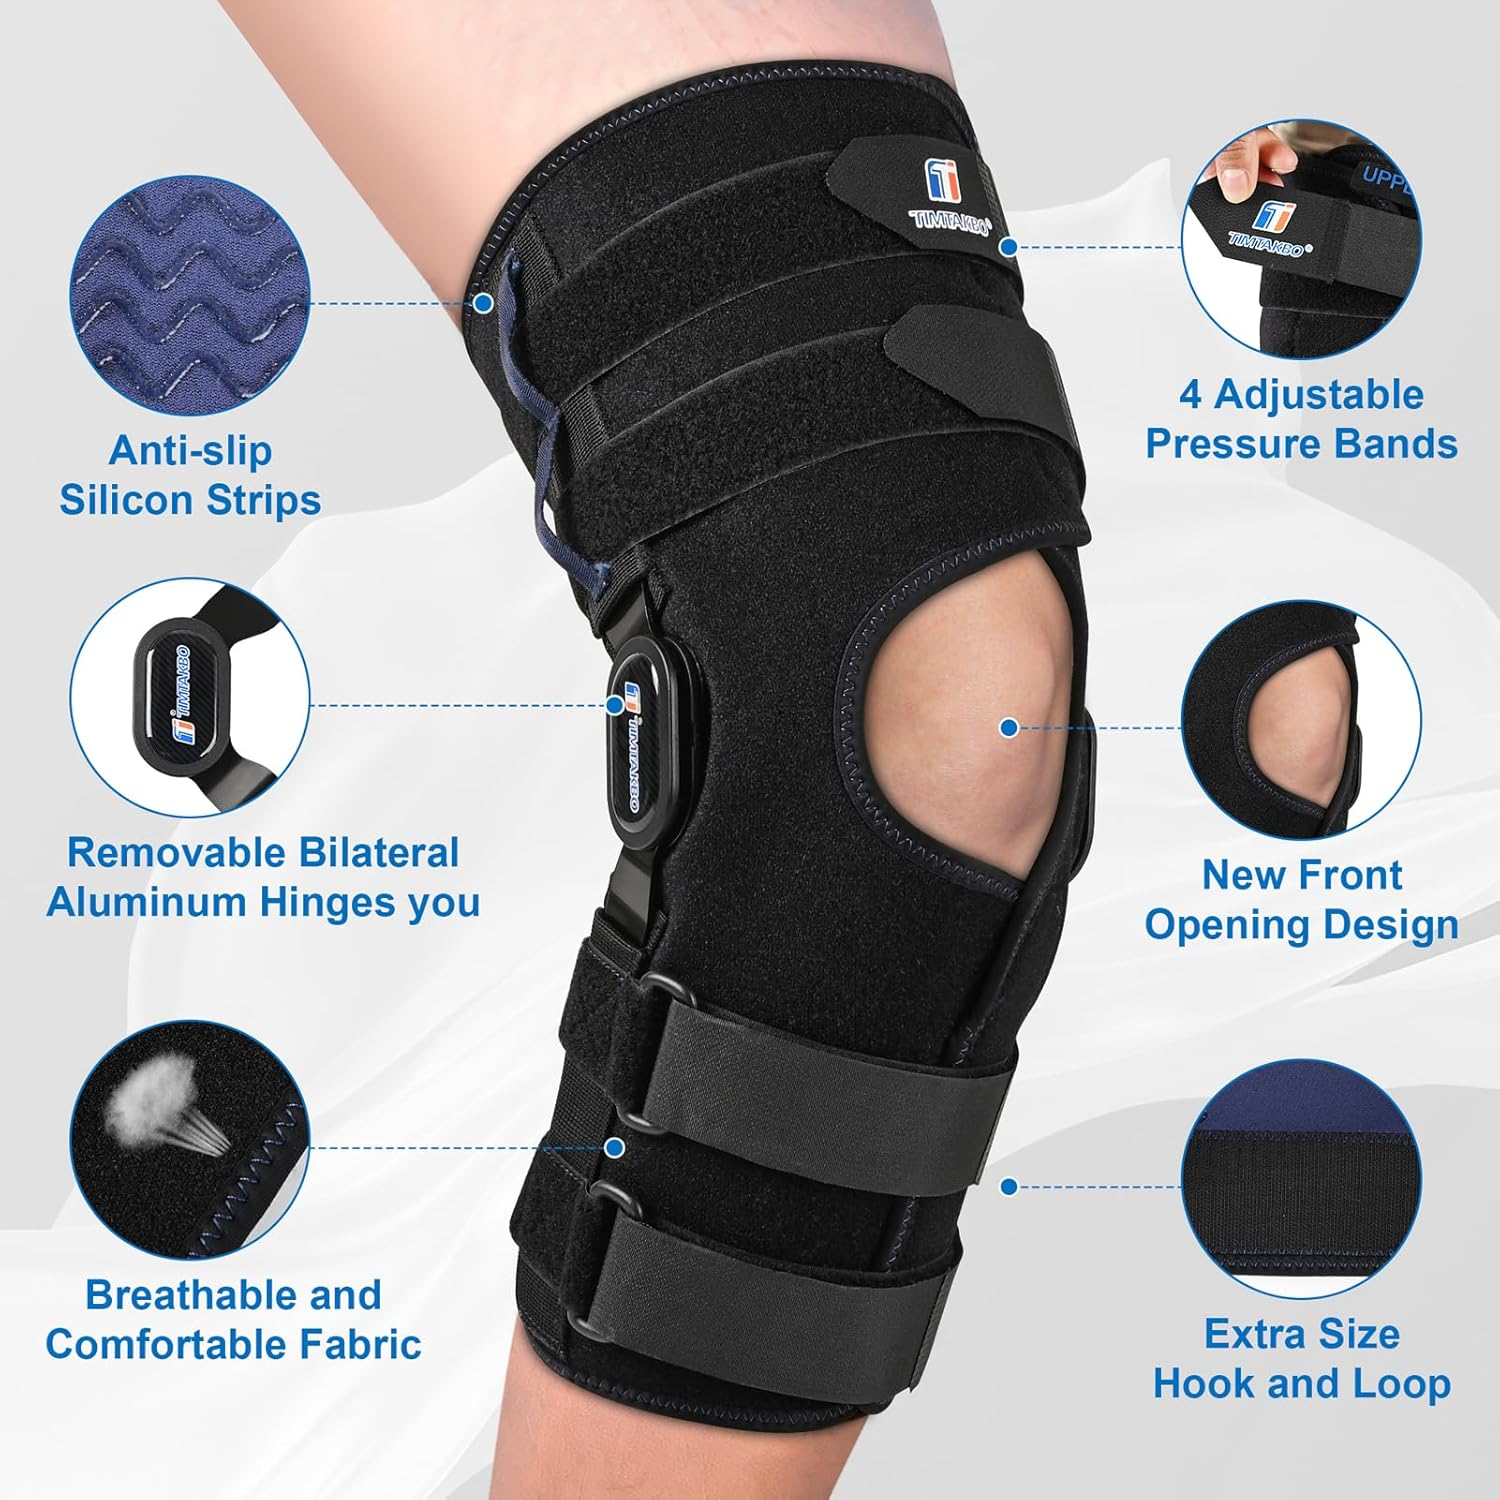
Wrap-Around Hinged Knee Brace (4-Strap)
For moderate knee instability, meniscus support, ACL/MCL injury recovery (mild to moderate), and post-injury swelling that prevents sliding a brace on. The wrap-around design opens fully so you can lay it flat against the back of your knee and close it around the front — much easier than a slide-on brace if you can't bend the knee. The 4-strap version (instead of the typical 2-strap) holds the limb more securely for injuries and keeps the brace from migrating down the leg as you walk.
Sizing Guide
Measure around the center of your kneecap with your leg straight, plus thigh and calf circumference for the strap reach. Match to the manufacturer's size chart. The fully-opening wrap design tolerates a wider size range than slide-on braces — useful if your measurements fall between two pull-on sizes. Confirm whether the model is universal or side-specific before ordering.
Tips & Tricks
Open the brace fully, slide your leg into position with the hinges on the sides of the joint, and close the wraps. Tighten the straps in this order: lower-calf first (anchoring above the calf muscle belly — that's what suspends the brace), then the strap above the knee, then the two over-the-kneecap straps. The 4-strap system lets you fine-tune compression at the knee separately from the suspension at the calf — that's the main advantage over the 2-strap design.
Common Mistakes
Tightening the kneecap straps before the calf strap leaves the brace with no anchor — it'll migrate down with every step. Hinges sitting above or below the joint line bind when you bend; take time to position them at the bony pivot points on both sides. If the brace still slides down, the upper calf strap is the fix — not the thigh strap.
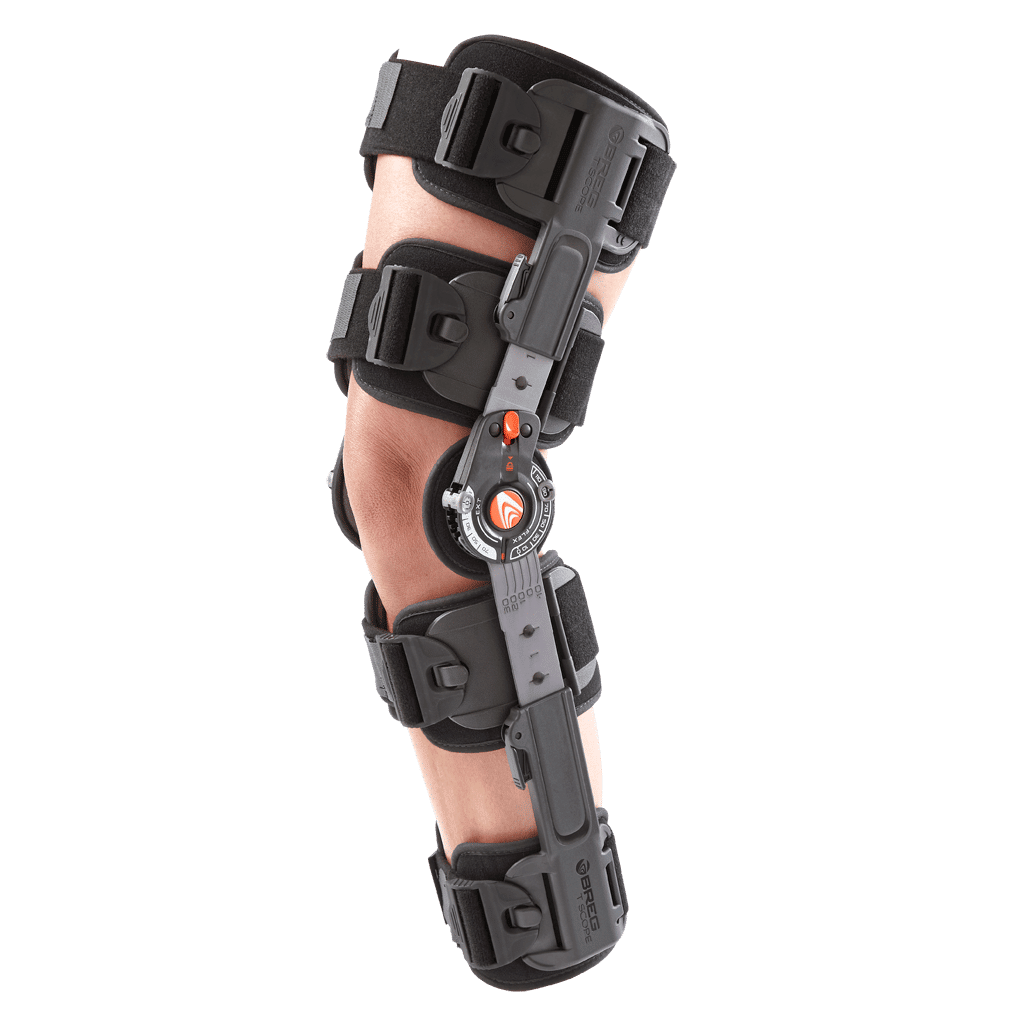
Knee T-Scope (Range-of-Motion Brace)
For post-surgical rehabilitation requiring controlled range of motion at the knee.
Sizing Guide
T-Scope braces are typically one-size-adjustable with telescoping bars. Adjust the length so the hinge aligns with your knee joint center. Follow surgical team instructions for ROM settings.
Tips & Tricks
Your surgeon or therapist will set the allowed range of motion. Do not adjust the ROM settings yourself unless instructed. Check strap tension regularly as swelling changes post-surgery. Suspension reminder: the calf strap just below the knee, sitting above the calf muscle belly and tightened firmly, is what keeps the T-Scope from sliding toward the ankle as you walk. Post-op patients see significant calf-circumference changes day-to-day from swelling and inactivity — re-check this strap multiple times per day for the first few weeks.
Common Mistakes
Changing the range-of-motion settings without your surgeon's guidance can compromise your recovery. Also, straps that are too loose allow the brace to shift and the hinge to misalign.
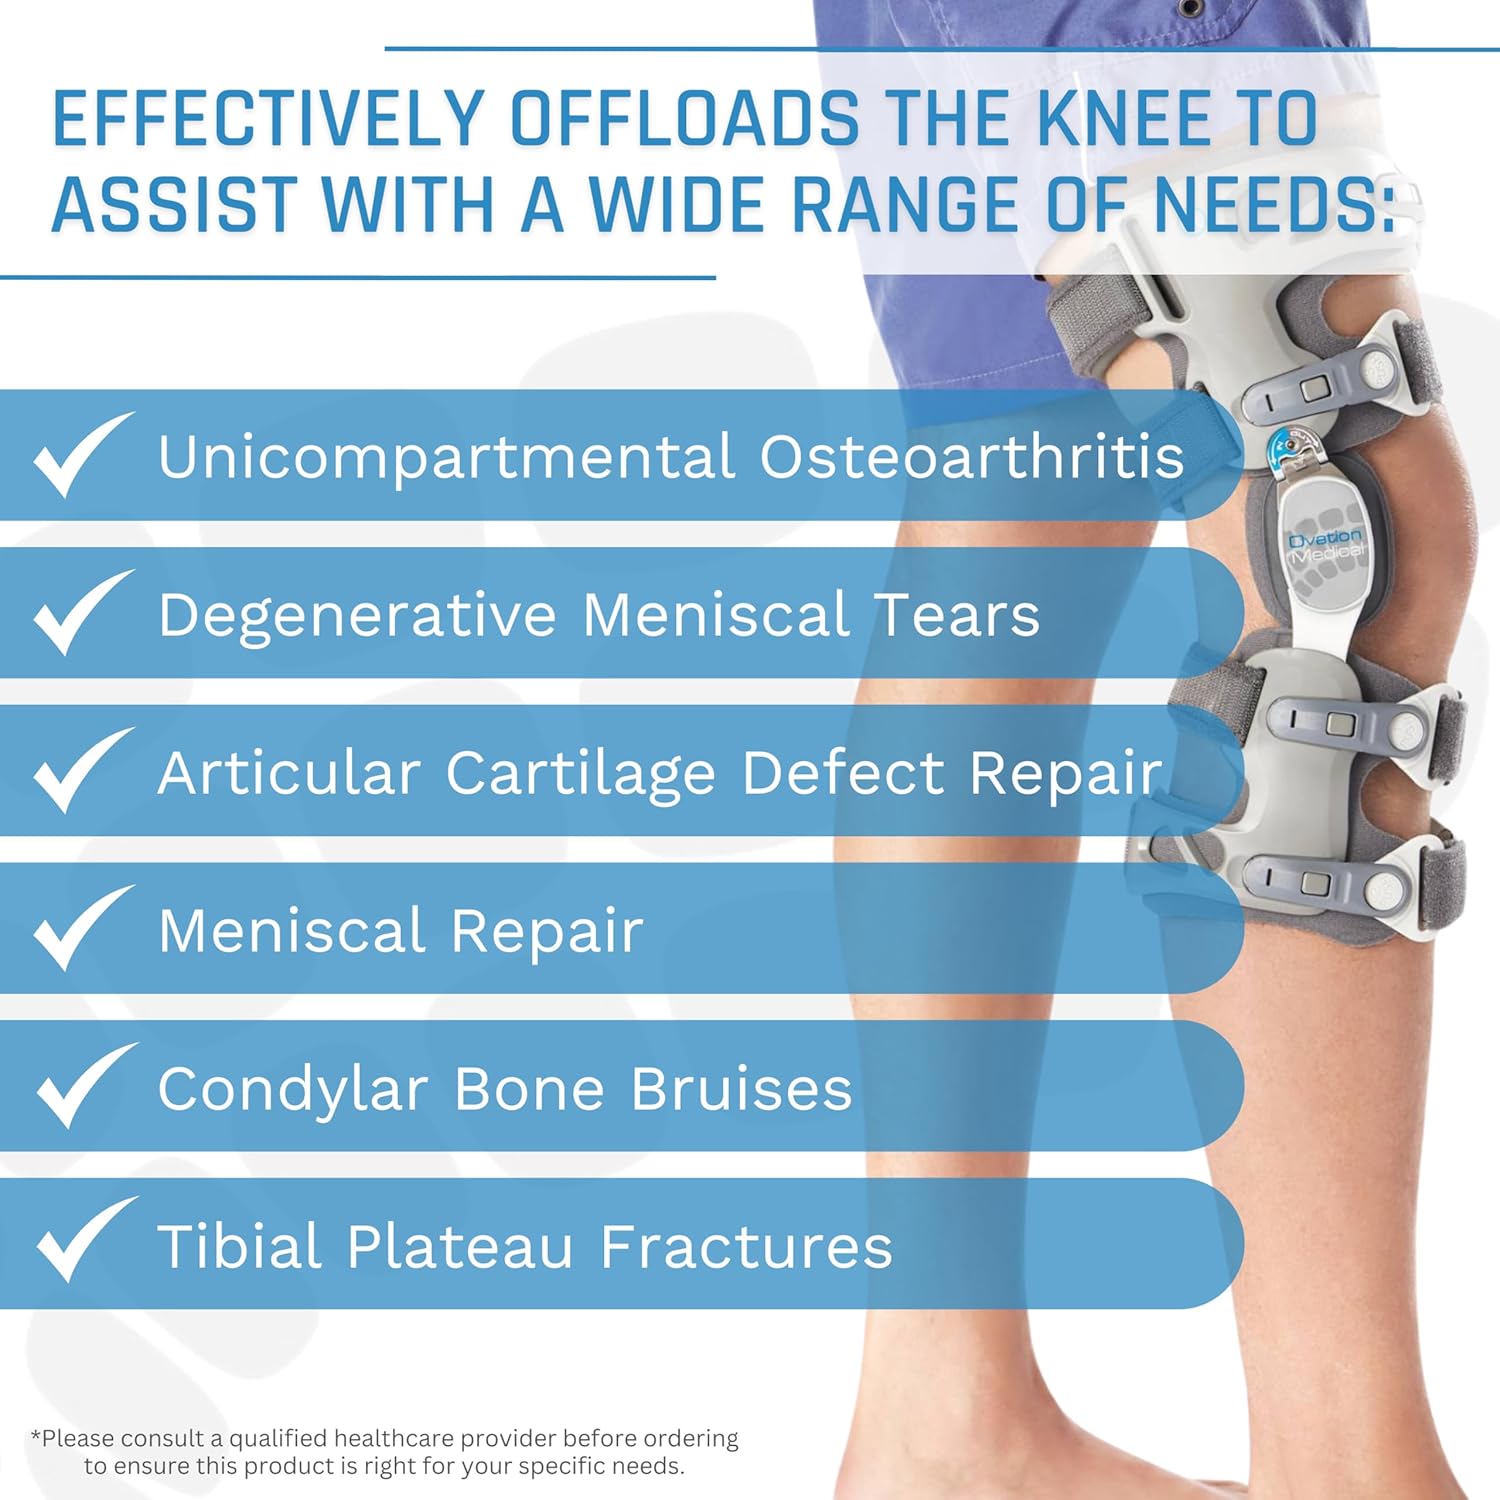
Single-Upright Unloader Knee Brace (Medial-Compartment OA)
For mild to moderate medial-compartment knee osteoarthritis — the inner-knee, varus / bowleg pattern that accounts for the majority of knee OA. Particularly useful when you need to wear an unloader on BOTH knees: a single-upright design has the hinge bar on the LATERAL (outer) side of each leg with the corrective pad on the medial side, so two single-upright braces won't collide between the legs. Lower-profile under pants than a double-upright.
Important: single-upright unloaders effectively only work for medial-compartment OA. The biomechanics are a three-point bending system: the midpoint force comes from a pad on the medial side of the knee, pushing the knee into mild valgus to open the medial joint space. A single upright can't reverse the direction for lateral-compartment OA — that would require the upright to sit on the medial side (between the legs), which isn't workable. If you have lateral-compartment OA, jump to the double-upright below. Also less rigid and less effective than a double-upright, so step up to a double-upright for severe medial OA on one knee.
Sizing Guide
Measure thigh circumference 6 inches above the kneecap and calf circumference 6 inches below the kneecap. Pick LEFT or RIGHT. Most single-upright unloaders are pre-configured for medial-compartment correction (the only configuration that works for this design) — confirm the listing isn't a generic neoprene sleeve before ordering. Confirm with your orthopedist that you have medial-compartment OA before buying any unloader brace. Knee circumference matters most for fit; if between sizes, go up.
Tips & Tricks
The corrective force should feel SUBTLE — not like a strong push wedging the knee sideways. Patients commonly turn the brace's dial up thinking "more push = more relief." Wrong. Right approach: start the dial at ZERO force and gradually increase ONLY until activity-related pain reduces. Stop there. If the brace feels like it's jamming the knee, back the dial off. If turning the dial seems to make pain WORSE rather than better, you may be turning it the wrong way — try the opposite direction (some dials unload when turned clockwise, others counter-clockwise). Suspension still anchors at the calf strap above the muscle belly, as with all knee braces on this page (see page note at top).
Common Mistakes
Using a single-upright unloader for lateral-compartment OA — the design can't deliver the right force vector and you'll end up worse off. Confirm compartment with your orthopedist first; if lateral, switch to the double-upright below. Cranking the dial up until you feel real pressure: wrong — that's how skin pressure injuries develop and why patients abandon unloader braces. If pain stays the same as you dial up, you may be turning the wrong way — reverse direction. Using a single-upright when you have severe single-knee medial OA is under-bracing — step up to the double-upright.
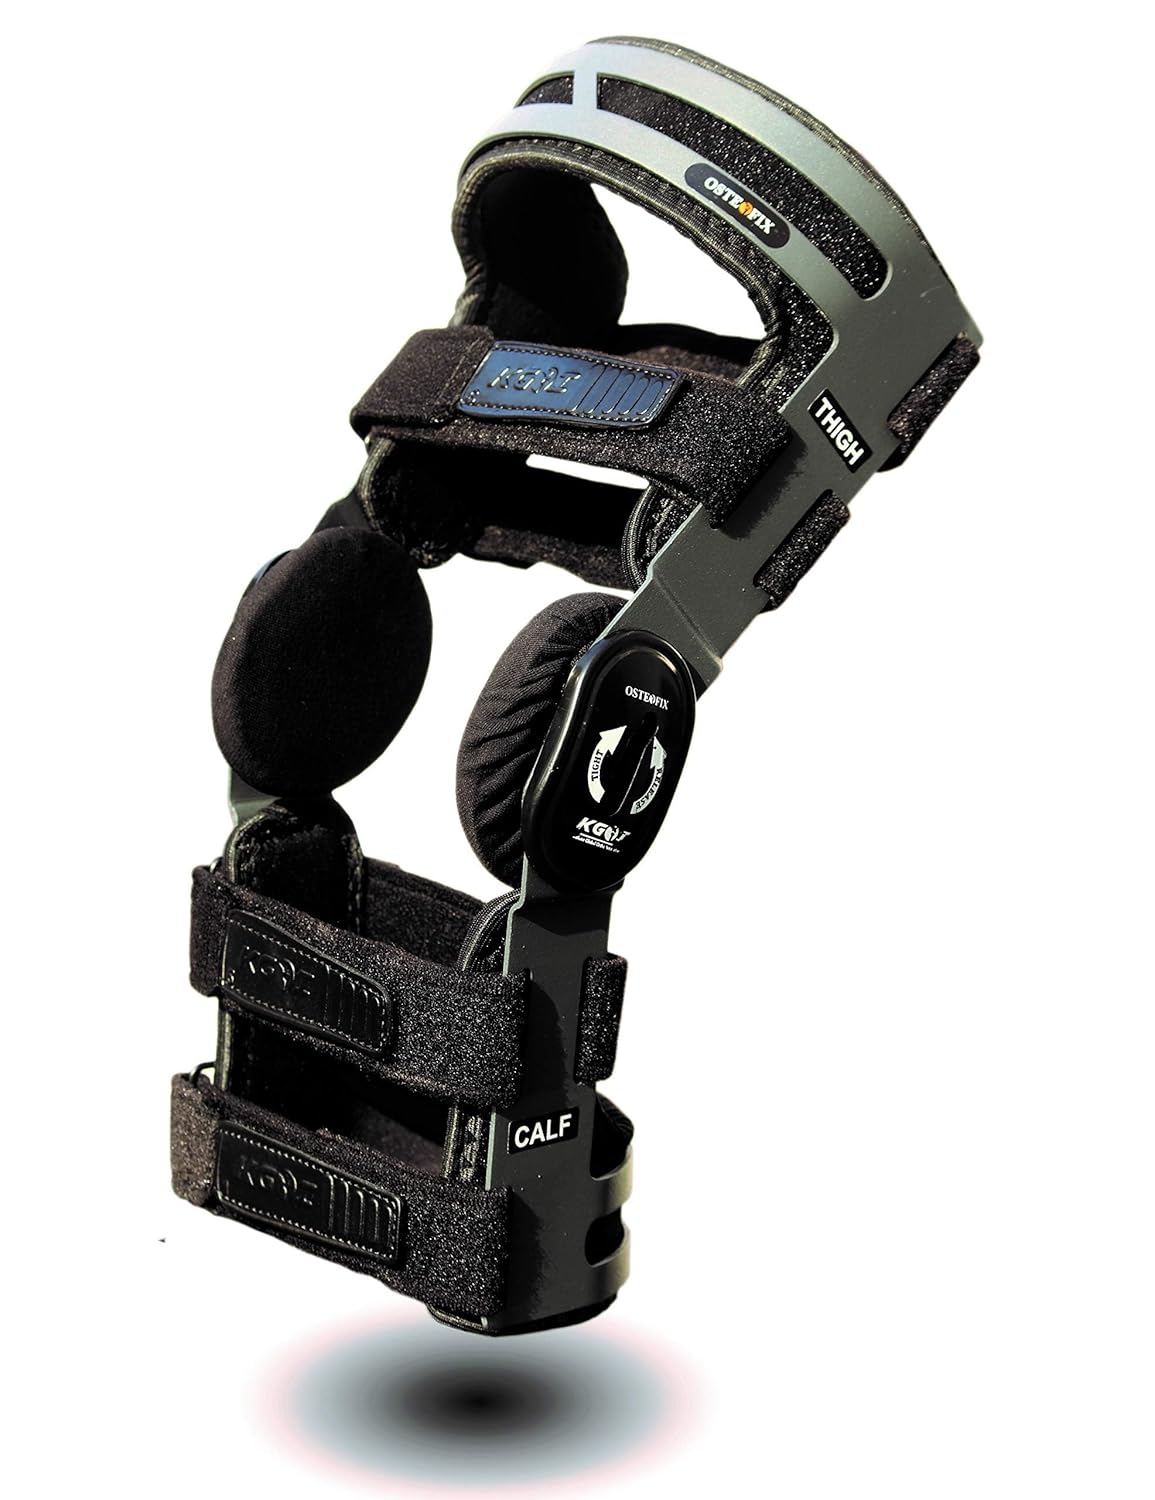
Double-Upright Unloader Knee Brace (Higher Rigidity)
For moderate to severe unicompartmental knee OA on one knee — when you want the most rigid, most effective off-loading from an over-the-counter brace. Hinges on BOTH sides of the leg make this design significantly stiffer than a single-upright, which means more consistent corrective force and better protection during activity. The default unloader brace recommendation for one painful knee. Trade-off: larger profile, more visible under pants, and the two-sided uprights can collide between knees if you wear braces bilaterally (use the single-upright above for that case).
Sizing Guide
Measure thigh circumference 6 inches above the kneecap and calf circumference 6 inches below the kneecap. Pick LEFT or RIGHT — and pick the right CORRECTION DIRECTION: "Medial" for medial-compartment (inner-knee, varus/bowleg) OA, "Lateral" for lateral-compartment (outer-knee, valgus/knock-knee) OA. Confirm with your orthopedist which compartment is affected before ordering — wrong direction makes pain worse, not better. Knee circumference matters most for fit; size up if between sizes.
Tips & Tricks
The corrective force should feel SUBTLE — not like a strong push wedging the knee sideways. Don't crank the dial in pursuit of "more relief" — that's the most common reason patients abandon unloader braces. Right approach: start with the dial at ZERO force and gradually increase ONLY until activity-related pain reduces. Stop there. If turning the dial makes the pain WORSE, you may be turning it the wrong way — try the opposite direction (the unloading direction depends on whether you're correcting medial vs lateral OA and on the model). Suspension still anchors at the calf strap above the muscle belly, as with all knee braces above on this page.
Common Mistakes
Ordering the wrong correction direction (medial vs lateral mix-up) is the most expensive mistake — the brace will make pain worse. Confirm with your orthopedist first. Setting the dial too aggressively pursues short-term feel but causes skin pressure issues and ultimately abandonment of the brace. If the dial seems to do the opposite of what you expect, it may be set in the wrong direction — try reversing. Wearing this on both knees (when you have bilateral OA) means the medial uprights collide with each other every step — use the single-upright unloader above for bilateral cases.

Neoprene Hinged Knee Sleeve
For mild knee instability, post-injury support, arthritis, and activities that put stress on the knee. Less rigid than a wraparound brace but more supportive than an elastic sleeve.
Sizing Guide
Measure around the center of your kneecap with your leg straight. Match to the manufacturer's chart. Most pull-on hinged sleeves come in standard sizes (S, M, L, XL); choose the size where the sleeve fits snugly without cutting in.
Tips & Tricks
A neoprene sleeve provides warmth and mild compression while the integrated side hinges add lateral stability. Pull-on style is easier to put on than a wraparound but harder if your knee is very swollen. The hinges should align with the sides of your knee joint. Hand-wash and air-dry to extend the sleeve's life. Suspension reminder: the sleeve's upper edge — sitting above the calf muscle belly with the elastic taper holding it there — is what keeps it from migrating down. Neoprene grips the skin more than knit fabric, so suspension is more forgiving, but if it slides toward the ankle, the sleeve is too large at the top.
Common Mistakes
A sleeve that slides down your leg is too large. Hinges that sit above or below the joint line will bind when you bend the knee. Neoprene can cause skin irritation for some users — wear a thin liner sock or cotton sleeve underneath if you develop a rash.
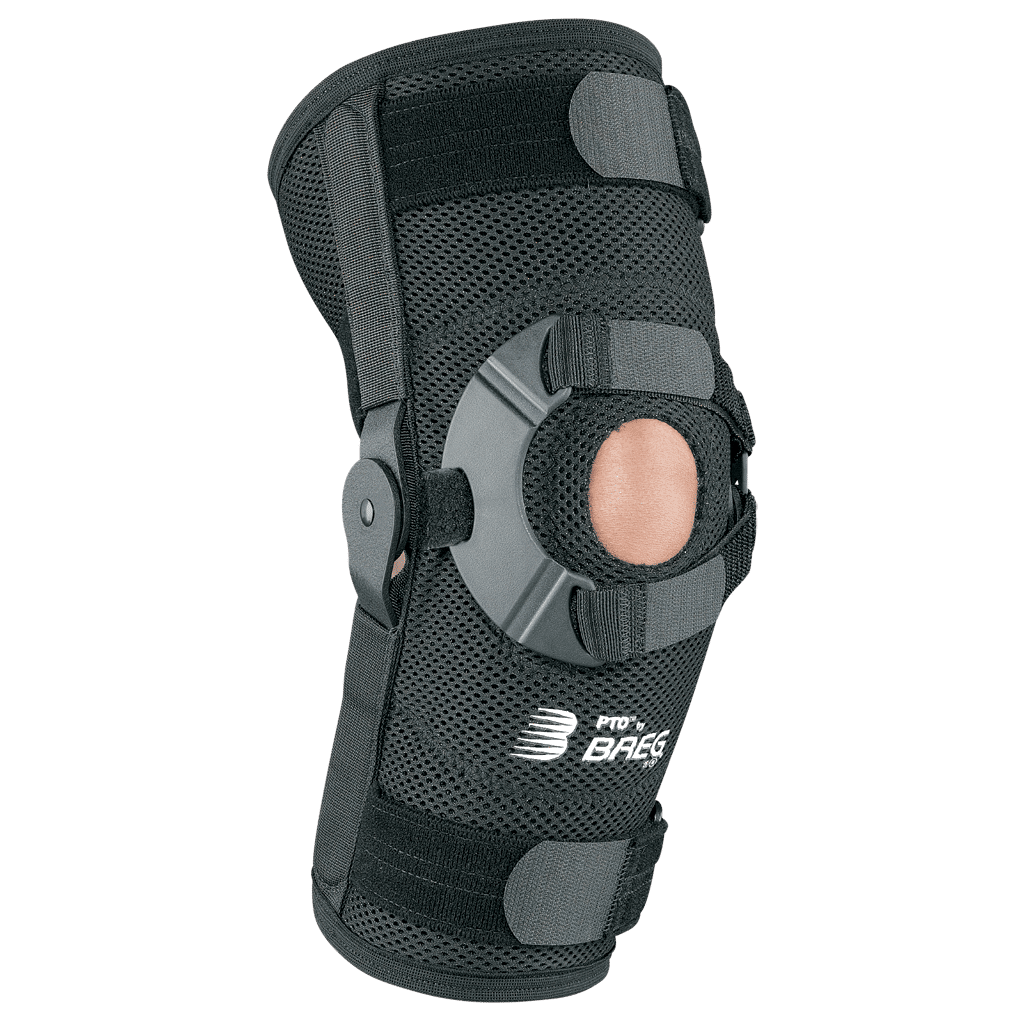
Patella Stabilizing Brace (J Brace / PTO)
For patella maltracking, patellofemoral pain syndrome, patella subluxation or dislocation, post-lateral release surgery, and chronic kneecap instability.
Sizing Guide
Sized XS through XXL. Measure thigh and calf circumference at the points specified by the manufacturer's chart. The brace has an open hole at the kneecap with a buttress or pressure plate on one side (usually the lateral, outer side) that pushes the kneecap inward.
Tips & Tricks
Position the open hole directly over your kneecap and the lateral buttress on the outside of the knee. The buttress creates a soft tissue wall that prevents the kneecap from sliding sideways. Some braces (like the Breg PTO) feature an adjustable pressure plate so you can fine-tune the amount of correction. Wear during sport, exercise, or any activity where the knee buckles or feels unstable. Suspension reminder: the calf strap or sleeve edge just below the knee — above the calf muscle belly — is what keeps the brace's open hole centered on your kneecap. If the brace migrates down the leg, the patella opening drifts off-target and the lateral buttress stops doing its job. Tighten the calf strap first.
Common Mistakes
If the open hole does not center over the kneecap, the brace will not stabilize tracking properly. The buttress goes on the side the kneecap tends to slip toward (usually outer/lateral). Generic elastic knee sleeves do not provide patella tracking support — make sure the brace specifically calls itself a patella stabilizer or J brace.