General & Mobility
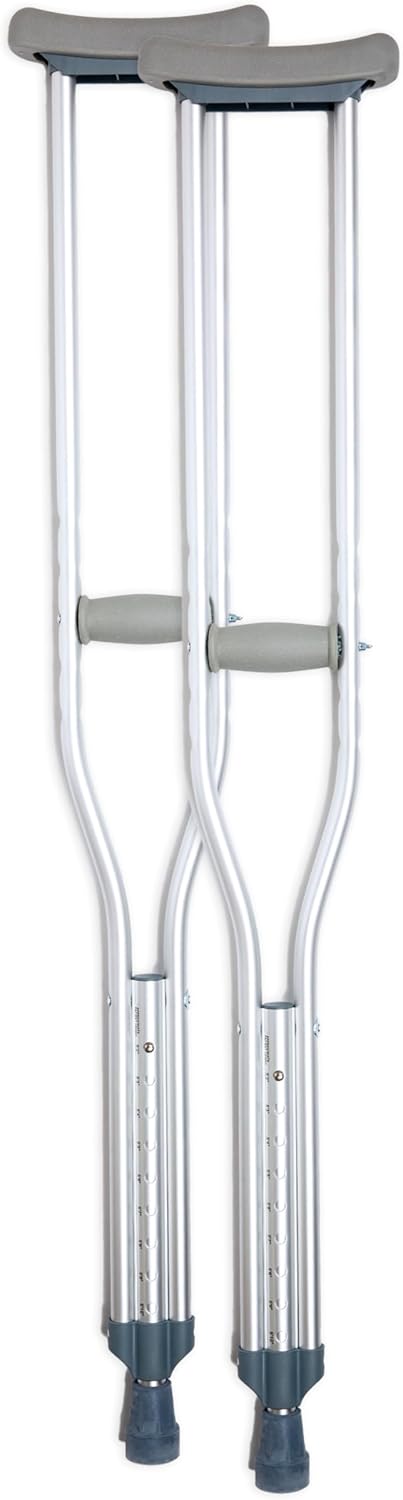
Underarm Crutches (Basic)
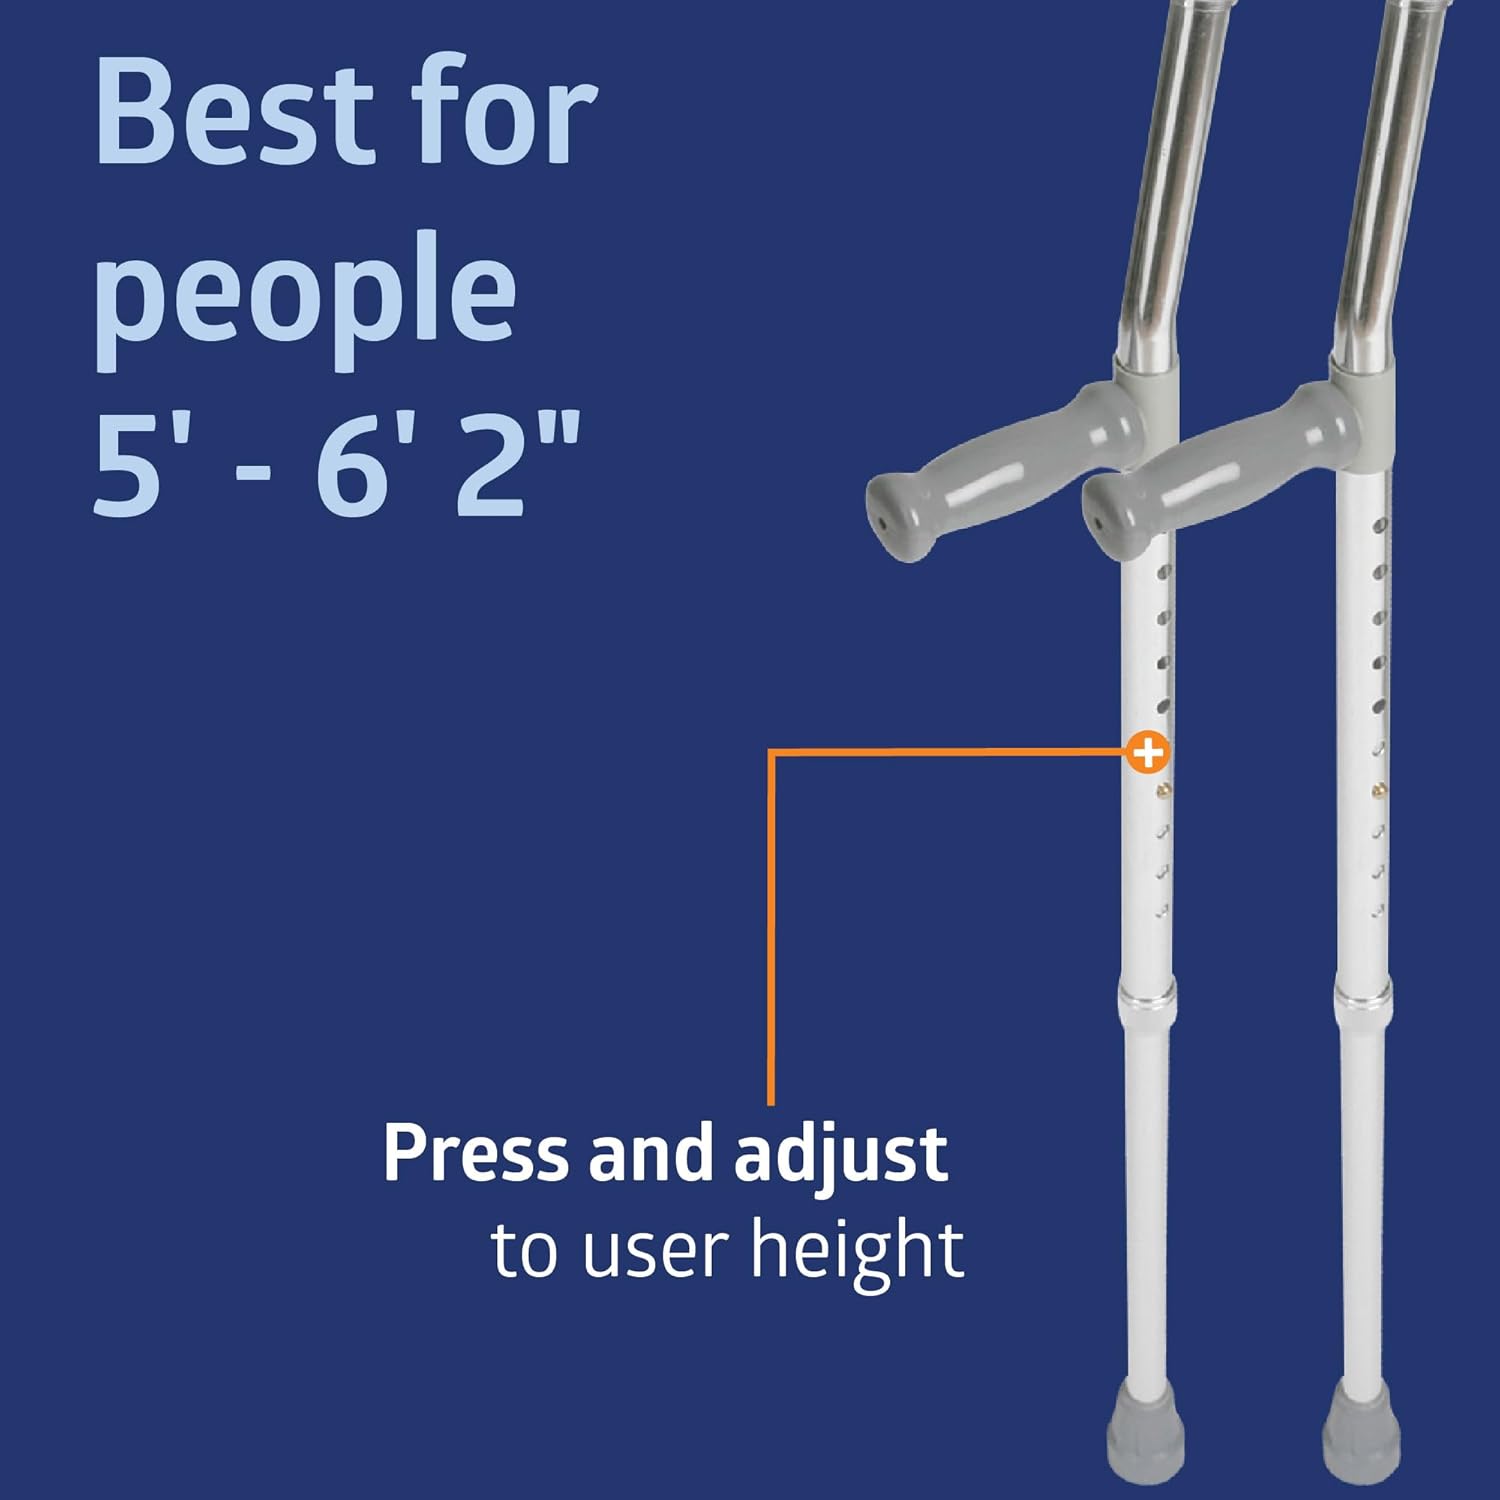
The standard pair-of-crutches you've seen in every clinic — for non-weight-bearing or partial-weight-bearing mobility after a foot, ankle, or lower-leg injury or surgery. Lightweight aluminum, height-adjustable, with padded underarm rests and handgrips.
Sizing Guide
Stand upright in shoes. The crutch top should sit 1-2 inches BELOW your armpit, not pressed into it. The handgrip should land at hip level so your elbow bends about 15-30 degrees when you grip it. The pair shown adjusts to fit users from about 5'2" to 5'10" with a weight capacity around 300 lbs. Taller and shorter sizes are sold separately by most brands.
Tips & Tricks
Carry your weight on the handgrips, not on the underarm pads. The pads are there to keep the crutch tucked against your ribs for control — they are not designed for you to rest your bodyweight on. Adjust the overall length first, then set the handgrip height separately. A small backpack frees your hands for drinks, phone, and keys.
Common Mistakes
Resting your armpits on the underarm pads is the classic mistake — long-term it can compress the brachial plexus and cause hand numbness, weakness, or tingling. Crutches set too short force a hunched posture; too tall and you'll feel shoulder and neck strain by the end of day one. Check that the rubber tips are not worn smooth before going outdoors.
Forearm Crutches (Standard)
Also called Lofstrand or Canadian crutches. The cuff wraps around your forearm and the handgrip carries your weight — no underarm contact. Better than underarm crutches for long-term use, multiple flights of stairs, and anyone who needs their hands free briefly (you can let go to open a door and the crutch stays on your arm).
Sizing Guide
Stand upright in shoes. The cuff should sit 1-2 inches below your bent elbow, fitting snugly around the thickest part of your forearm without pinching. The handgrip should land at hip-crease level so your elbow bends about 15-30 degrees when bearing weight. Aluminum, height-adjustable, with a 4-inch closed cuff suitable for most adult forearms. Open-cuff and pediatric sizes are available separately.
Tips & Tricks
Forearm crutches take a few days longer to learn than underarm crutches but are kinder to your shoulders, neck, and posture for any use longer than 2-3 weeks. The cuff is supposed to grip your arm firmly — if it slides up and down with each step, it's too loose. Most clinics issue the closed-cuff style by default; switch to open-cuff (gap in the back) if you have trouble getting your forearm in and out.
Common Mistakes
Using these like underarm crutches by gripping high and leaning forward defeats the design. Your weight goes through the handgrip, not the cuff. Cuffs too loose slide around and chafe; cuffs too tight cut off blood flow — there should be a finger-width of space when standing relaxed. Inspect the cuff rivets every few months; that joint sees the most wear.
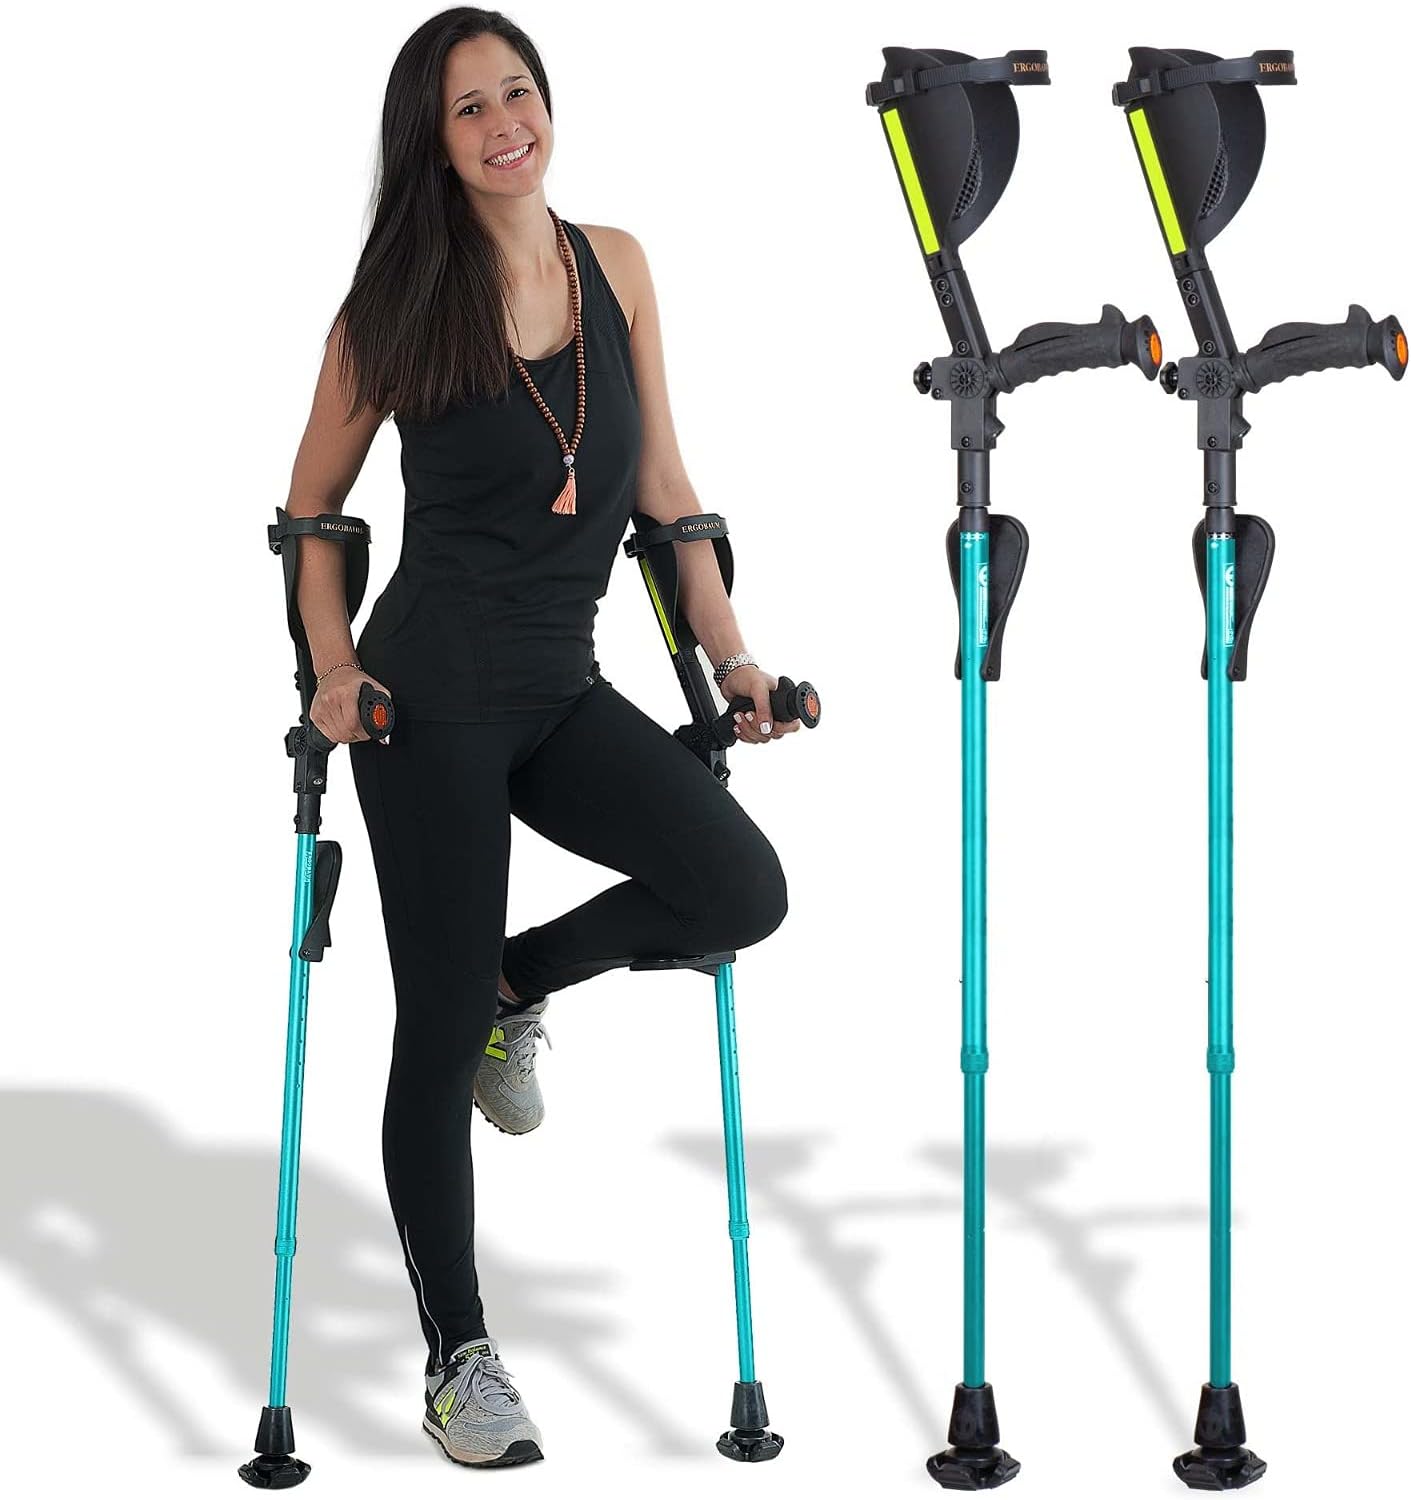
Premium Ergonomic Forearm Crutches
A higher-end forearm-crutch design for anyone using crutches for months or as a permanent mobility aid (cerebral palsy, post-polio, chronic instability, lower-limb amputees walking on a prosthesis). Articulating tips, gel or anatomically-shaped handgrips, and a generally more comfortable load path through the wrist and shoulder.
Sizing Guide
Fitting works the same as standard forearm crutches — cuff below the elbow, handgrip at hip-crease level, 15-30 degree elbow bend. Premium models add an articulating rubber tip that stays flat to the ground at every walking angle, which reduces slips on smooth floors and adds traction on wet surfaces. Color options are usually available. Confirm height range and weight capacity on the listing before ordering.
Tips & Tricks
If standard aluminum forearm crutches are causing wrist pain or palm pressure injuries after several weeks of use, the ergonomic handgrip is the upgrade that matters most. The articulating tip is the second-biggest difference — once you walk on it, it's hard to go back. Worth the upgrade for long-term users; overkill for someone with a 6-week recovery.
Common Mistakes
The premium price is not a substitute for proper fit. A perfectly-tuned standard crutch beats a poorly-fit premium one. Some users also forget that articulating tips need to be replaced before they wear flat in the middle — the curved profile is what makes them work.
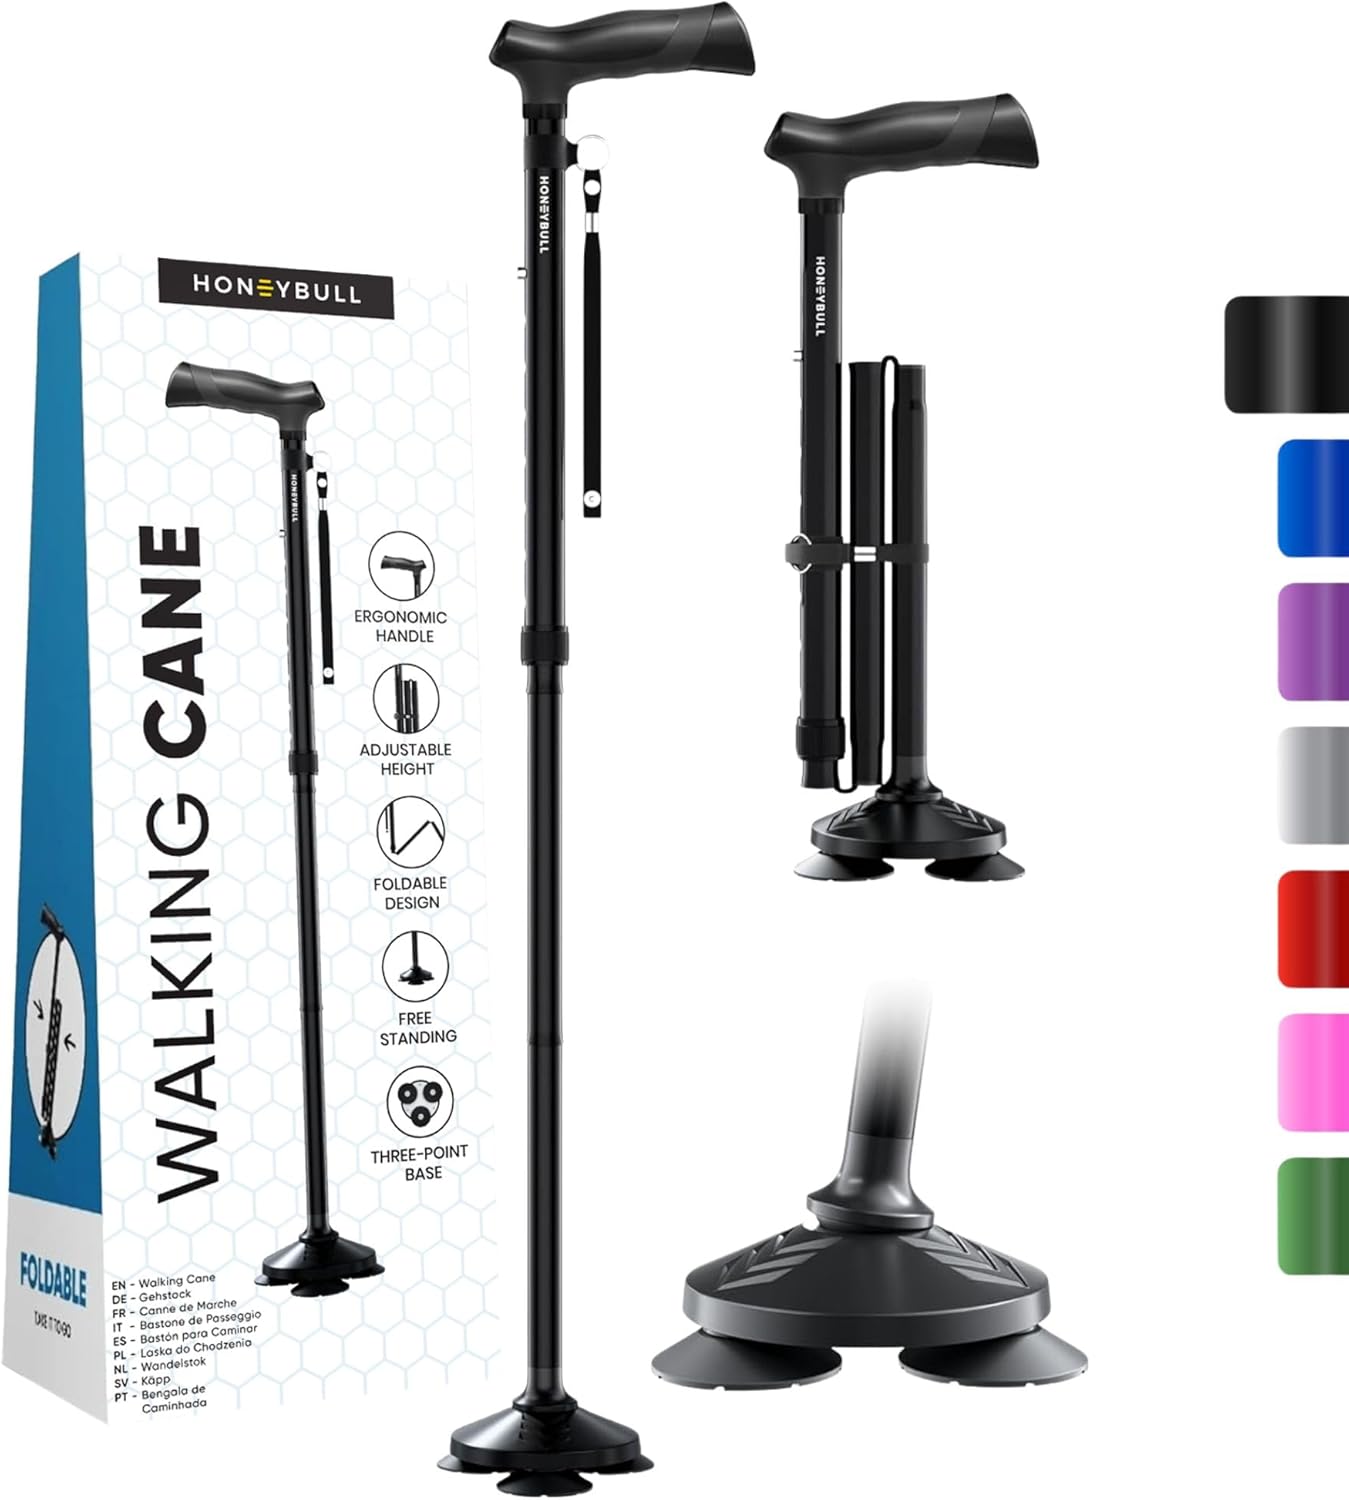
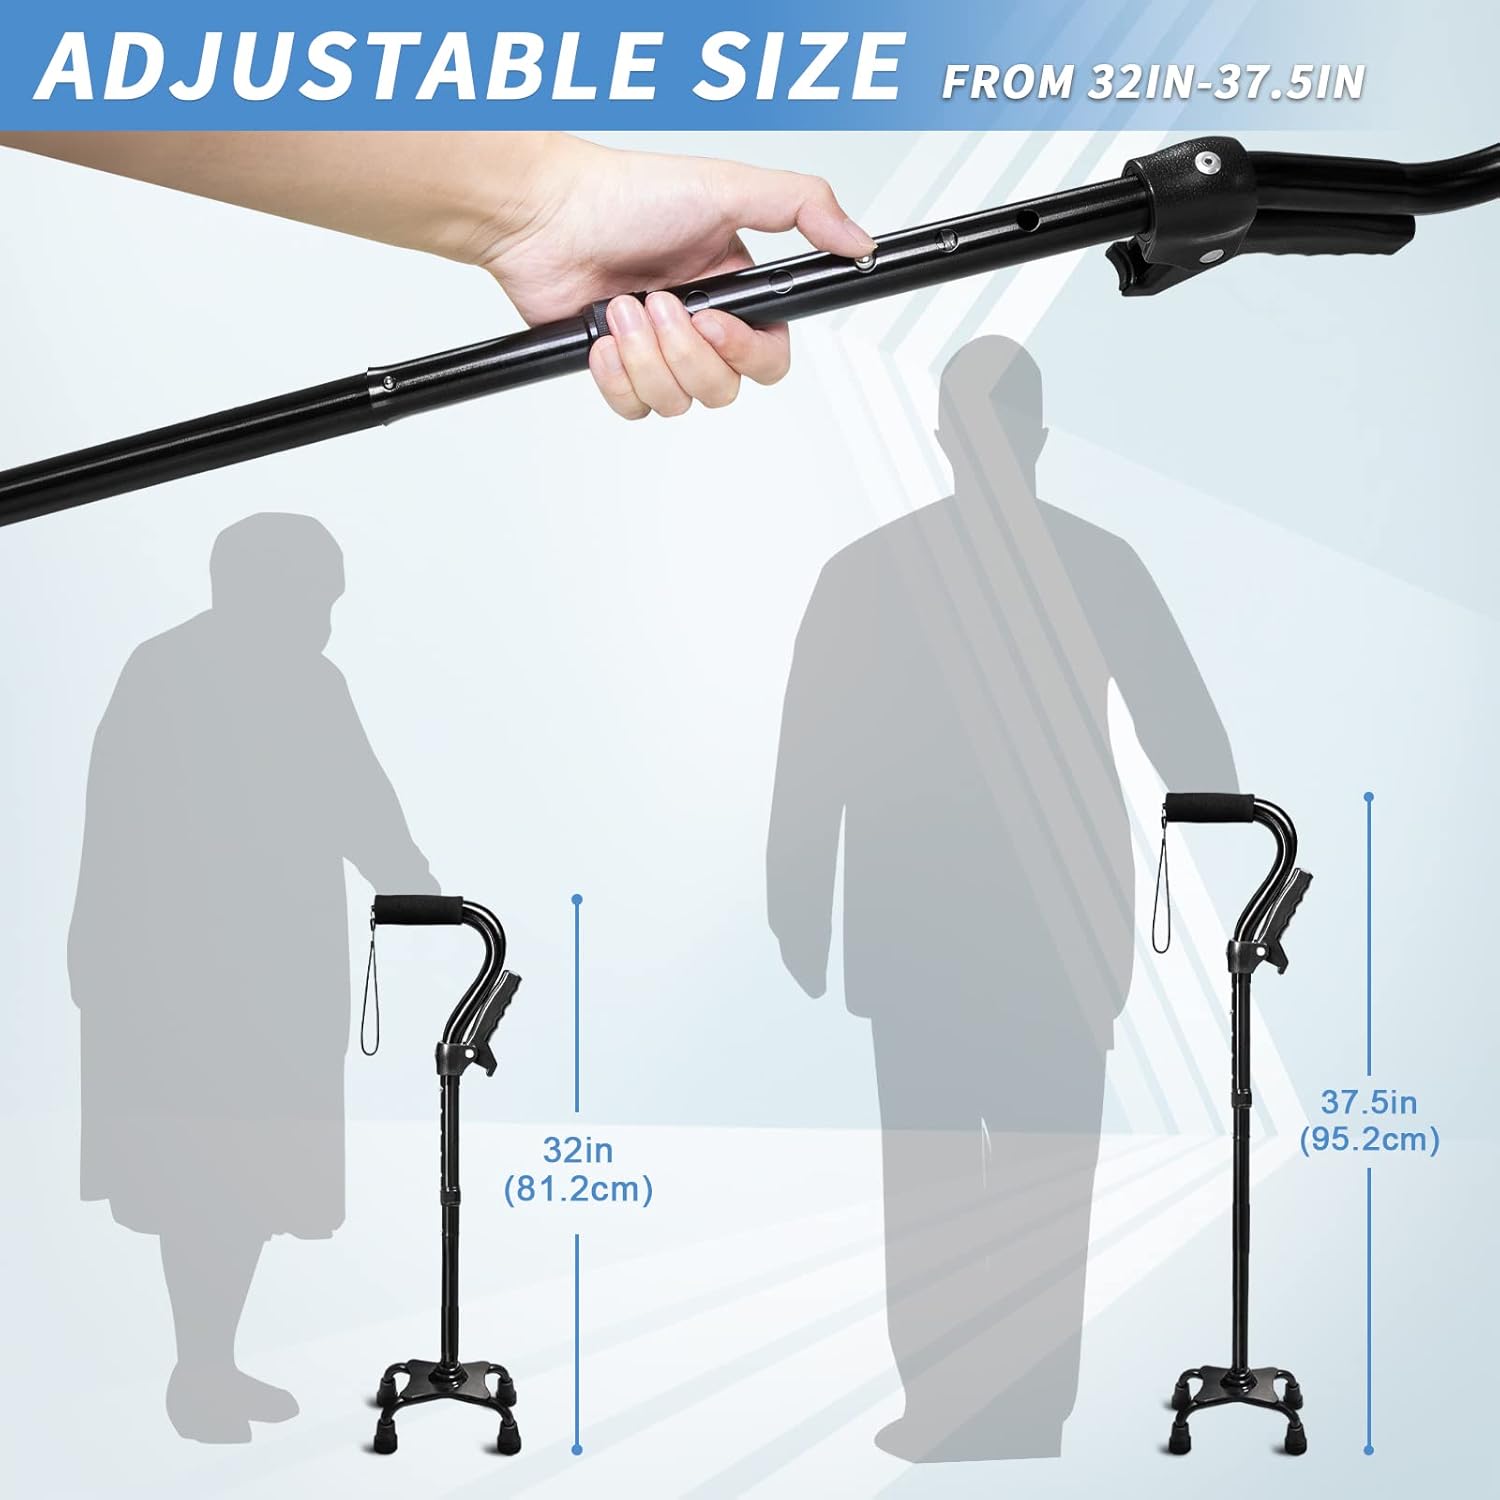
Single-Point Cane
The most common cane — one rubber tip on the floor, one handle in your hand. Best for mild balance support, light partial weight-bearing, and a steadier gait when an injured or weaker leg slows you down. Foldable versions tuck into a bag when you don't need them.
Sizing Guide
Stand upright in shoes with your arms relaxed at your sides. The handle of the cane should land at the crease of your wrist so your elbow bends about 15-20 degrees when you grip it. Most single-point canes are height-adjustable. Aluminum versions weigh about 1 pound; standard weight capacity is 250-300 lbs.
Tips & Tricks
Hold the cane in the hand OPPOSITE the injured or weaker leg. Move the cane forward at the same time as the affected leg, then step through with the strong leg. Replace the rubber tip the moment it shows wear lines — a slick tip on a smooth lobby floor is one of the most common falls we see in clinic.
Common Mistakes
Holding the cane on the SAME side as the injury is the classic mistake — it doesn't unload the affected leg and it twists your spine. A cane that is too short makes you stoop and shifts weight forward; too tall and your shoulder hikes up with every step. If you find yourself leaning on the cane heavily, you may need a quad cane or hemiwalker instead.
Quad Cane (4-Pronged)
A cane with a 4-tip base — far more stable than a single-point. Best for moderate balance issues, stroke recovery, partial weight-bearing where one tip would tip over, and anyone who needs to push down hard on the cane to stand up out of a chair. A folding model also includes an extended arm that gives you a second handhold to help rise to standing.
Sizing Guide
Same fit as a single-point: handle at wrist-crease height, 15-20 degree elbow bend. The 4-prong base orients with the wide side outward (away from your body) so it doesn't kick your ankle. Quad canes are heavier than single-point — typically 1.5 to 2.5 lbs — and have a 250-300 lb weight capacity. Height-adjustable; some fold flat for car or restaurant use.
Tips & Tricks
All four tips have to touch the ground at once or the cane is unstable. On uneven sidewalks the cane can wobble — slow down and look ahead. The wide base is what makes the cane stable enough to stay upright when you let go, which is a real upgrade for anyone who needs both hands free briefly (paying at a counter, opening a door). The extended stand-assist lever is a separate handhold for pushing yourself up out of a low chair or toilet.
Common Mistakes
Orienting the wide base toward your body is the most common error — it catches the inside of your ankle every step. Quad canes are heavier than single-point canes; if a user has weak grip or shoulder pain from the extra weight, a rolling walker may be a better fit. The narrow-base quad is also less stable than the wide-base — pick the wide-base unless you specifically need to fit in tight spaces.
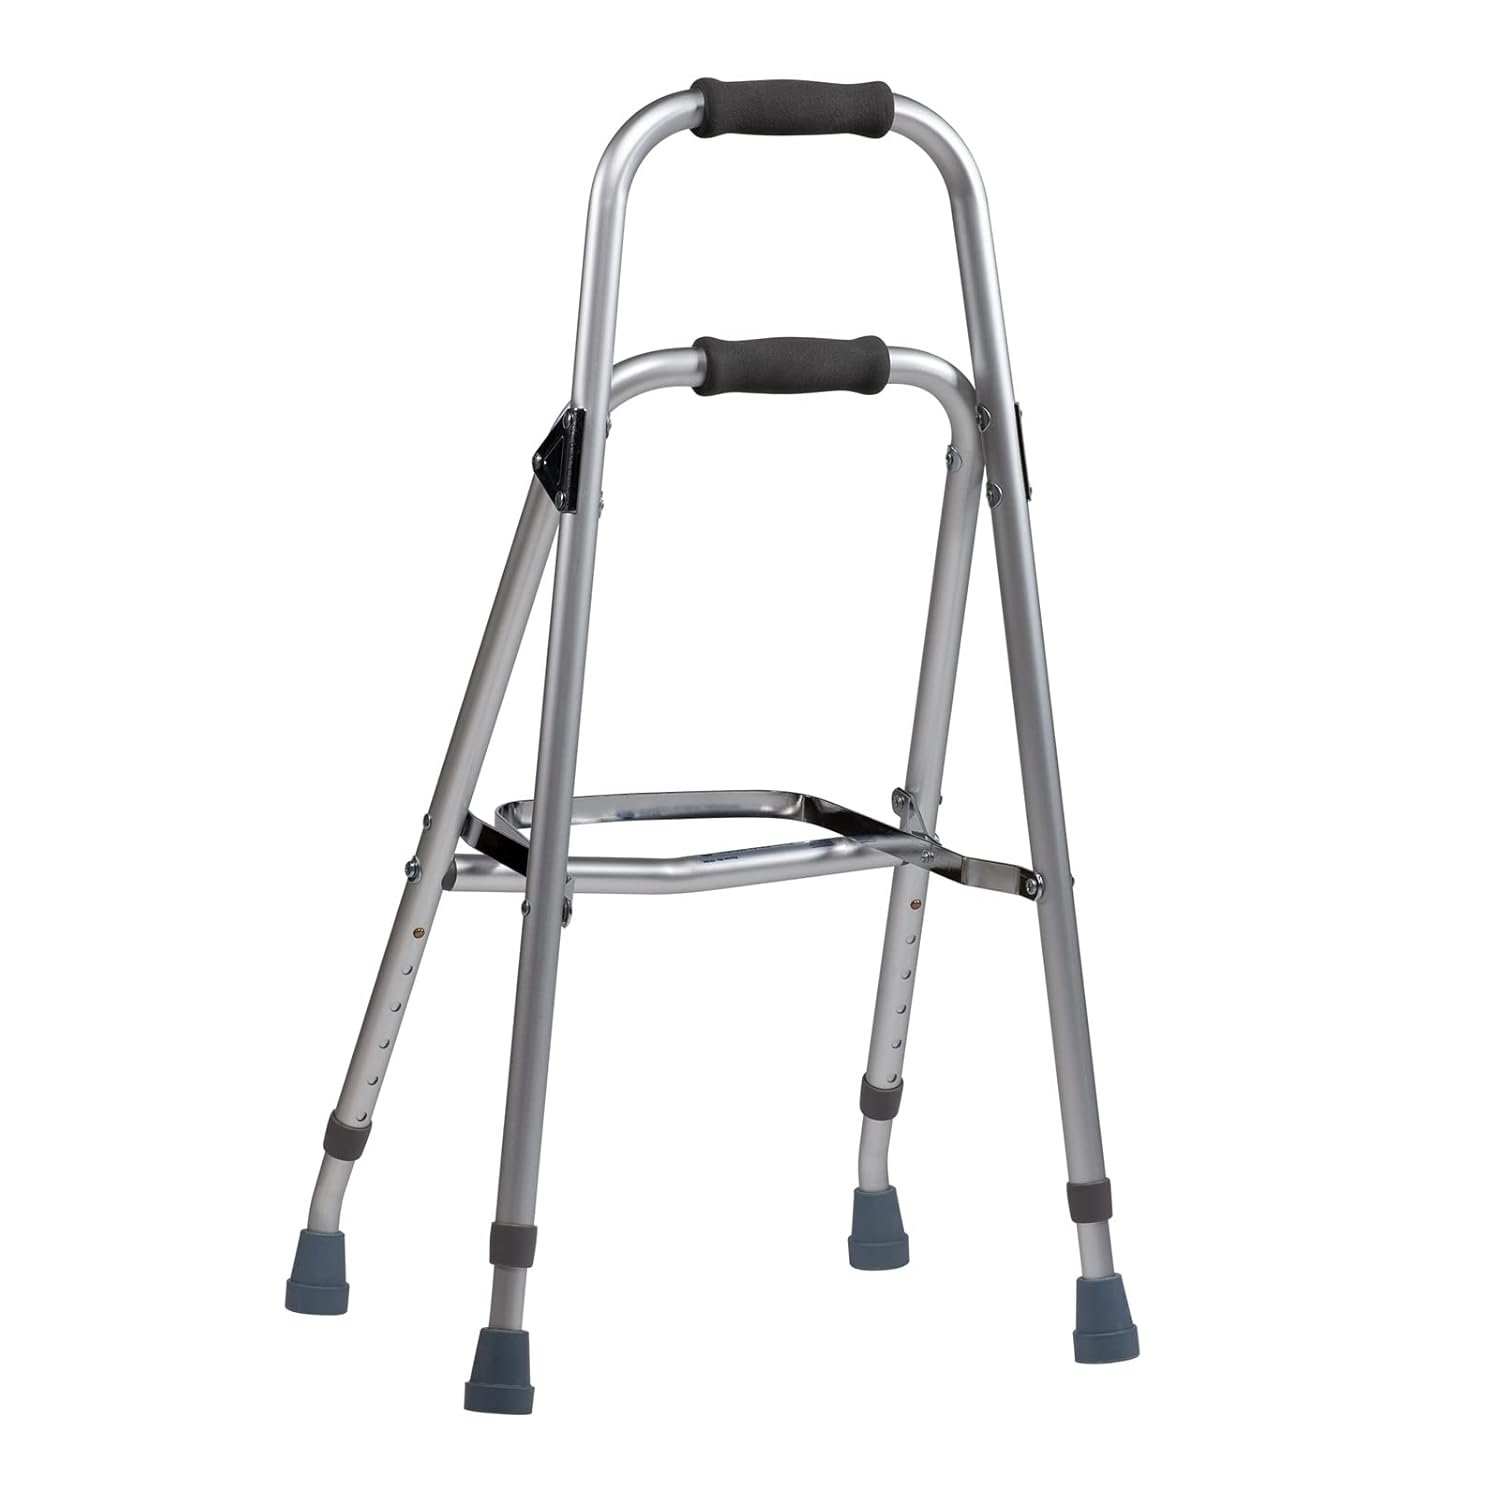
Hemiwalker (One-Arm Walker)
A wide-based walking aid you use with one arm — bigger and more stable than a quad cane but operable with a single hand. Designed primarily for stroke patients with one-sided weakness (hemiparesis) and others who can only grip with one arm but need more support than a cane can provide.
Sizing Guide
Stand upright in shoes with your stronger arm at your side. The top handle should sit at wrist-crease height (15-20 degree elbow bend). Tool-free height adjustment is standard. The Dynarex model adjusts up to 34 inches in height and supports up to 300 lbs. The wide base — usually 4 contact points spread far apart — gives you a stable surface to lean on briefly when standing up or transitioning.
Tips & Tricks
Operate the hemiwalker with your STRONGER side. Move the walker forward, step the weak leg up to the walker, then step the strong leg past it. Most hemiwalkers can be configured for left- or right-hand use — check the orientation before tightening. Wider base = more stable but harder in tight indoor spaces; narrower base = better indoors, less stability outside.
Common Mistakes
Trying to push a hemiwalker with the weak side defeats the design. Lifting and placing the walker too far ahead causes you to lean forward and lose stability — keep it close. The hemiwalker is not the same as a rollator; there are no wheels, so each step requires a small lift. If lifting becomes too tiring, look at a rolling walker (rollator) with a seat instead.
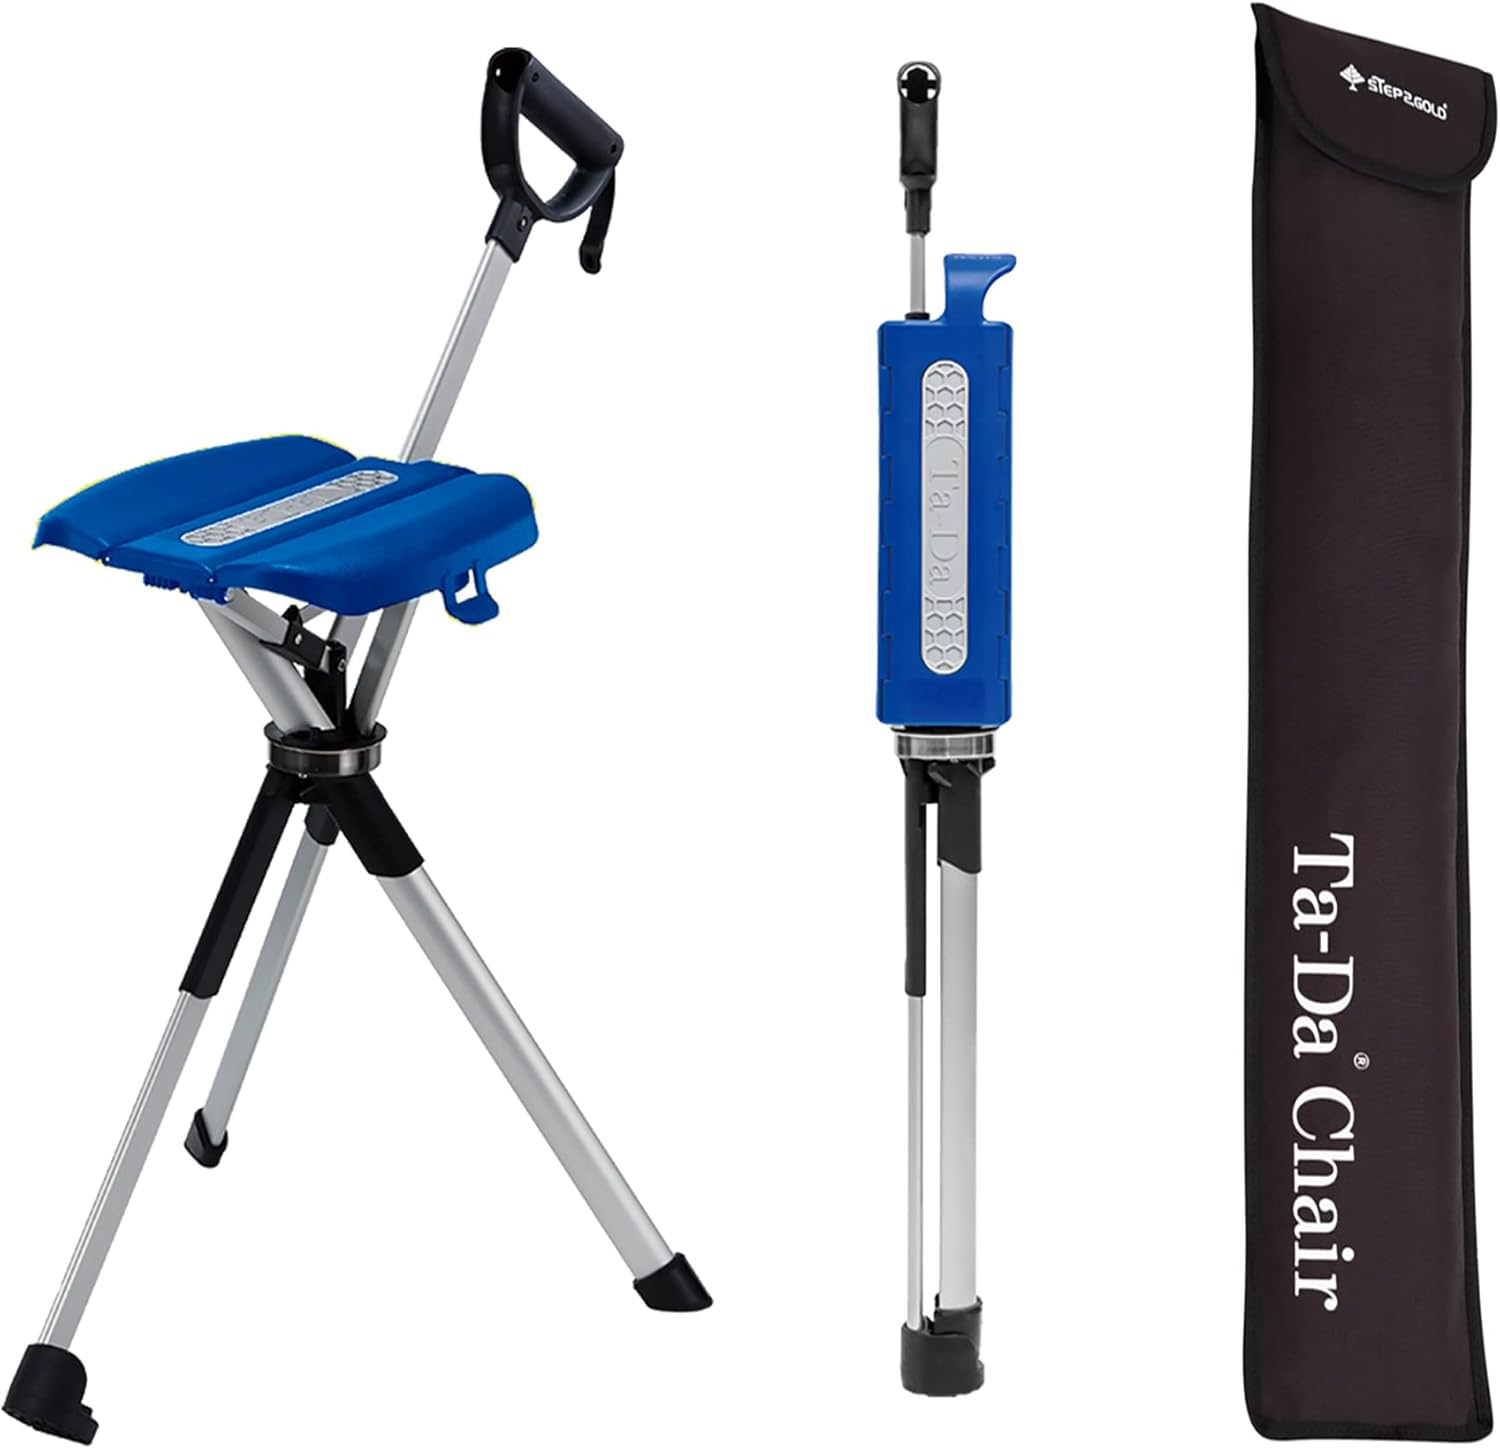
Cane with Built-In Seat
A lightweight folding cane that doubles as a portable stool. Great for people with limited standing endurance — long museum lines, outdoor events, public transit, errands. Walk to the bus stop, fold it open, sit down. Then fold and keep going.
Sizing Guide
The handle (when walking) should land at your wrist crease with the elbow bent 15-20 degrees, same as any cane. Folded-out seat height is generally 18-22 inches off the ground. Check the listed weight capacity carefully — some folding seat canes are rated for 250 lbs of standing-cane weight but only 220-250 lbs when seated. Aluminum frame keeps the total weight around 1.5-2 lbs.
Tips & Tricks
IMPORTANT: sit with the cane's vertical post BETWEEN your legs, not in front of or behind you. This keeps the load directly over the base for stability and prevents tip-overs. Open the seat and feel it lock fully before you put weight on it. On uneven ground, scout for a flat spot before sitting — the small footprint is less forgiving than a chair.
Common Mistakes
Sitting with the post behind or in front of you tips the cane over. Sitting before the seat is fully open and locked is the second-most common failure. These canes are not designed for prolonged seating — they are short-rest tools, not patio chairs. If you need to sit for more than a few minutes at a time, a rollator with a seat will be more comfortable.
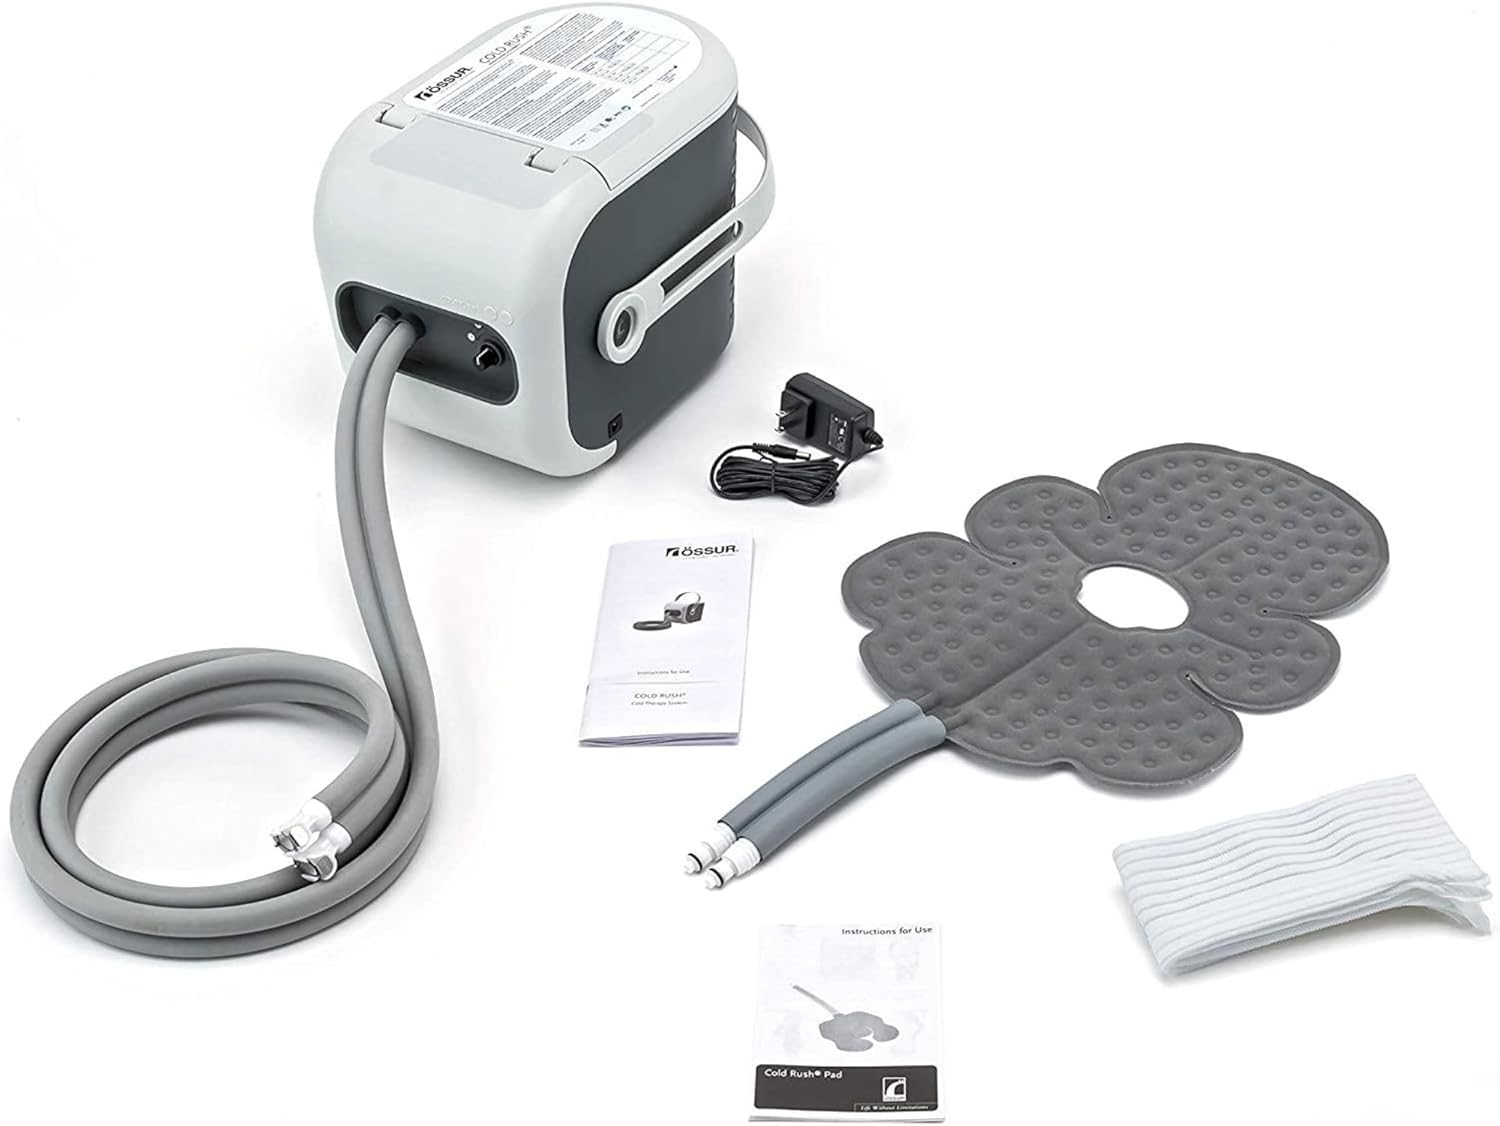
Cold Therapy Unit
For post-surgical swelling, acute injuries, and pain management through controlled cold compression.
Sizing Guide
Cold therapy units come with pads sized for specific body parts (knee, shoulder, ankle, etc.). Choose the pad that matches the area you need to treat. The unit itself is one-size.
Tips & Tricks
Fill the reservoir with ice and water as directed. Apply for 20 minutes on, then 20 minutes off. Place a thin cloth between the pad and your skin to prevent ice burn. Elevate the treated area when possible.
Common Mistakes
Applying cold therapy directly to skin without a barrier can cause ice burns. Also, running the unit continuously beyond the recommended time can damage tissue. Follow the 20-on, 20-off cycle.
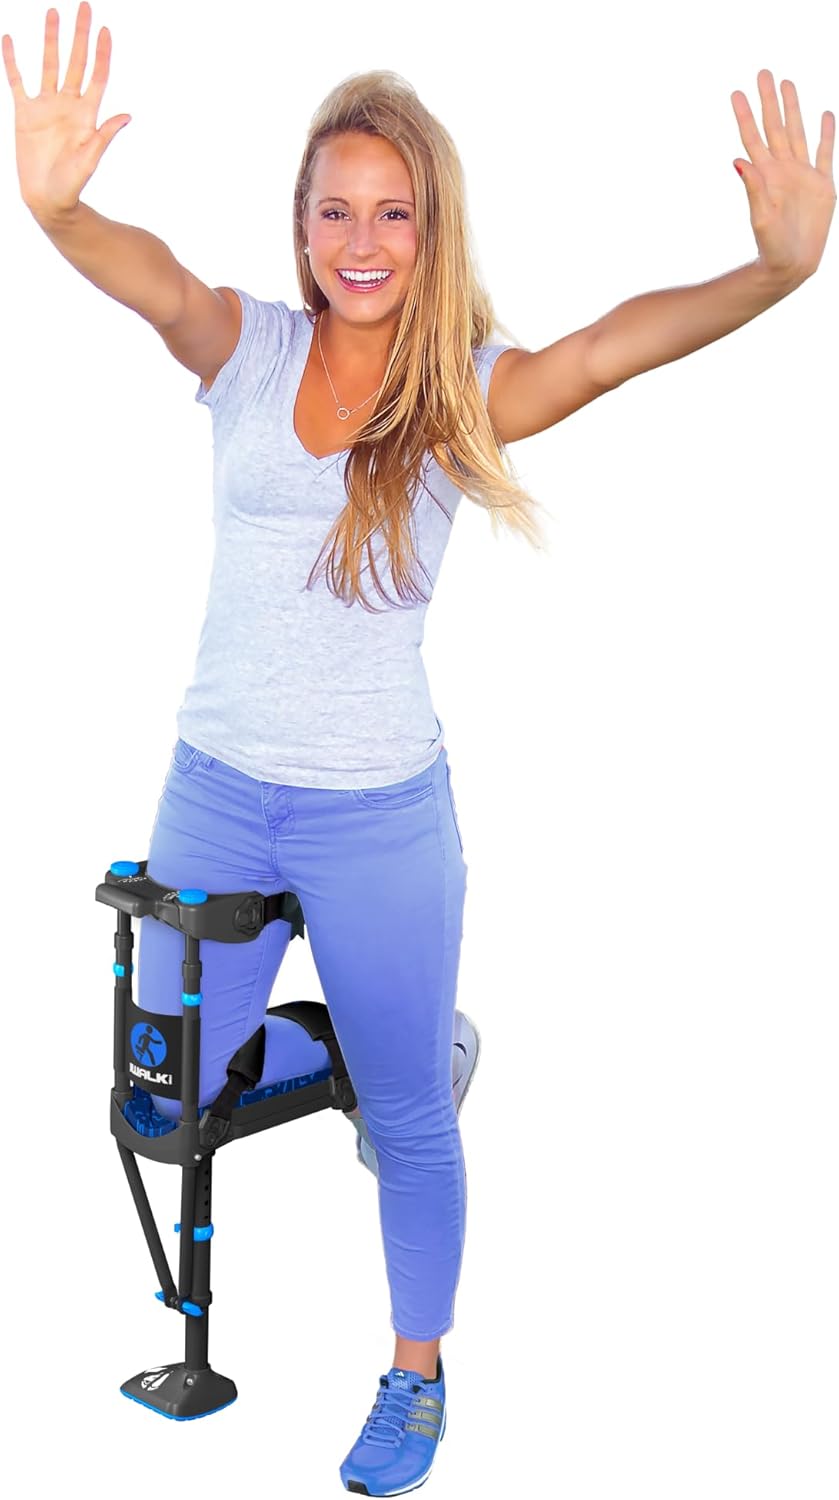
iWALK 3.0 (Hands-Free Crutch Alternative)
For non-weight-bearing recovery after foot, ankle, or lower leg injury or surgery. The injured leg's knee rests in a padded platform strapped to the lower leg, leaving both hands completely free. Better than crutches for stairs, getting dressed, cooking, going to the bathroom, and any activity that requires holding objects.
Sizing Guide
One size adjustable, fits most adults 4'10" to 6'6" with a weight capacity around 275 lbs. The knee platform height adjusts to match your shin length. Requires reasonable balance, core strength, and ability to bend the non-injured leg fully — not recommended if you have balance issues, severe arthritis in the other knee, or have not been cleared by your provider.
Tips & Tricks
Spend the first hour adjusting and practicing on flat ground with a wall or counter nearby for support. Walking with iWALK feels similar to walking on a peg leg — there's a learning curve of 30 to 60 minutes for most users. Once comfortable, iWALK is far less tiring than crutches over long distances or full days. Great for going back to work or school sooner.
Common Mistakes
Trying it for the first time on stairs is a fall risk — practice on flat ground first. Walking on uneven outdoor surfaces (grass, gravel, ice) is also risky for new users. iWALK is not appropriate for above-knee injuries, knee injuries on the non-affected side, or for hip/thigh weakness. If in doubt, confirm with your surgeon or therapist before use.
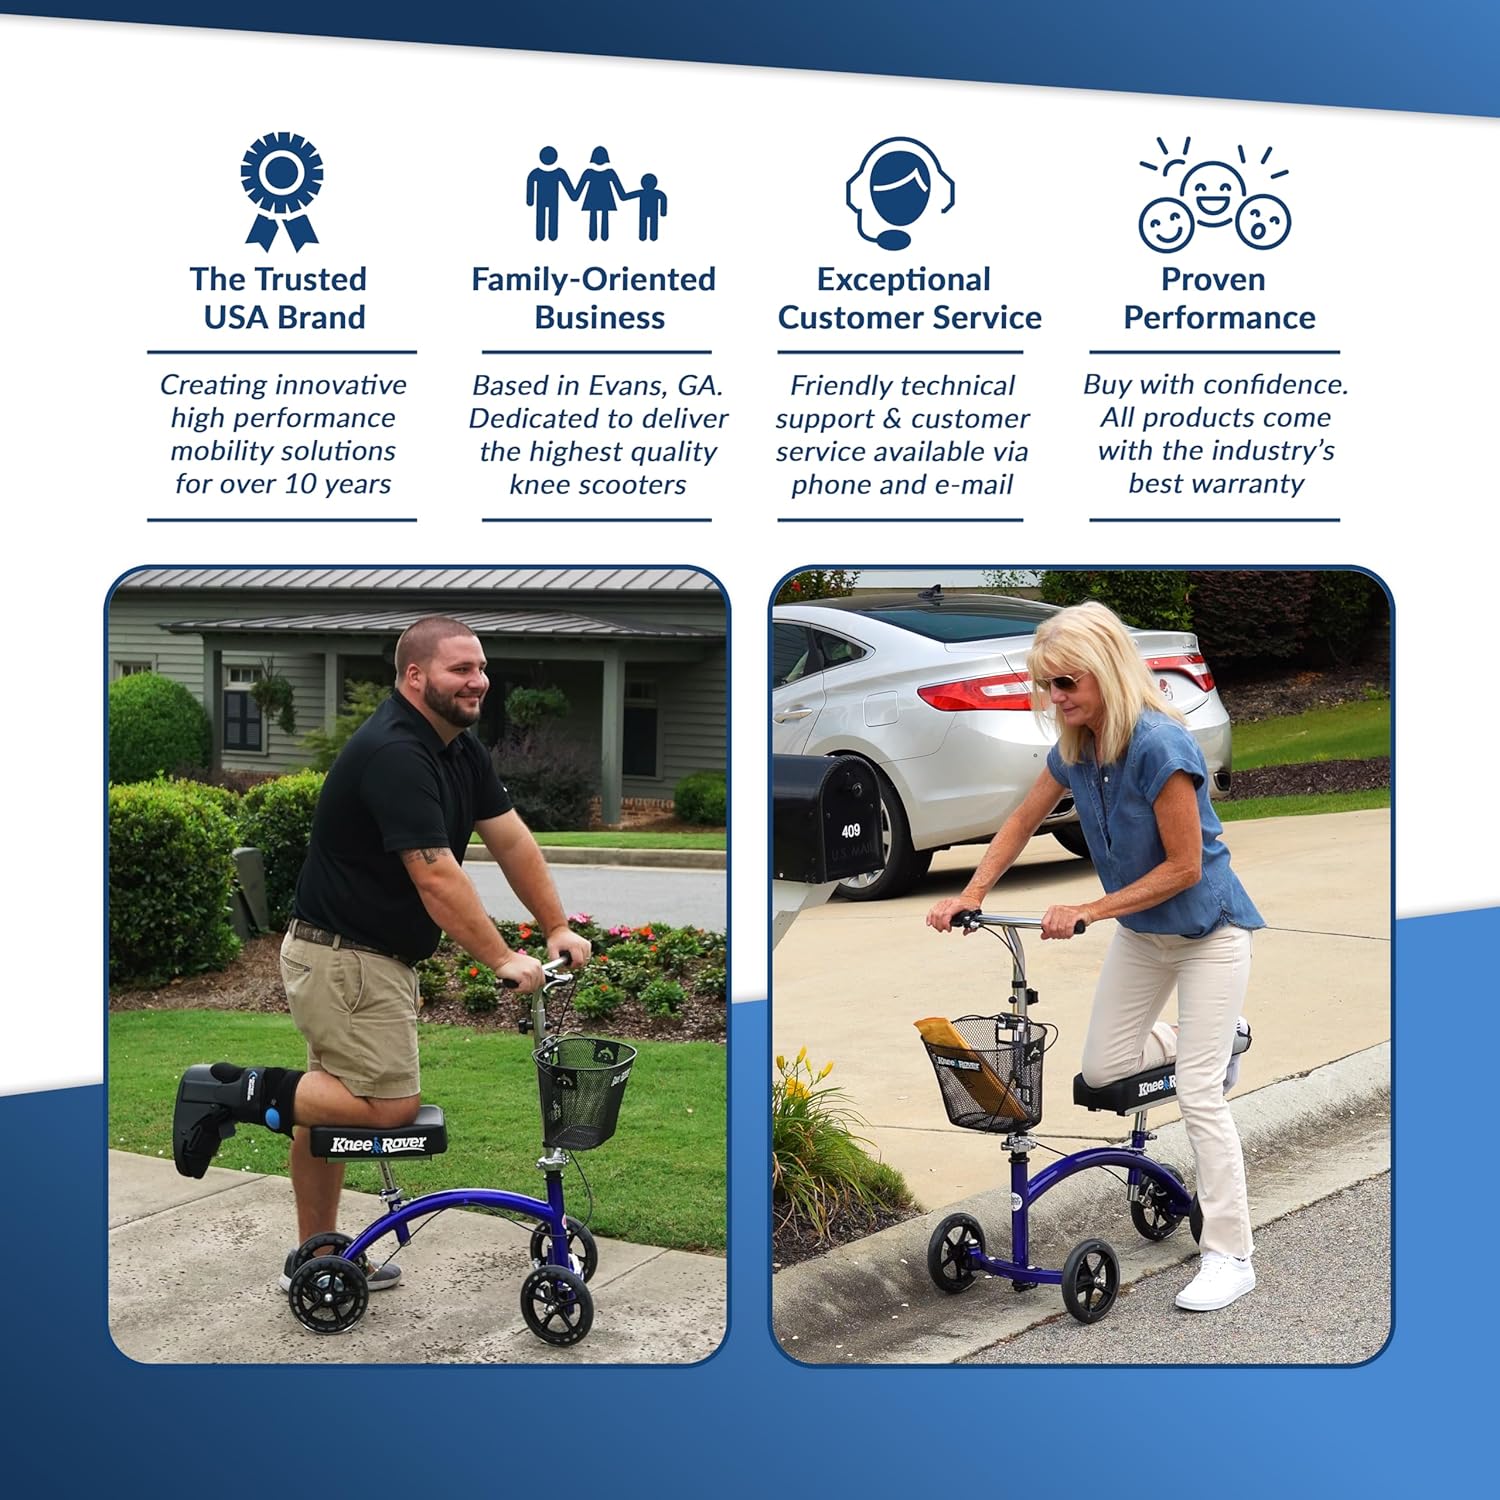
Knee Scooter (Knee Walker)
For non-weight-bearing recovery after foot, ankle, or lower leg injury or surgery. The injured leg rests on a padded platform while the other leg pushes you forward. Much easier than crutches for long-distance walking.
Sizing Guide
Most knee scooters are height-adjustable to fit users from about 4'8" to 6'4". The knee platform should sit at a height where your shin rests parallel to the ground with your hip neutral. Steerable front wheel and hand brakes are standard. Check the weight capacity (commonly 300-500 lbs).
Tips & Tricks
Position your injured leg on the padded platform with the knee at 90 degrees. Push off with your good leg and steer with the handlebars. Practice slow turns and braking on flat ground before tackling ramps or carpet. Most insurance plans do not cover knee scooters, so purchasing or short-term renting is common.
Common Mistakes
Using a knee scooter on stairs is unsafe. Going too fast on smooth flooring can cause the scooter to slide out from under you, especially when turning. Letting too much weight rest on the injured side defeats the purpose if you were told to be fully non-weight-bearing.
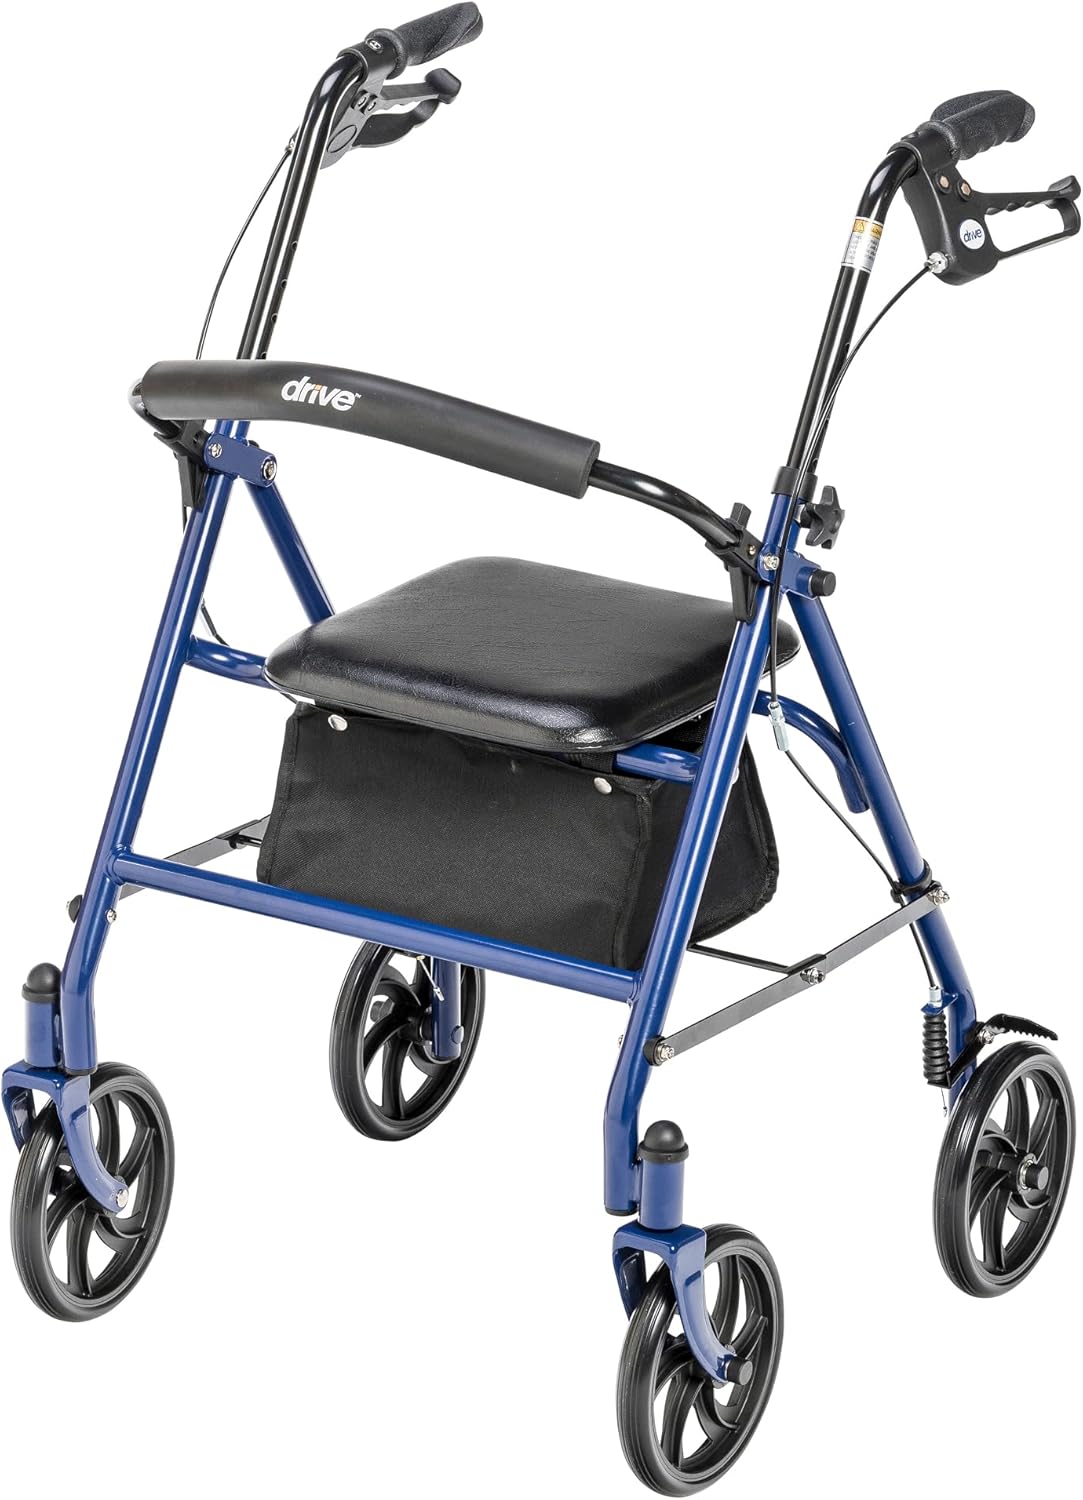
Rolling Walker (Rollator)
For balance support, fall prevention, post-surgical recovery, and reduced walking endurance. Provides more stability than a cane with the convenience of wheels and a seat.
Sizing Guide
Stand upright with your arms relaxed at your sides. The handgrips of the rollator should sit at wrist height so your elbows bend about 15-20 degrees. Most rollators are height-adjustable. Check the weight capacity (typically 250-500 lbs) and wheel size (larger wheels handle uneven surfaces better).
Tips & Tricks
Look for models with hand brakes that lock for safe sitting on the integrated seat. A 4-wheel rollator with a seat is best for endurance use; a 2-wheel walker provides more stability but requires lifting. Adjust the handgrips so your shoulders are relaxed, not hunched up.
Common Mistakes
Pushing the rollator too far ahead and then walking to catch up creates poor posture and reduces stability. Keep it close to your body. Skipping the brake lock before sitting on the seat is a fall risk. A rollator set too low makes you lean forward and strain your back.
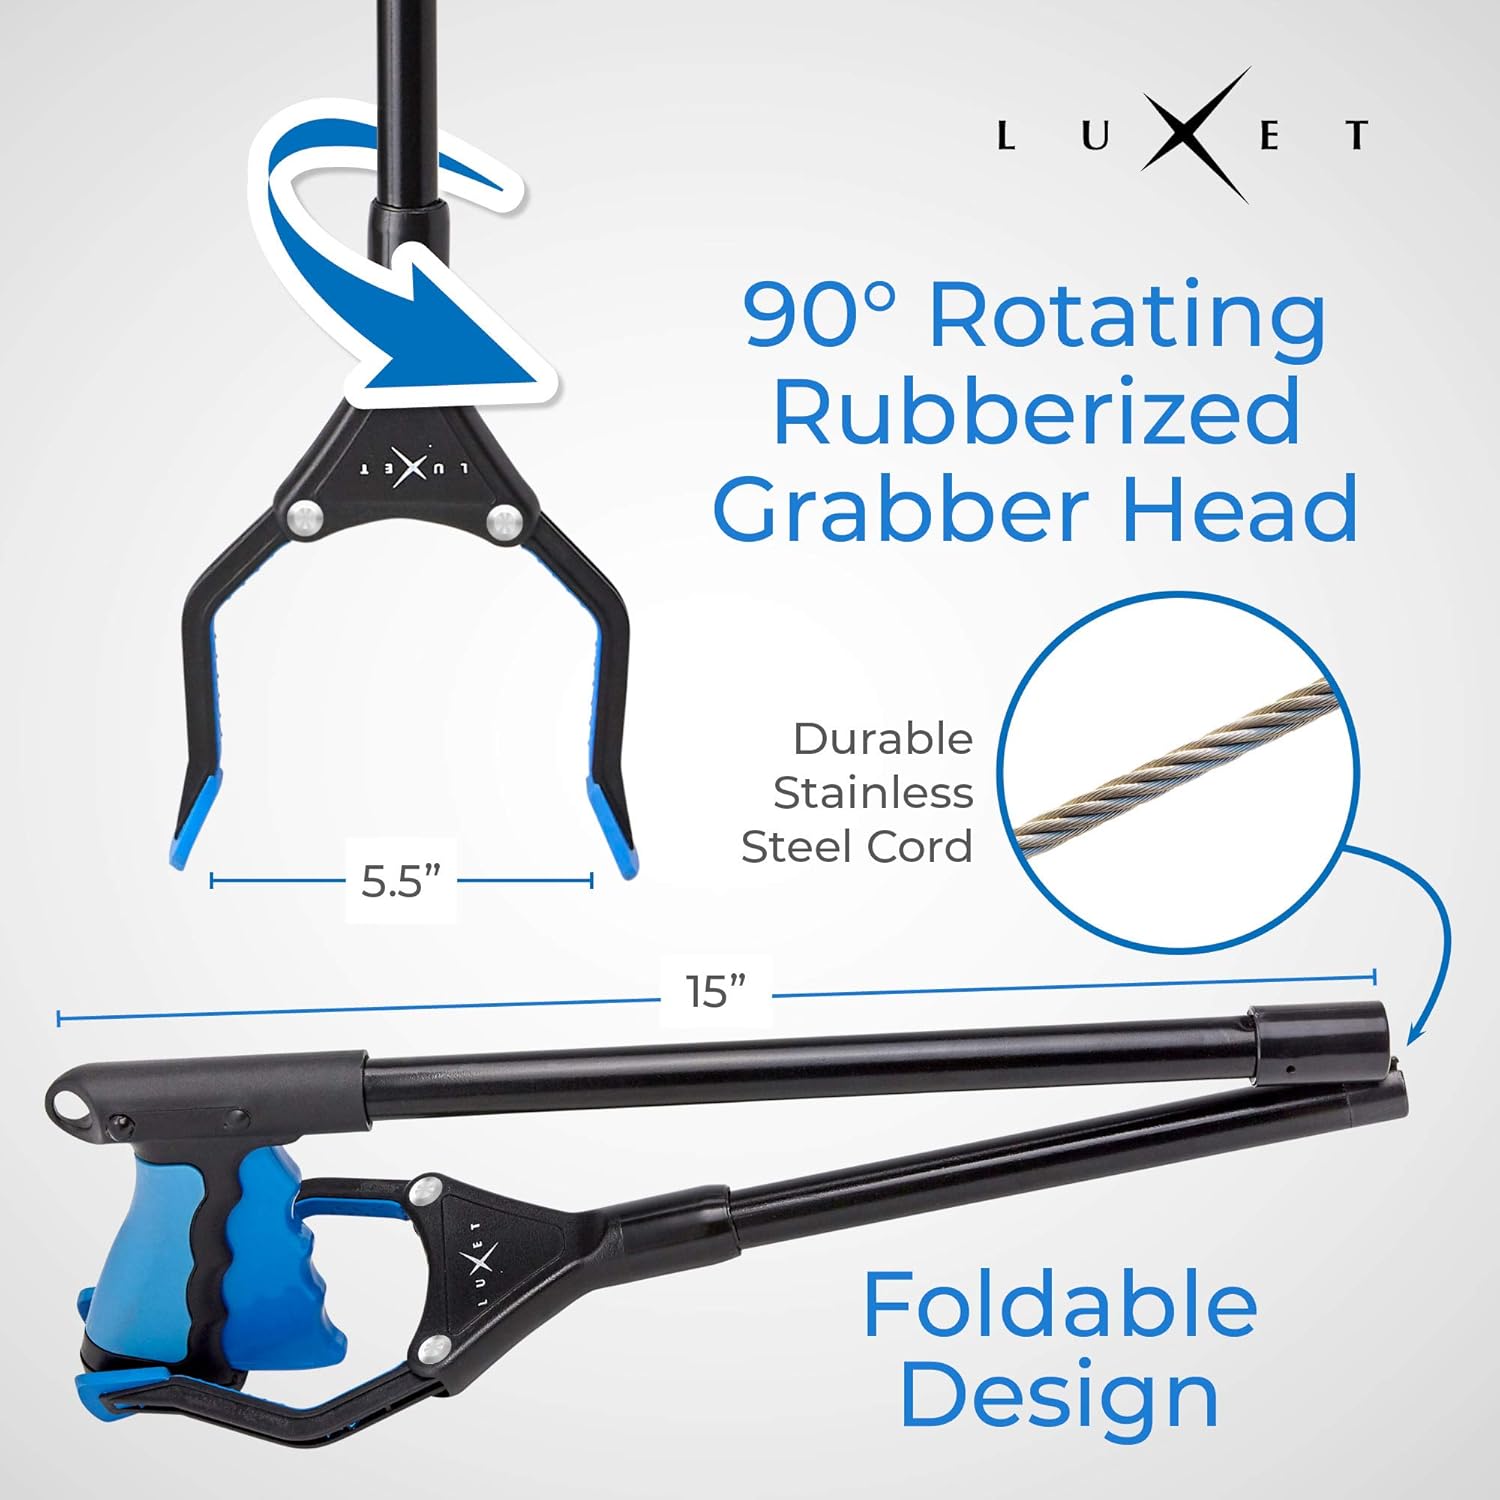
Reacher / Grabber
For post-hip or post-back surgery patients who cannot bend, anyone with reduced flexibility, and reaching items on the floor or high shelves without bending or climbing.
Sizing Guide
Reachers are typically 26 to 32 inches long. Longer reachers (32 inches) help for floor pickups without bending; shorter ones (26 inches) are easier to maneuver in a kitchen or small space. Look for a model with a magnetic tip (helpful for keys, coins) and a locking trigger if grip strength is limited.
Tips & Tricks
Squeeze the trigger to close the jaws around the object. Most jaws have a rubberized non-slip grip. Pair a reacher with a long-handled shoe horn and a sock aid for a full post-hip-surgery recovery kit. Keep one upstairs and one downstairs if mobility is limited.
Common Mistakes
A reacher is not designed for heavy items — most have a 1 to 2 pound weight limit. Trying to grab heavier objects can damage the mechanism. The jaws need to be perpendicular to the object for a secure grip; angled grabs slip.