Daily Living Aids
Adaptive equipment for upper-limb amputees, stroke survivors, people with arthritis, and anyone with reduced grip strength or one-handed function. The goal is independence with everyday activities — eating, cooking, dressing, bathing, and getting around the house — without needing custom fabrication.
Many picks below are inspired by the Enhancing Skills for Life "Hands Free" catalog — a 501c3 nonprofit supporting the bilateral upper-limb-loss community out of Houston, Texas. Their full catalog has hundreds more items; this is a curated short list of broadly useful, affordable, Amazon-available picks.
Eating & Meal Prep
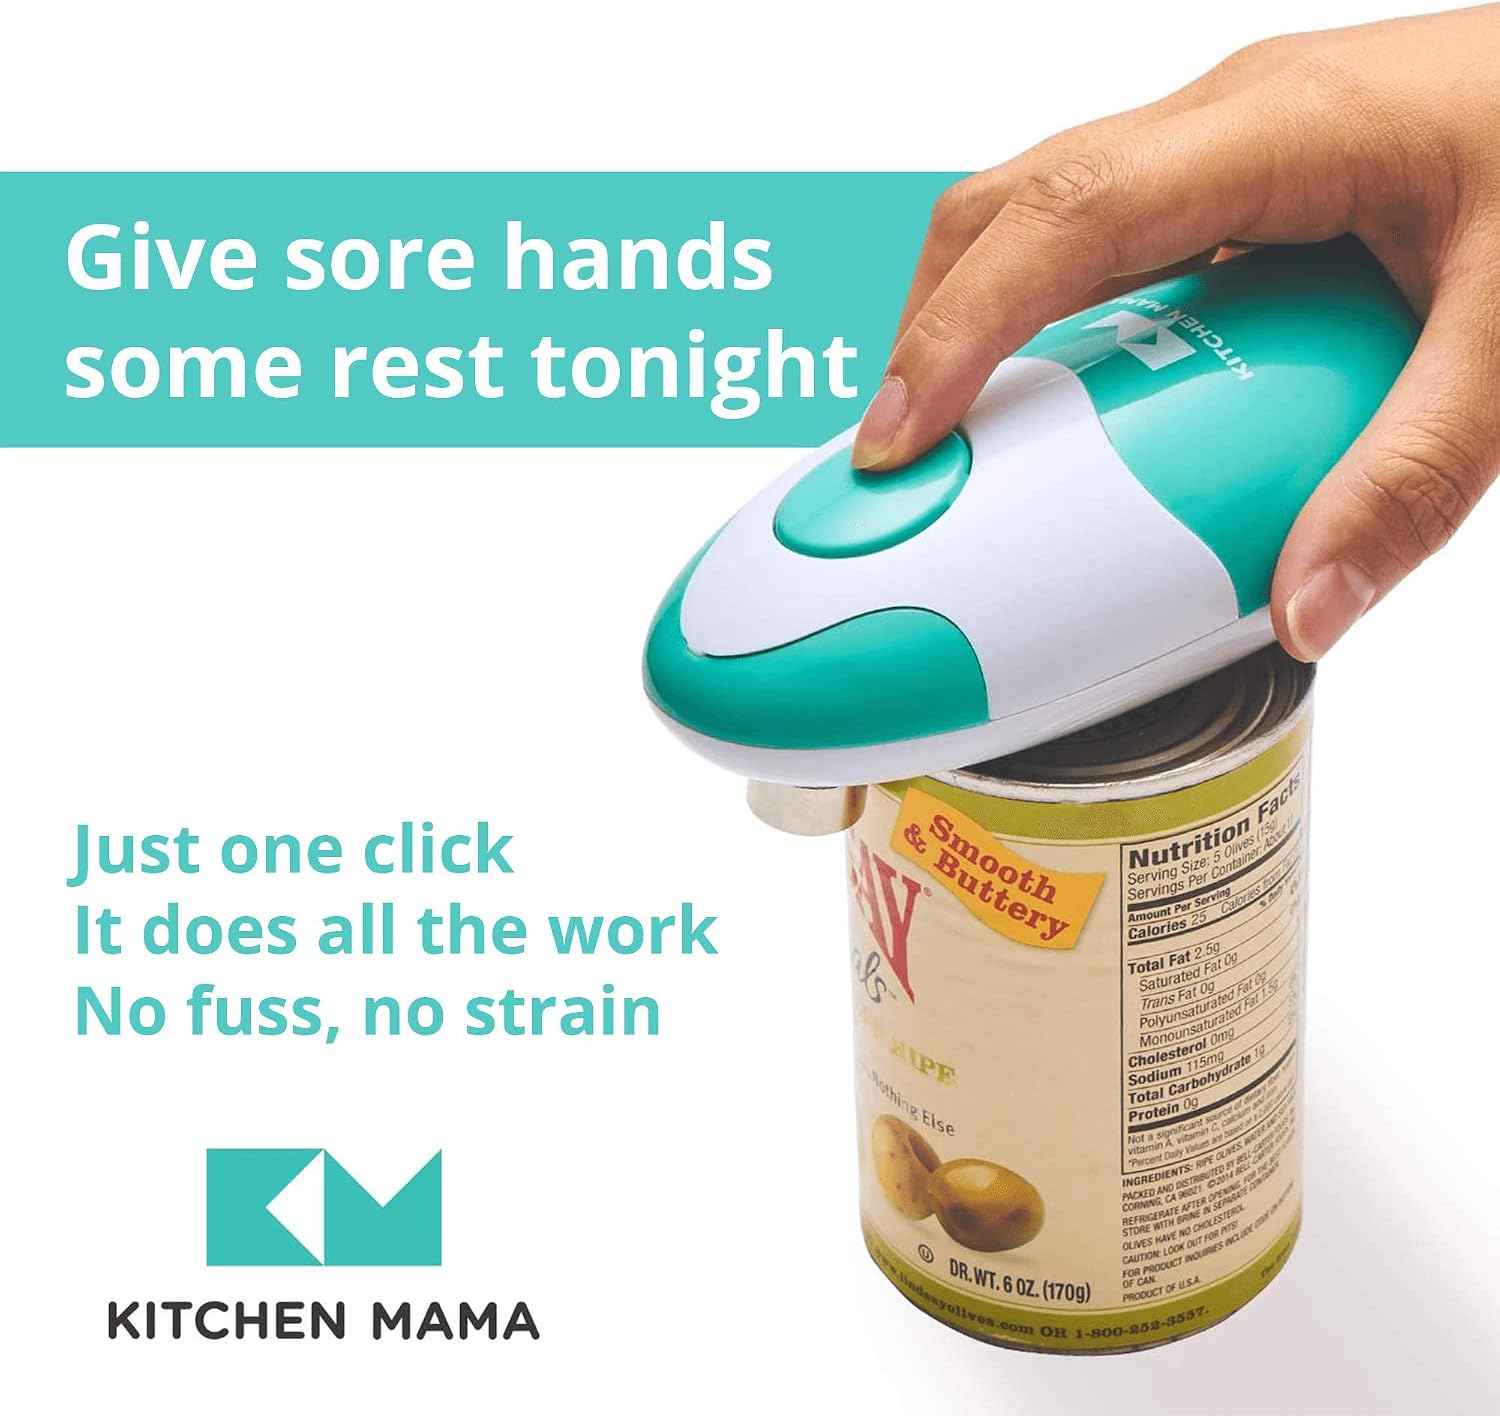
One-Touch Electric Can Opener
A countertop can opener that opens any standard can with the press of one button — no twisting, no grip, no two-handed operation. Best for upper-limb amputees, stroke survivors, severe arthritis, and anyone who can no longer turn a manual can opener. The blade also leaves a smooth (non-sharp) edge, which reduces cuts.
Sizing Guide
Most one-touch openers are compact countertop appliances (about 5-6 inches tall) that run on AA batteries or a wall outlet. Compatible with standard cans from soup-can to coffee-can size; oversized industrial cans require a different tool. Battery-powered models are more portable but slower; wall-powered models are faster and don't run out mid-can.
Tips & Tricks
Place the unit on a non-slip mat (Dycem works well — see below) so it doesn't walk across the counter while the motor runs. Stabilize the can with your prosthesis, residual limb, or weak hand while the opener does the work. The smooth-edge cut means you can lift the lid back off without cutting yourself, which is a huge win for one-handed users.
Common Mistakes
Skipping the non-slip base is the most common error — the unit vibrates and migrates while running. Trying to open dented or unusually shaped cans is also a known failure mode; the magnet that holds the can won't seat correctly. Batteries die mid-can on cheap models; either keep spares or buy a wall-powered version.
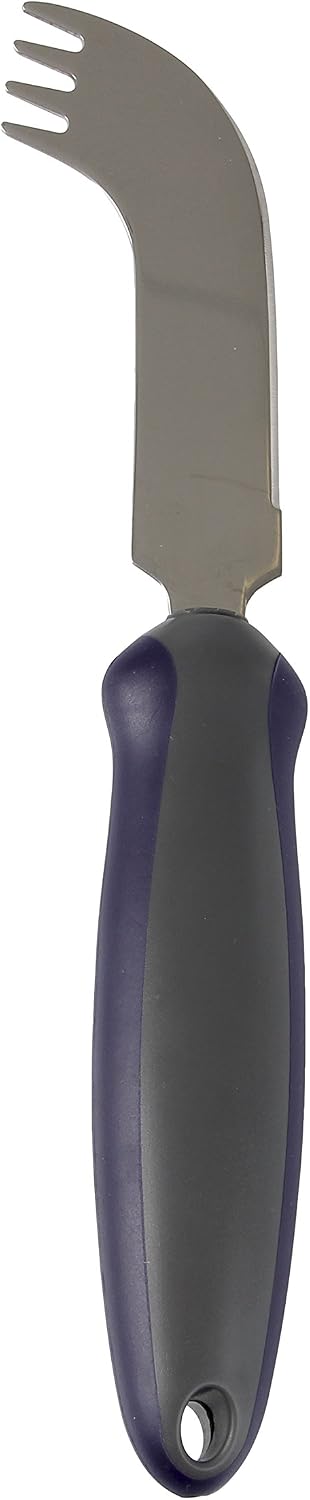
Nelson Knife (One-Handed Knife-Fork)
A Nelson knife is a specialized fork-knife device: a curved, rocking cutting blade with fork tines at the tip, so the same hand both cuts food and spears it to eat. No slicing motion, and no second hand needed to stabilize. The classic single-hand dining tool for stroke survivors with one-sided weakness, hand-surgery recovery, and upper-limb amputees who eat with a prosthesis or residual limb. The mezzaluna option below is knife only: it rocks to cut but has no fork.
Sizing Guide
Rocker knives come in two main styles: a one-handed "T-handle" rocker (vertical handle, single blade) and a two-handled mezzaluna (horizontal blade with handles at each end, used with one hand by pressing down and rocking). The T-handle style is easier with a prosthesis; the mezzaluna is easier with a single sound hand. Most are stainless steel with rubberized grips. Dishwasher-safe versions are widely available.
Tips & Tricks
The rocking motion only works if the blade is sharp — replace or sharpen at least once a year. Pair the rocker knife with a scoop plate (below) or a plate guard so food doesn't get pushed off the plate while you cut. For tougher meats, place the plate on a Dycem mat so it doesn't slide.
Common Mistakes
Trying to slice with a rocker knife defeats the design — the rocking motion is the whole point. Pressing down too hard wedges the blade into the plate instead of cutting through food. A dull rocker knife is more dangerous than a sharp one because it slips off food.
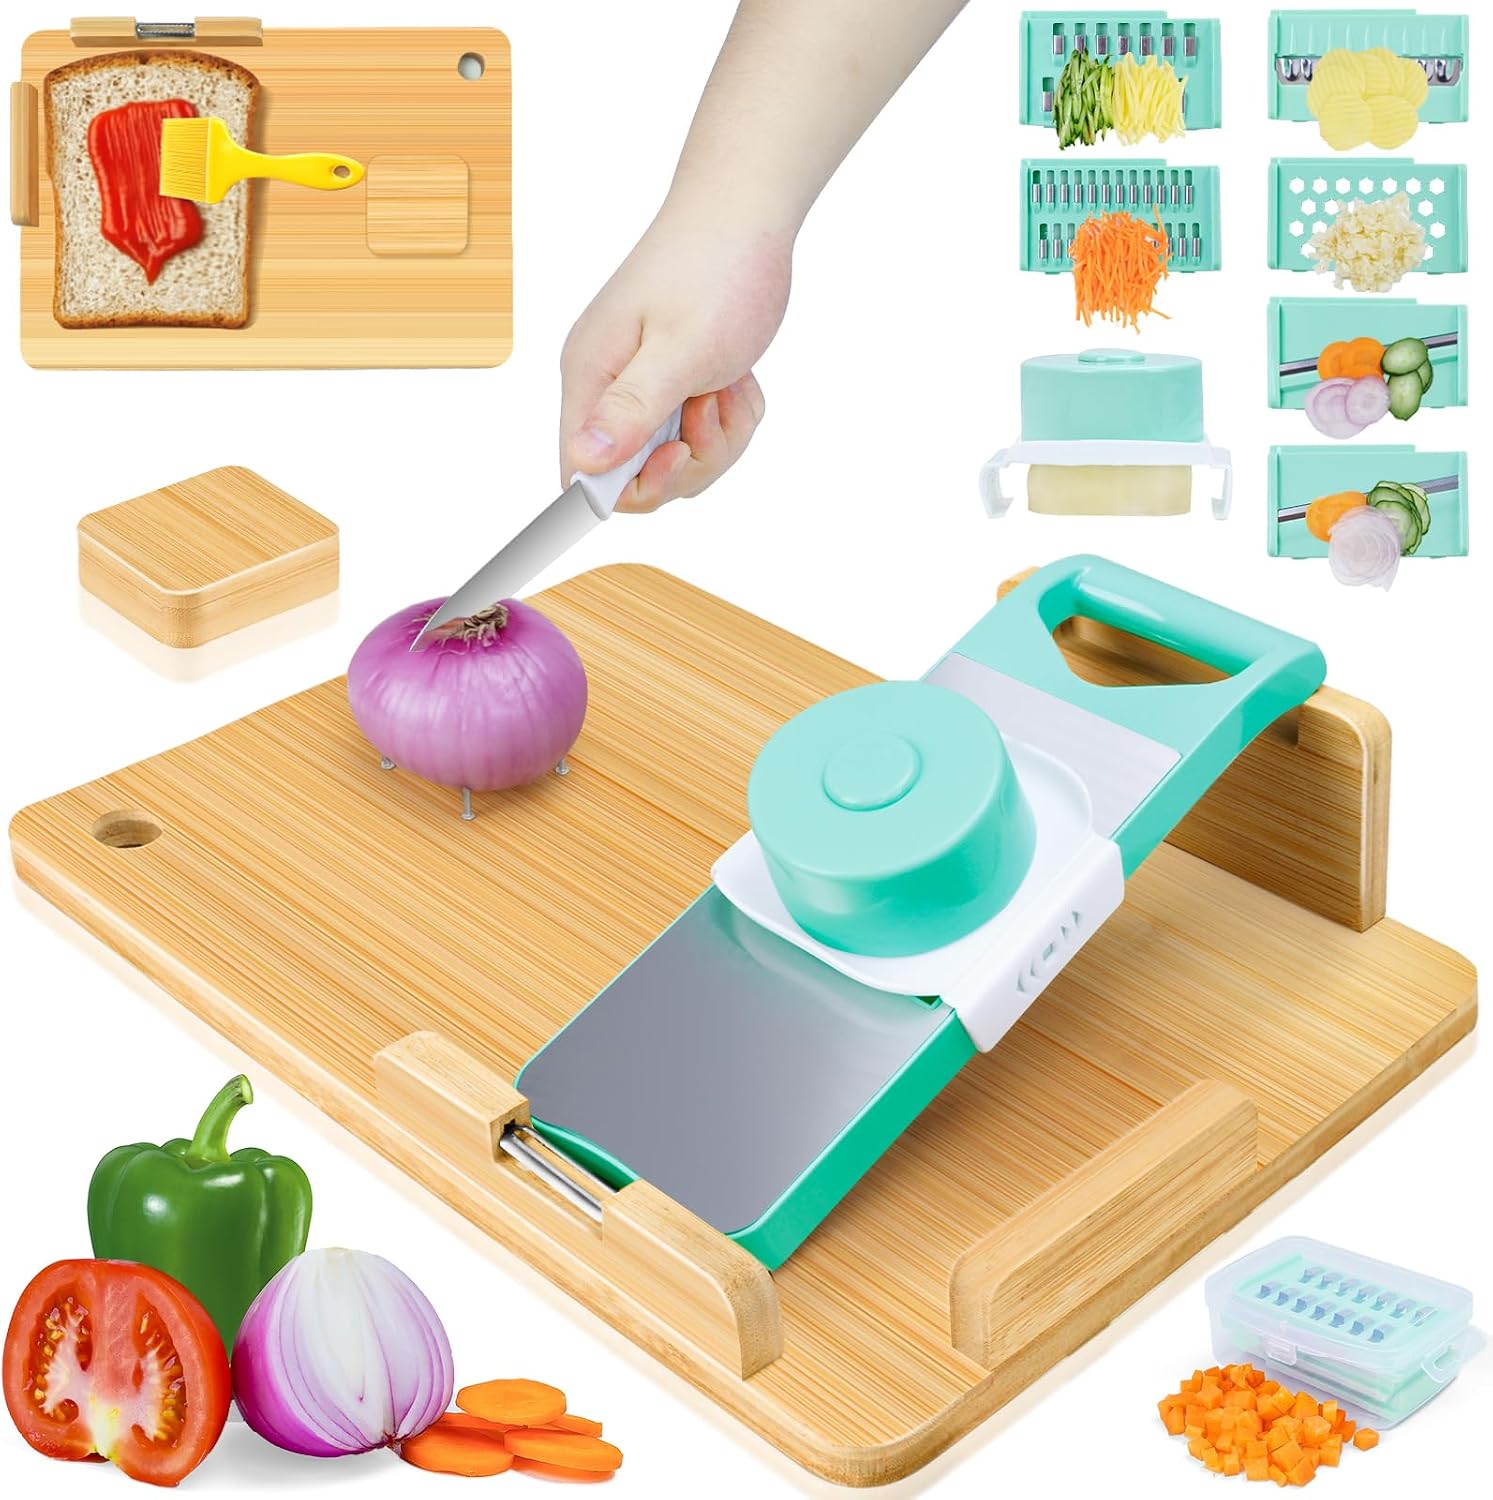
One-Handed Cutting Board (with Spikes & Clamp)
A cutting board with stainless steel spikes that grip food in place, a corner clamp that holds bowls or boxes, and a non-slip base. Lets a one-handed user pin a tomato, an apple, or a slice of bread and cut it without a second hand to hold it. Also doubles as a fixed surface for opening cartons, tearing open packets, or buttering bread.
Sizing Guide
Most adaptive cutting boards are around 10x14 inches with two corner spikes (vegetable holding) and one corner clamp (bowl or jar holding). Look for suction-cup feet that lock to a smooth countertop. Higher-end "deluxe" models add a built-in vice for opening boxes and pop-top cans. Plastic or hardwood — plastic is dishwasher safe and lighter.
Tips & Tricks
Press fruits or vegetables firmly down onto the spikes before cutting — the spikes only work if they're fully engaged. The clamp corner holds a bowl steady for one-handed stirring. The bread-holding corner of most boards has small ridges to keep bread from sliding while you butter it. Wipe down the spikes after each use to keep them clean.
Common Mistakes
Choosing a board without a non-slip base is the most-regretted purchase — the board slides while you cut. Spikes that are too short (under half an inch) don't hold round produce like apples securely; look for at least 1/2-inch spikes. The clamp opening is fixed — if your bowls are wider than the clamp, the bowl-holding feature is wasted.
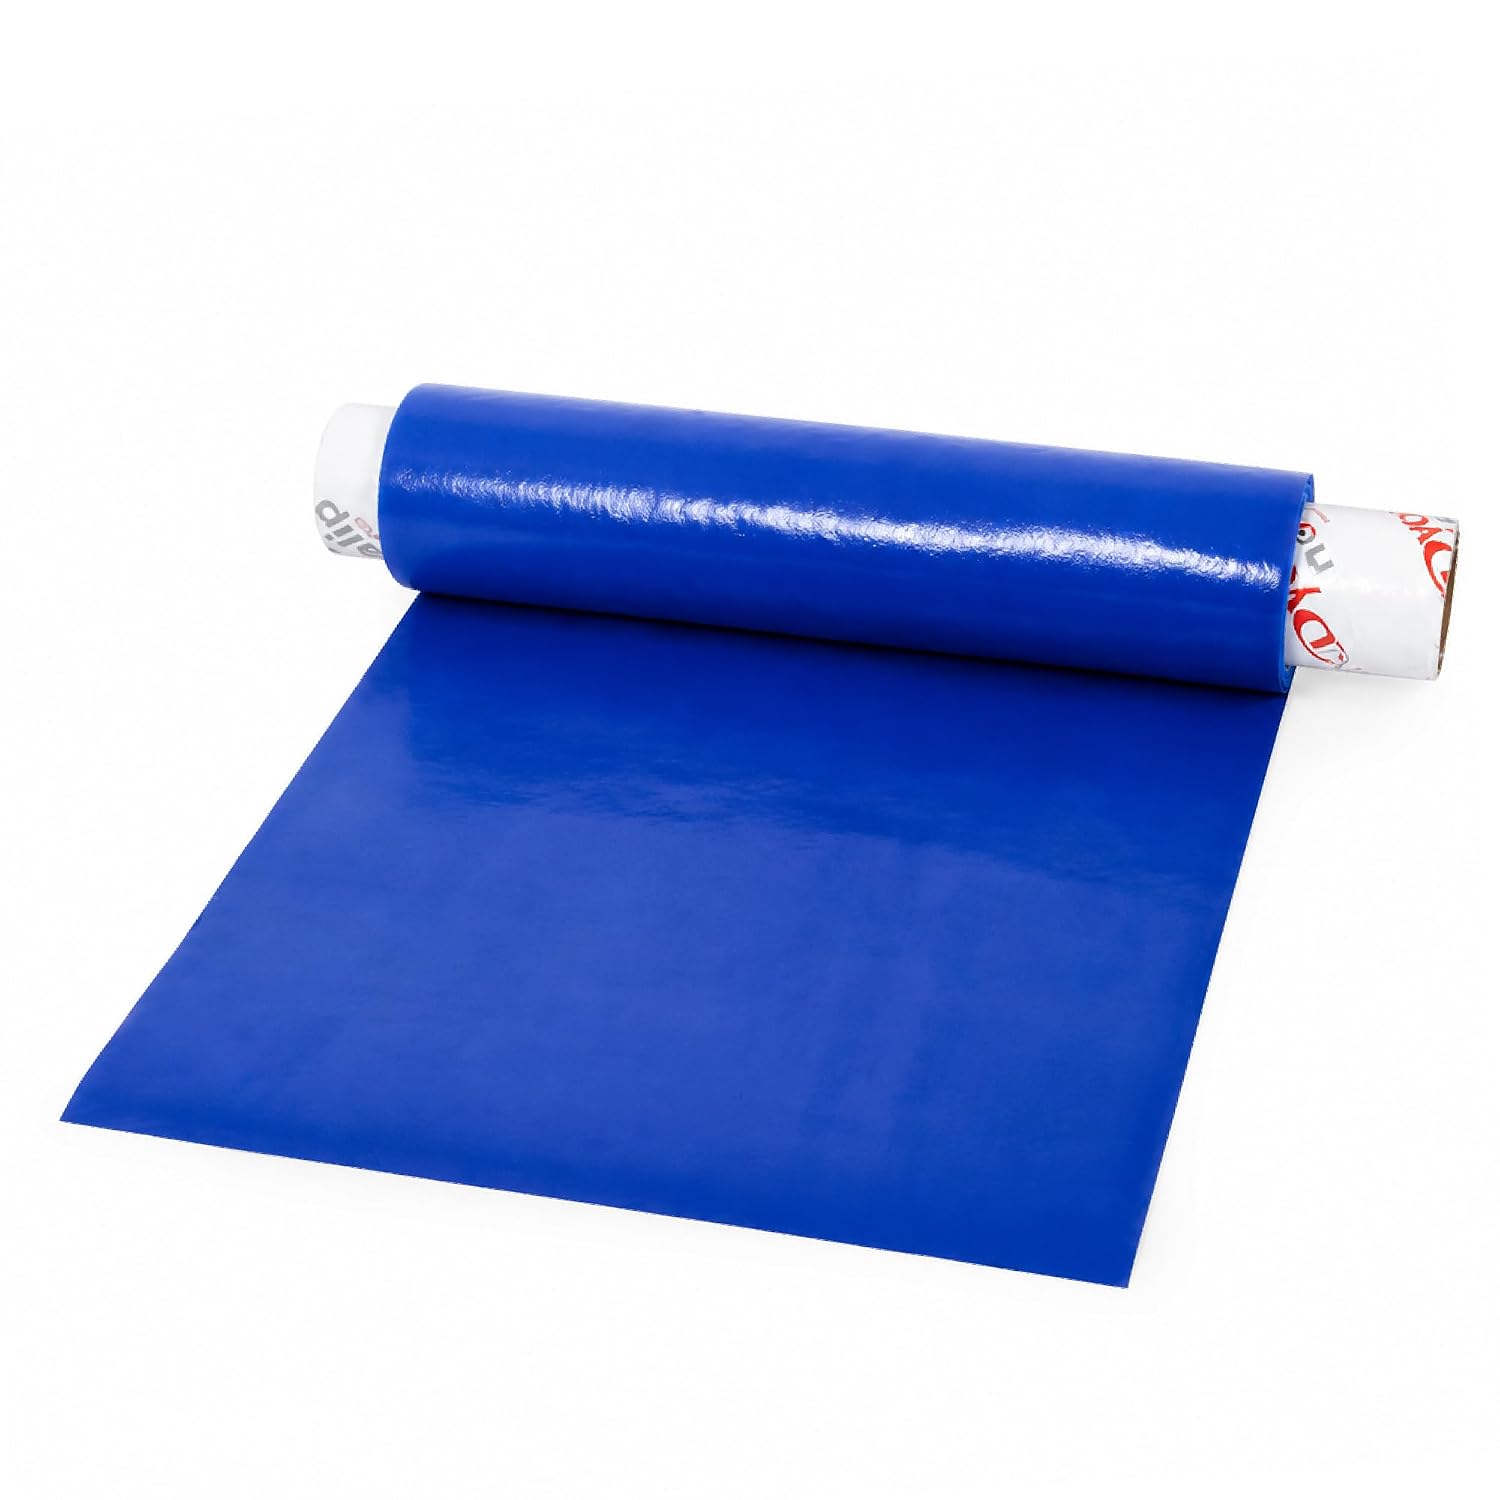
Dycem Non-Slip Matting
A roll of grippy non-slip rubber mat you cut to size and place under anything that needs to stay put: plates, bowls, the can opener, the cutting board, a phone, a mixing bowl. The most universal tool in the adaptive equipment toolbox — recommended by virtually every occupational therapist. Also opens jars (wrap a strip around the lid and twist).
Sizing Guide
Sold in rolls (typically 8 inches wide by 2 yards long) and in pre-cut sheets, circles, and squares. The roll is the best value — cut whatever shape you need. The "thick" or "premium" version grips better and lasts longer than thin versions. Available in beige, blue, red, or other colors. Wash with mild soap and water; air dry. Lasts years.
Tips & Tricks
Cut a small piece for every spot you use regularly: under the dinner plate, under the cutting board, under the phone on the bedside table, in the bathroom for a shampoo bottle. To use as a jar opener, wrap a strip around the lid and twist. Surfaces must be clean and dry on both sides — grime kills the grip. A square the size of a coaster is enough for most plates.
Common Mistakes
Buying cheap "non-slip" mat substitutes is the most common false economy — they wear out in months. Dycem-brand or equivalent premium silicone matting lasts for years. Leaving the matting in direct sunlight degrades the rubber. Stacking heavy items on it permanently leaves an indent; rotate which items go on which piece.
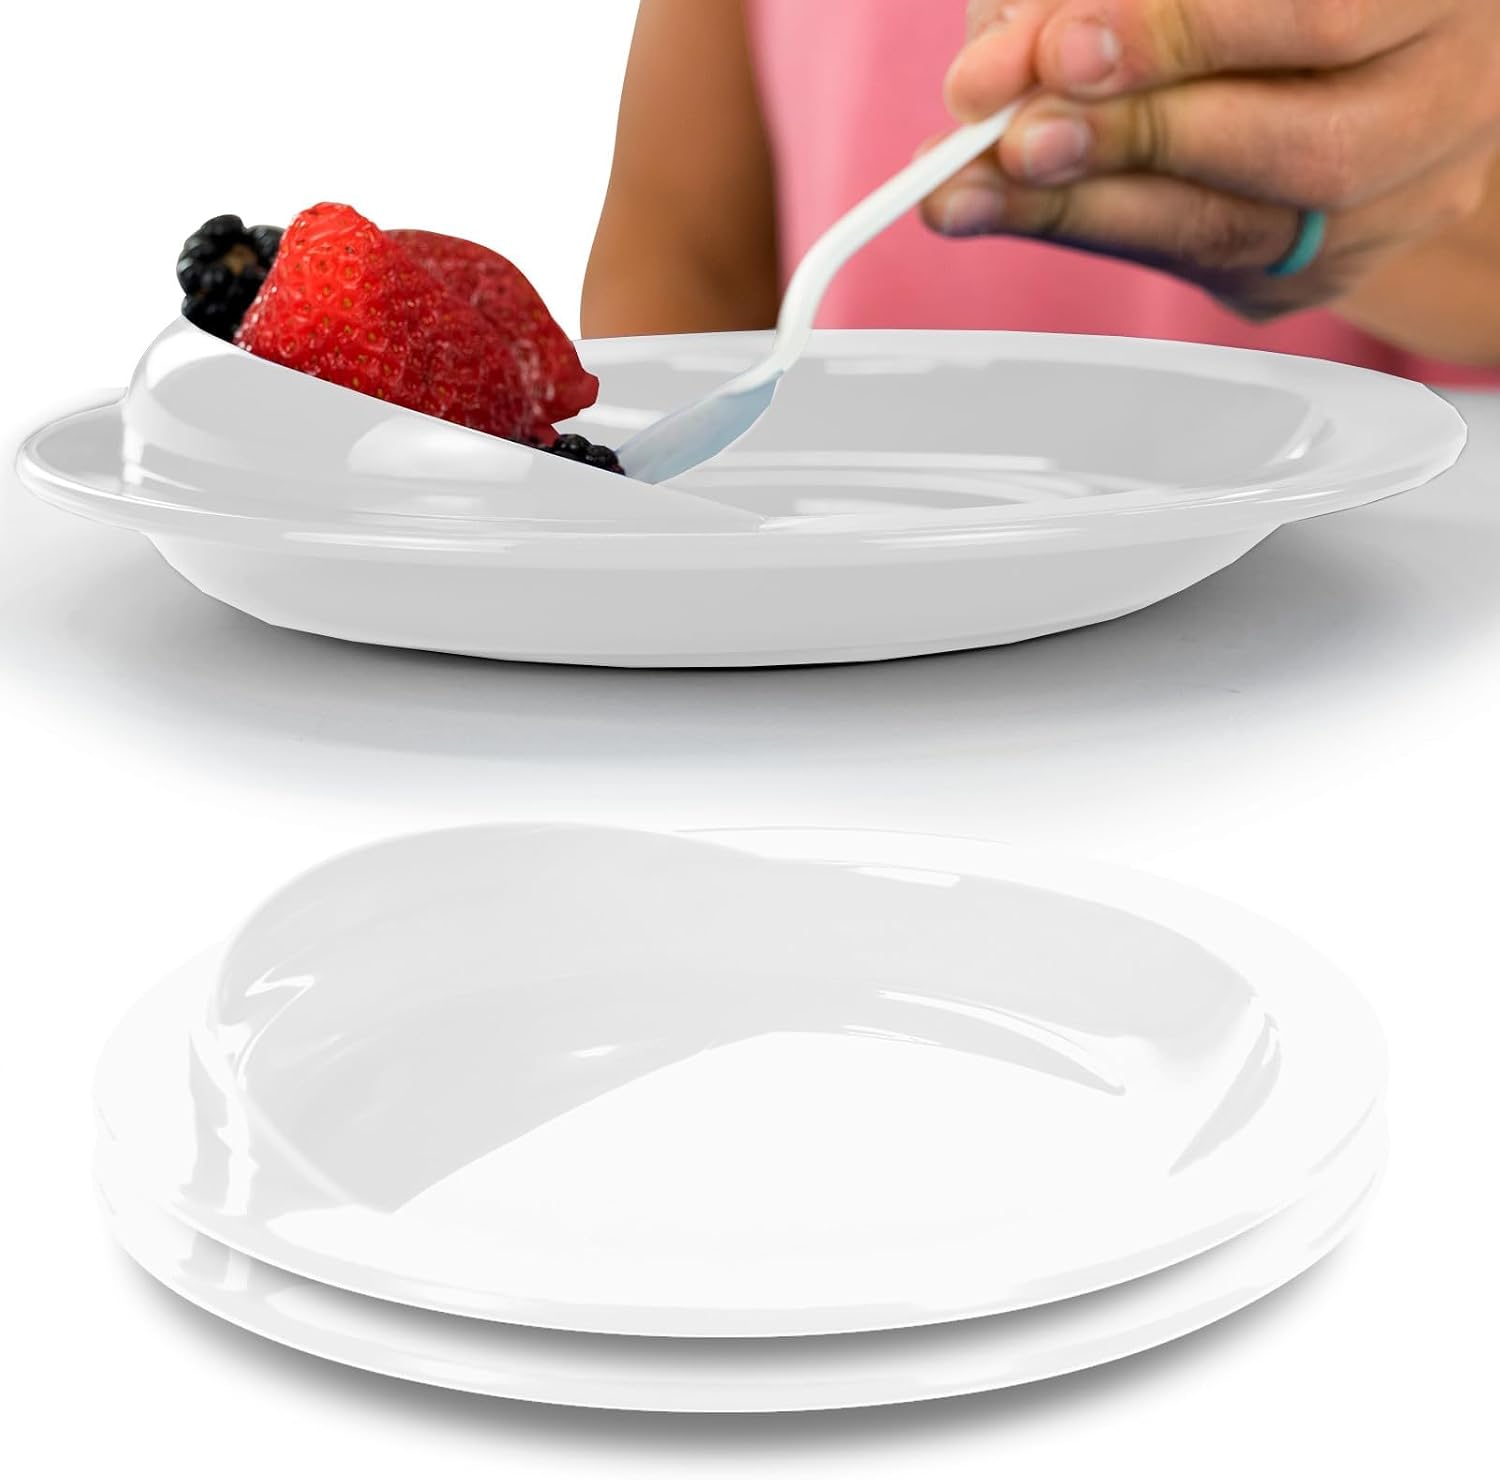
Scoop Plate (Stackable)
A dinner plate with one curved-up wall (the "scoop") that lets you push food against the wall to load a fork or spoon with one hand. This spill-proof set has a non-slip base that keeps it steady on the table, stacks well for storage, and comes as a 2-pack. Standard equipment for one-handed eating after stroke, hand surgery, or upper-limb amputation.
Sizing Guide
About 9 inches across with a high curved wall on one side to push food against. Lightweight and stackable for storage; BPA-free, microwave and dishwasher safe on most models. The non-slip base grips smooth tables to keep the plate steady while you scoop; for extra hold, add a Dycem mat (above).
Tips & Tricks
Position the scoop wall on the side AWAY from your dominant hand so you push food toward it as you scoop. If the plate slides on the table, set it on a Dycem mat for grip. Combined with a Nelson knife, a Dycem mat, and built-up utensils, the scoop plate is the foundation of a one-handed eating setup.
Common Mistakes
A wall that is too short lets food push off the edge; make sure the scoop wall is tall enough. On a very slick surface even a non-slip base can shift under heavy pushing; a Dycem mat underneath adds grip. Overfilling past the scoop wall defeats the spill-proof design.
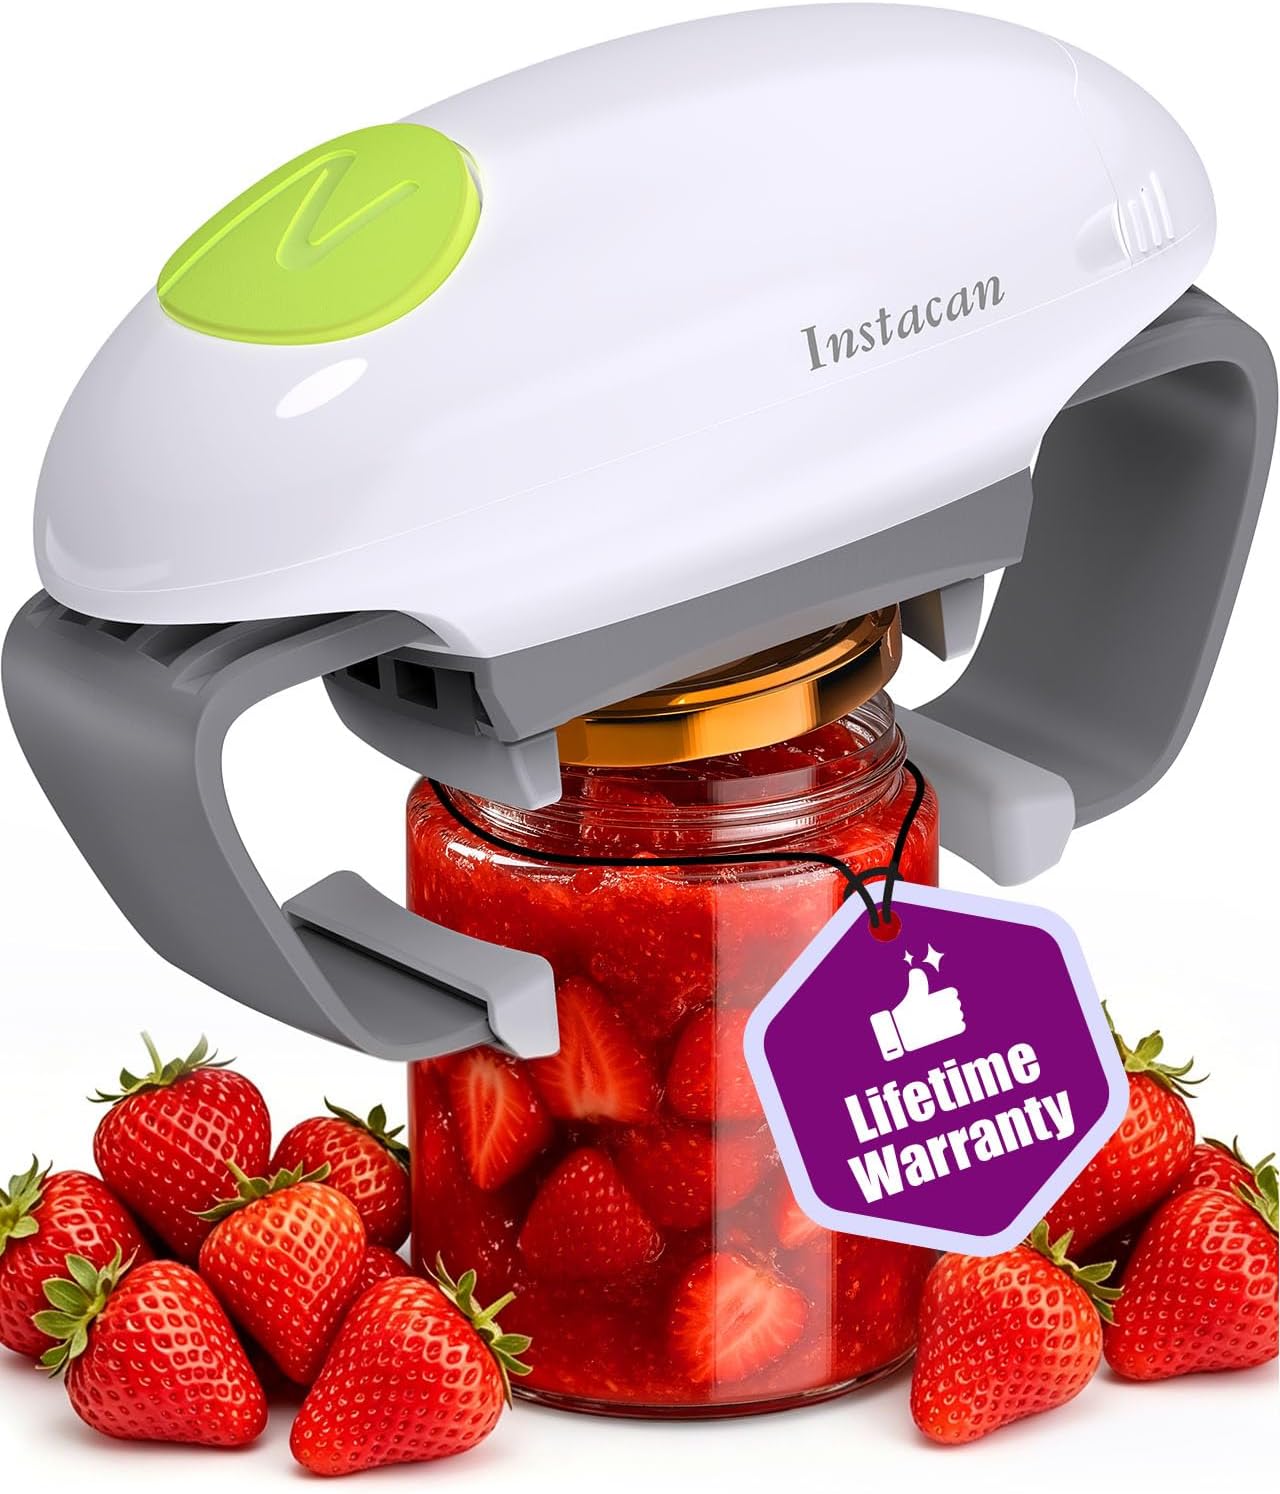
One-Handed Electric Jar Opener
An automatic jar opener that clamps onto the lid and twists it off at the press of a button, so a stubborn jar opens with one hand and almost no grip strength. Best for arthritis, reduced grip, stroke weakness, and one-handed users who can't hold a jar and twist at the same time. Because it grips the lid itself, you don't have to stabilize the jar with a second hand.
Sizing Guide
A battery-powered countertop unit (typically runs on AA batteries). Adjustable jaws fit most standard lids, from small (about 1 inch) up to large (about 3 to 4 inches). It grips the lid rather than the jar, so it works nearly hands-free once it clamps on. Check the lid-size range on the listing if you often open very small or very large jars.
Tips & Tricks
Set the opener on the lid, press the button, and let it clamp and twist on its own. Steady the jar lightly with your forearm, residual limb, or weak hand if it tips, though many jars open with no hold at all. Fresh batteries make a real difference on tight, first-time seals. For a very stubborn lid, tap it against the counter first to break the vacuum, then let the opener finish.
Common Mistakes
Weak or old batteries are the usual reason it stalls on a tight lid; keep spares on hand. Trying it on a lid outside the jaw's size range won't work; check the range first. A wet or greasy lid can slip in the jaws, so wipe the lid before you start. For thicker utensil handles alongside this, see the built-up foam grips below.
Dressing
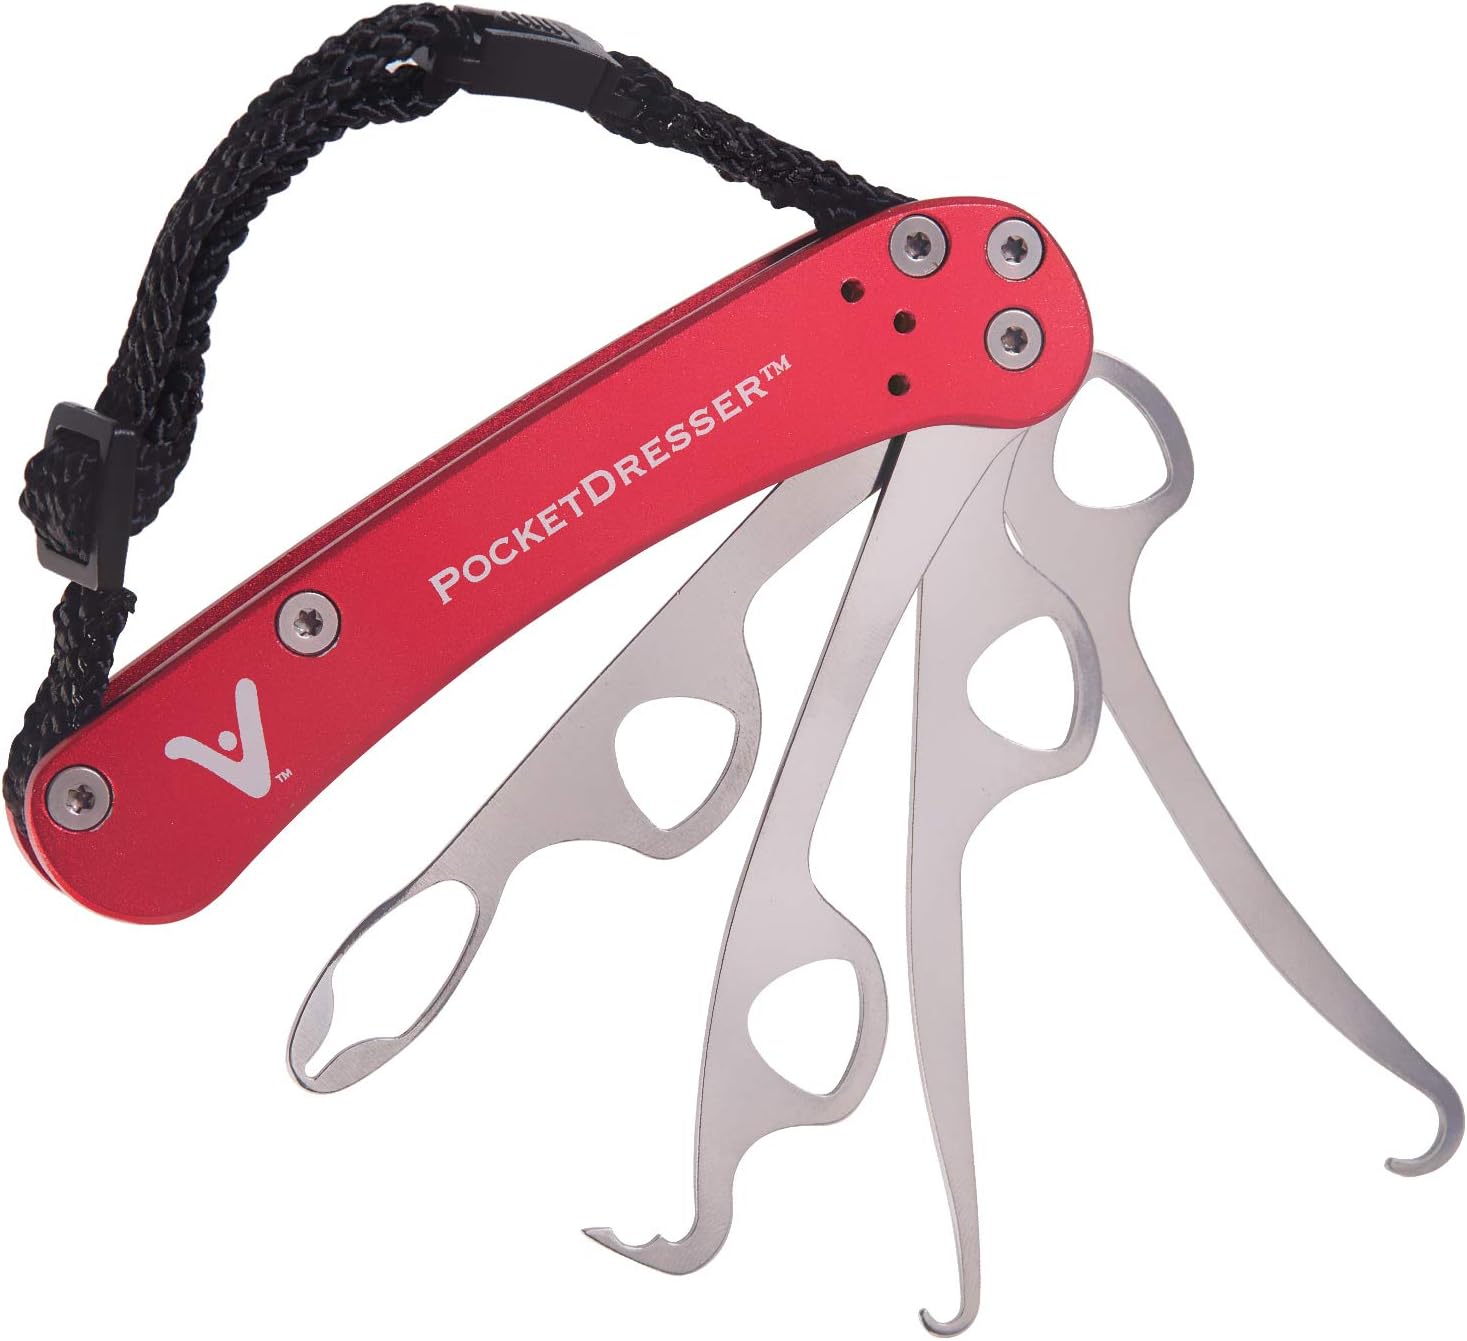
Folding Button Hook & Zipper Pull (PocketDresser)
The Vive PocketDresser is a folding, pocket-sized dressing multi-tool: several button hooks and a zipper-pull hook swing out of an aluminum handle like a pocket knife, so one tool covers different button sizes and zippers. Built for users with one hand, reduced fine-motor control, arthritis, or upper-limb amputation. A wrist lanyard keeps it on your hand while you work, and everything folds closed to slip into a pocket or bag.
Sizing Guide
The handle holds multiple hooks: larger wire loops for coat and dress-shirt buttons, a fine loop for small buttons, and a dedicated zipper-pull hook. Swing out the one that fits what you are working on, then fold it away when done. The aluminum handle is thicker than a plain wire button hook, which is easier to hold with a weak grip. Folded, it is roughly pocket-sized.
Tips & Tricks
Push the wire loop through the buttonhole FROM THE OUTSIDE of the shirt, hook the button, and pull it back through. Match the loop to the button: the fine loop for small dress-shirt or blouse buttons, the larger loops for coat buttons. Use the zipper-pull hook, not a button loop, for zippers. The technique takes a few tries; watch a short video before getting frustrated.
Common Mistakes
Using a button loop to pull a stiff jacket or jeans zipper bends the wire; use the dedicated zipper-pull hook for that load. Forcing a large loop through a small buttonhole strains the wire; switch to the fine loop. Pulling the button back through too fast, over time, bends the loop out of round.
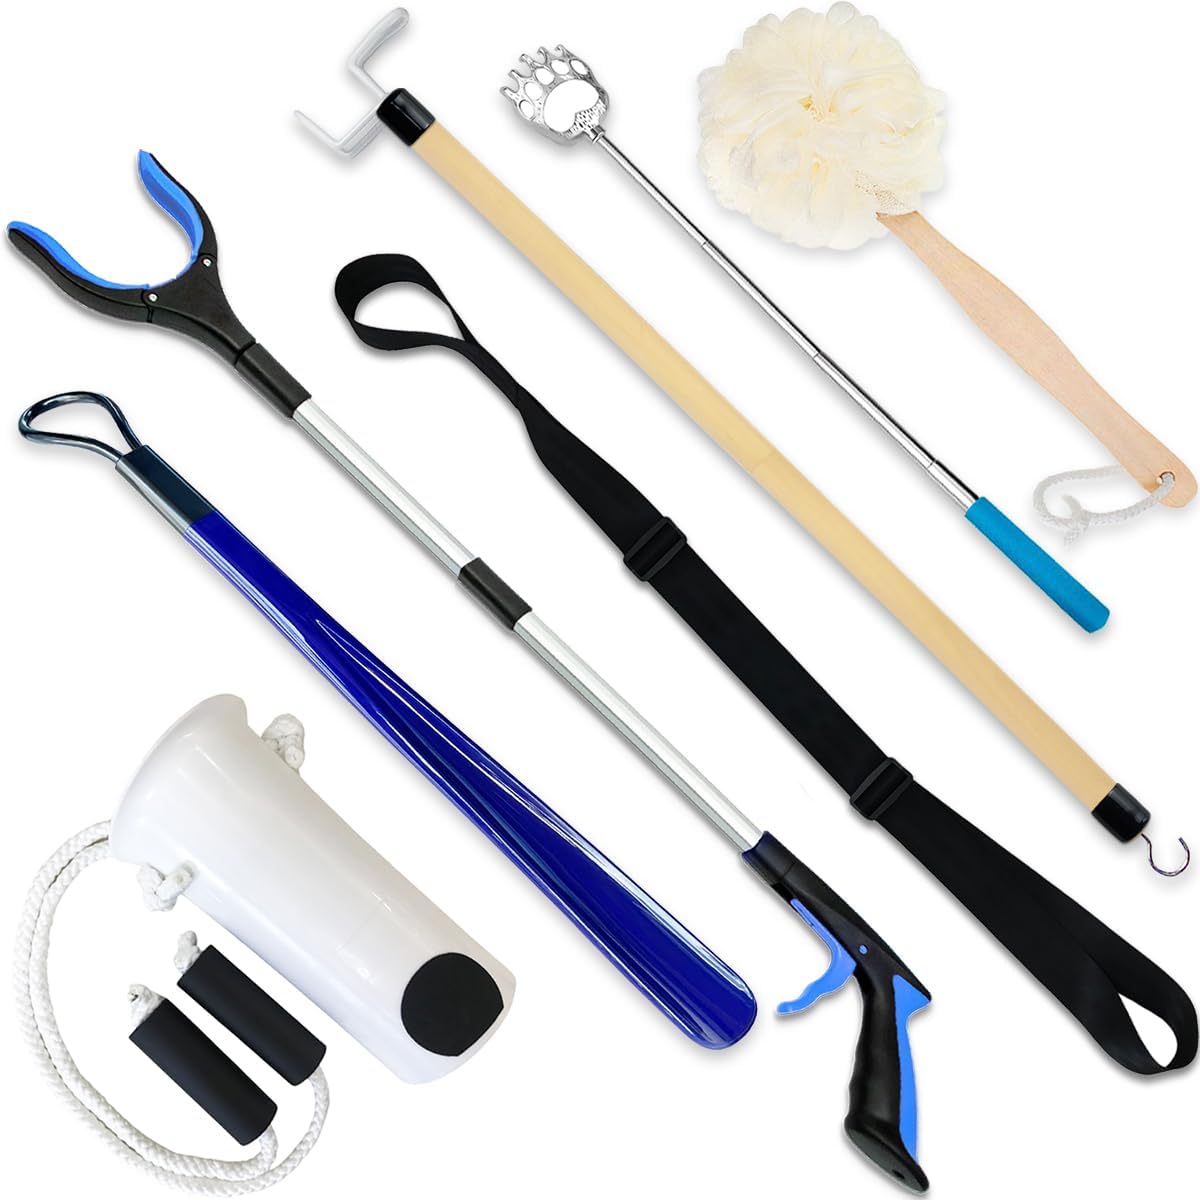
Dressing & Reaching Kit (Hip/Knee Recovery)
A bundled kit of long-reach dressing tools for anyone told not to bend past 90 degrees at the hip, the standard restriction after hip replacement, knee replacement, or back surgery. Instead of buying each piece separately, this set gathers the core tools: a reacher/grabber, a sock aid, a long-handled shoe horn, a dressing stick, a long-handled bath sponge, and a telescoping back scratcher. Also handy for anyone with limited bending, reduced grip, or one-handed function.
Sizing Guide
One-size kit built for adults. The reacher runs about 26 inches, and the shoe horn and dressing stick are long enough to reach your feet without bending below 90 degrees at the hip. The sock aid fits most adult feet and has foam-grip cords. Exact contents vary a little by seller, so check the listing photo for the pieces included.
Tips & Tricks
Use the sock aid and the long shoe horn to dress your lower half without leaning forward past your hip precaution. The reacher picks up dropped items and helps pull up pants; the dressing stick hooks waistbands and sleeves. Keep the kit in one place, bedside is ideal, so every tool is within reach when you get up. Pair it with magnetic shoe closures (on the Shoes & Shoe Accessories page) so you never have to bend to fasten a shoe.
Common Mistakes
Bending to grab a tool defeats the purpose; set the kit where you can reach it without leaning. The standard sock aid in the kit may struggle with tight compression socks; use a compression-specific aid for those. Over-reaching with the grabber for heavy objects can strain the wrist, so use it for light items.
Long-Handled Back Scrubber (Adjustable)
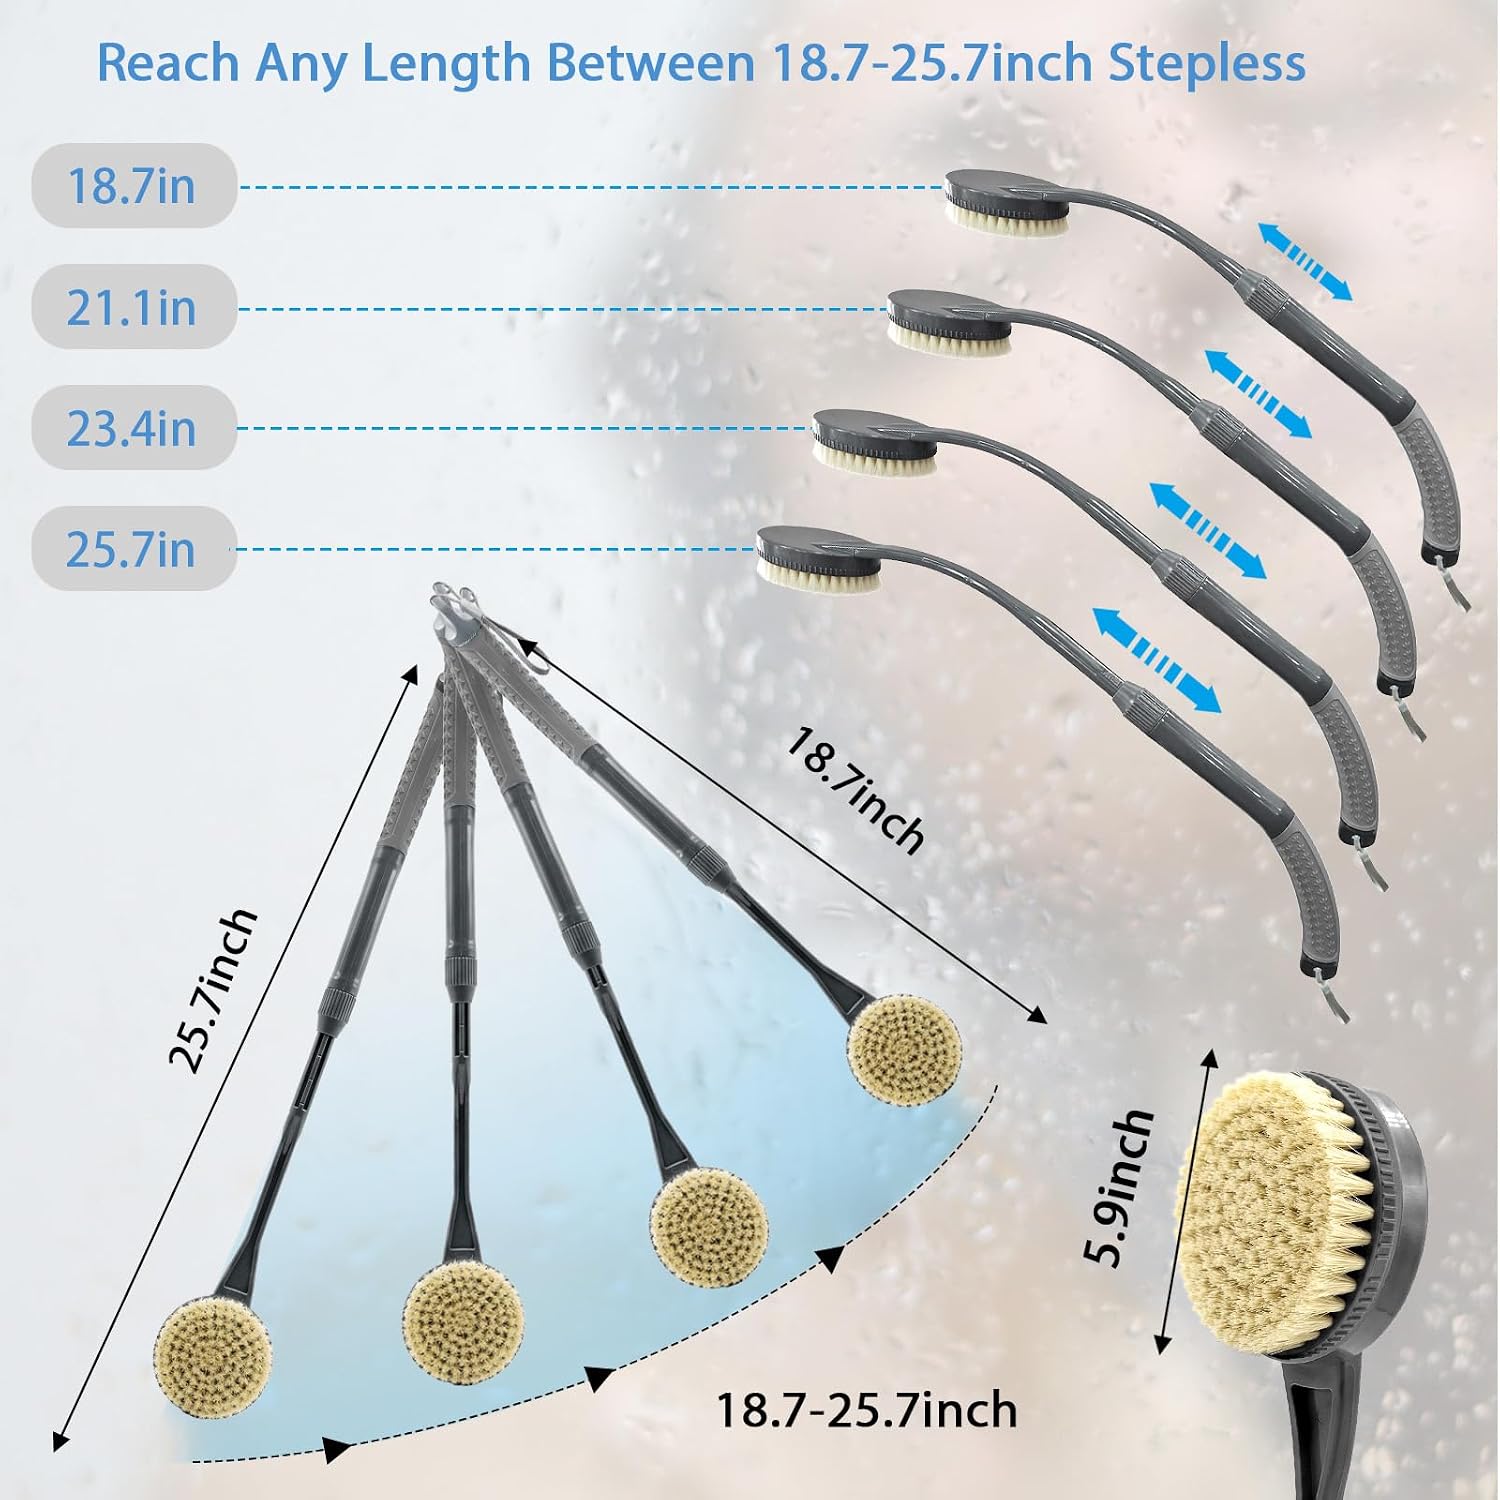
A back scrubber with a bristle brush head on a telescoping handle, so you can wash your back, feet, and lower legs without bending or twisting. The handle extends steplessly from about 18.7 to 25.7 inches to match your reach, and the curved end gets to the middle of your back. Standard for post-surgical recovery, limited shoulder or trunk mobility, upper-limb difference, and anyone who can't easily reach all parts of the body in the shower.
Sizing Guide
The handle telescopes from about 18.7 to 25.7 inches and locks at any length in between, so it fits different heights and reach. The bristle brush head is about 5.9 inches and pops off for cleaning or replacement. A non-slip grip helps with wet hands. Firmer bristles exfoliate; if your skin is sensitive, wet them first to soften them.
Tips & Tricks
Set the handle length so the curved head reaches the center of your back without straining your shoulder. Wet the bristles and add body wash directly to the brush. Pair it with a wall-mounted dispenser (below) so you don't have to handle a bottle one-handed. Rinse the head and hang it to dry after each use so it lasts.
Common Mistakes
Extending the handle past its lock point stresses the joint and it can collapse mid-use; keep it within range. Bristles that are too stiff for sensitive skin can irritate; soften them under warm water first. Leaving a wet brush head in a closed caddy grows mildew; hang it to air-dry.
Wall-Mount Triple Soap Dispenser
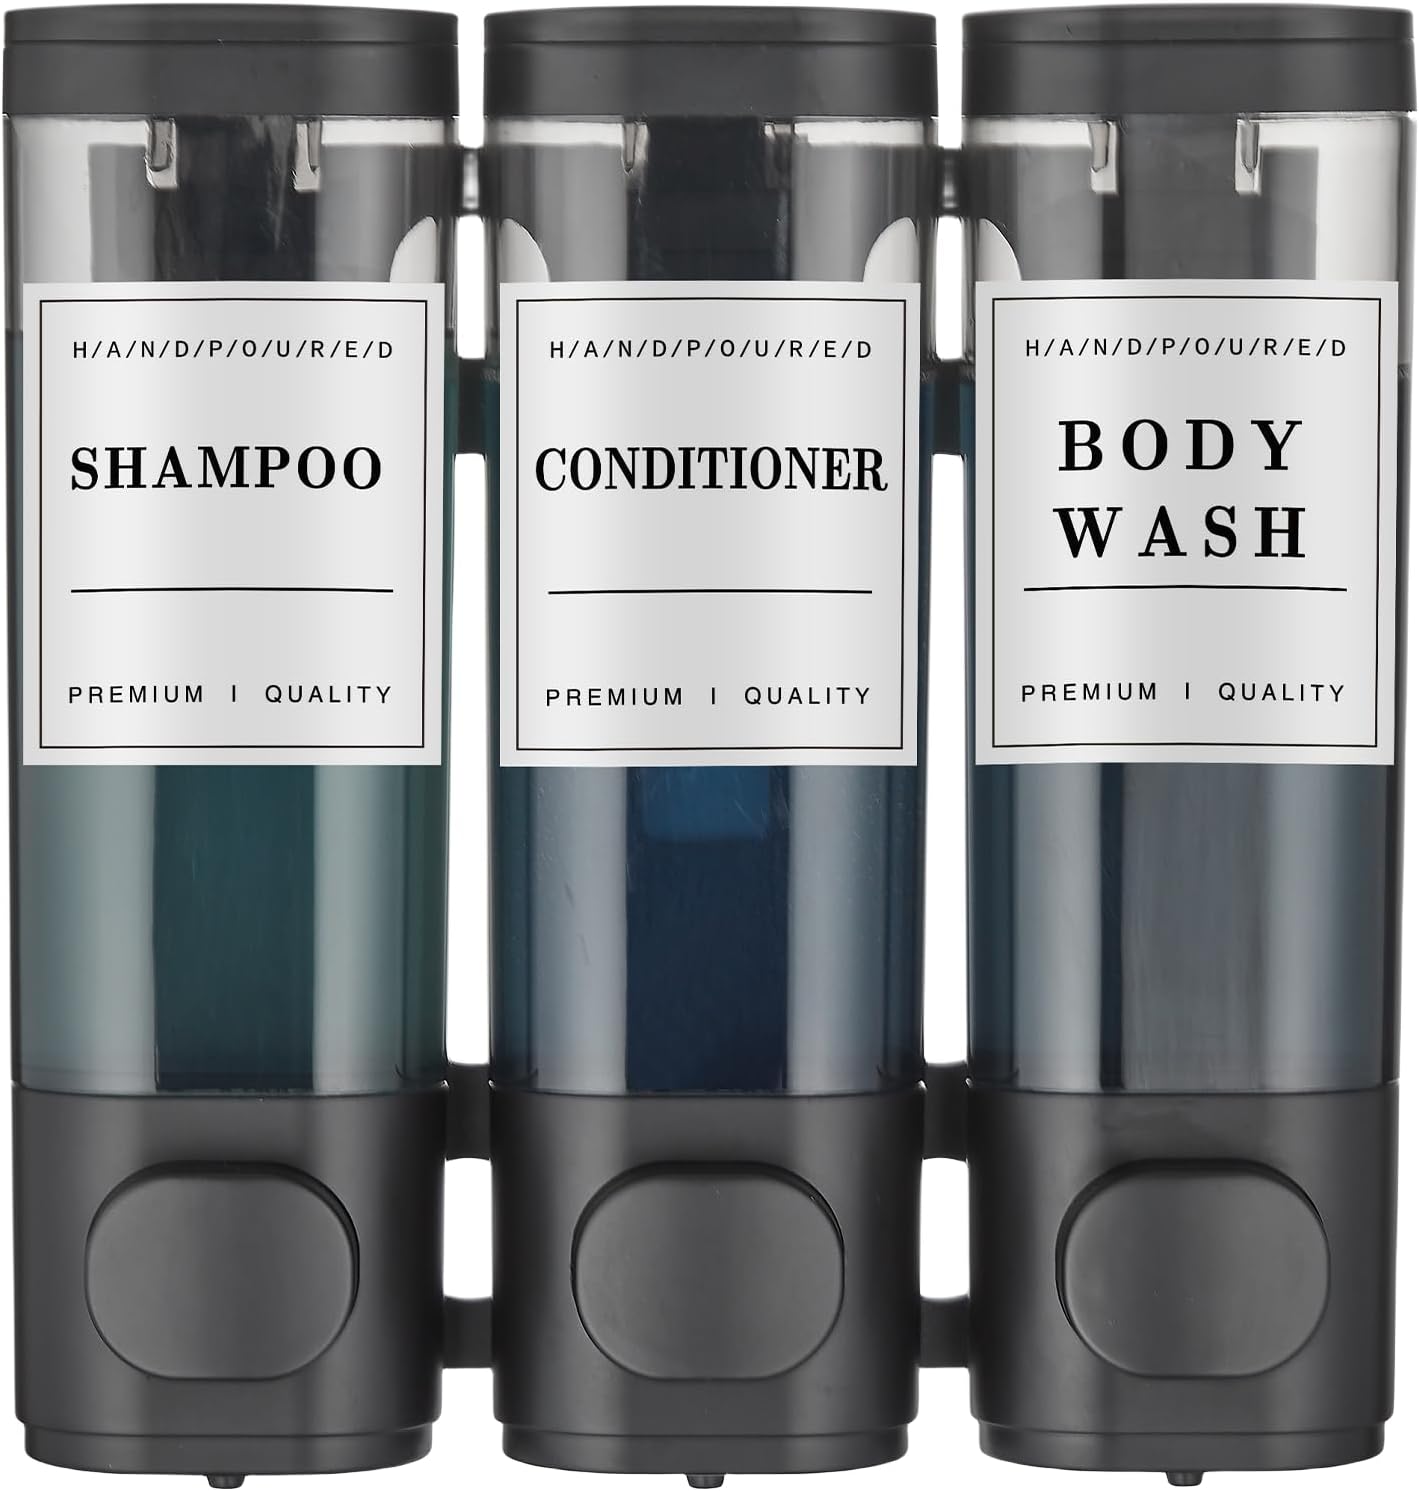
A wall-mounted dispenser with three chambers, one each for shampoo, conditioner, and body wash, that you operate with a single push of a large button. No twisting caps or gripping slippery bottles, and everything stays mounted in one place on the shower wall. Best for upper-limb difference, severe arthritis, low vision, and anyone who can't open or hold a shampoo bottle.
Sizing Guide
Three clear chambers let you see levels at a glance and refill from any standard bottle. Mounts with screws or strong adhesive depending on your tile and surface. The large press buttons dispense with light pressure, so you can use a forearm, wrist, or knuckle if grip is limited. Single- and dual-chamber versions exist if you need fewer.
Tips & Tricks
Mount it at hip or chest height, wherever you can press it most easily. The fixed shampoo, conditioner, body-wash order removes the "which bottle did I grab?" problem for low-vision users. If a thick body wash struggles through the pump, dilute it about 1:1 with water. Adhesive mounts hold well on smooth tile, but check them every few months and re-stick as needed.
Common Mistakes
Adhesive-mount dispensers eventually loosen; check the adhesive monthly and re-stick before it falls. Overfilling a chamber can make the button drip. Very thick or bead-filled washes can clog the pump; thin them or use a smoother formula.
Hands-Free Hair Dryer Wall Mount
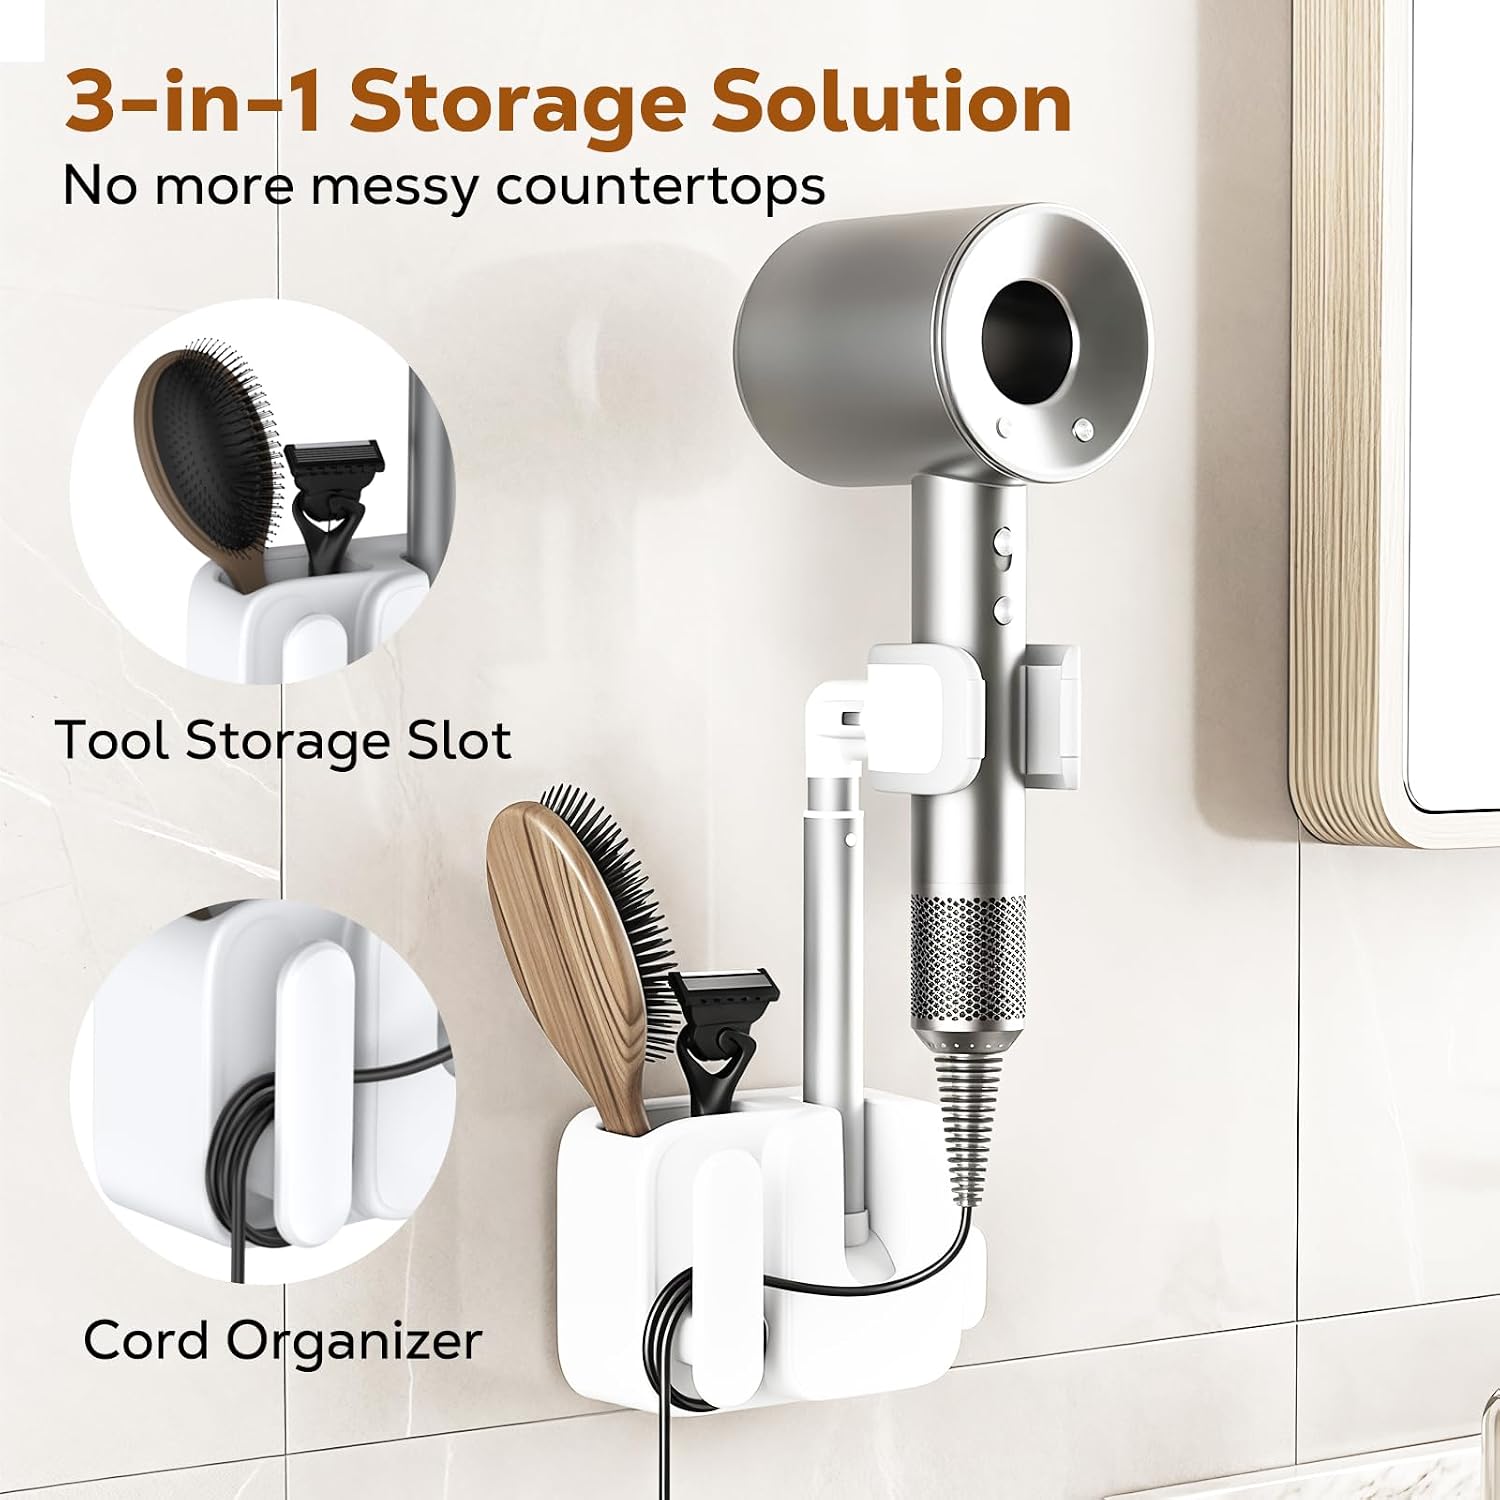
A wall-mounted holder that grips a hair dryer at an angle so you can dry your hair using head and body movement instead of holding the dryer. This 3-in-1 mount also has a slot for a brush or styling tool and a built-in cord organizer to keep the counter clear. Useful for upper-limb difference, hand tremor, and anyone who can't grip a hair dryer for the time it takes to dry hair.
Sizing Guide
The bracket fits standard barrel-shaped hair dryers; confirm your dryer's handle fits before ordering. It mounts to the wall with adhesive on smooth tile or a painted wall, which keeps counter space free. The side slot holds a brush or comb, and the base wraps the cord. Adhesive mounts last a few months of daily use before they need re-sticking.
Tips & Tricks
Mount the holder at face height or just above so the airflow comes across your hair from above; then rotate your head under it to dry different sections. Route the cord through the organizer so it does not dangle into the sink. Aim hot air away from the adhesive mount so heat does not soften it. For fully hands-off drying, a hooded dryer (below) is the other route, though it is slower.
Common Mistakes
Pointing hot air directly at the adhesive mount softens it and it can let go; aim the airflow away. Sticking the mount on a dusty or textured surface weakens the bond; clean and dry the spot first. Forcing a dryer handle that is too large into the clamp can crack it; check the fit first.